Introduction: Navigating the Indie Tech Budget Maze
Embarking on an indie tech project—whether it’s a quirky web app, a hardware hack, or a digital art installation—can be electrifying. But many creators underestimate one crucial aspect: the real cost of turning their vision into reality. Unlike corporate ventures with deep pockets, indie makers, digital hobbyists, and post-industrial creators often fund their ideas out of pocket or with modest crowdfunding campaigns. This means every dollar, euro, or yen counts, and overspending can spell disaster before your project even gets off the ground.
This guide is your roadmap for budgeting your indie tech or offbeat online project. We’ll break down costs with granular detail, highlight common budgeting pitfalls, and offer actionable strategies to stretch your resources further. Whether you’re building a micro SaaS, a kinetic sculpture, or a retrofuturist online service, understanding where the money goes—and where it’s wasted—can mean the difference between a successful launch and an abandoned prototype. Let’s get you prepared to budget like a pro, make smart investments, and keep your indie vision sustainable.
Core Budget Categories for Indie Tech Projects
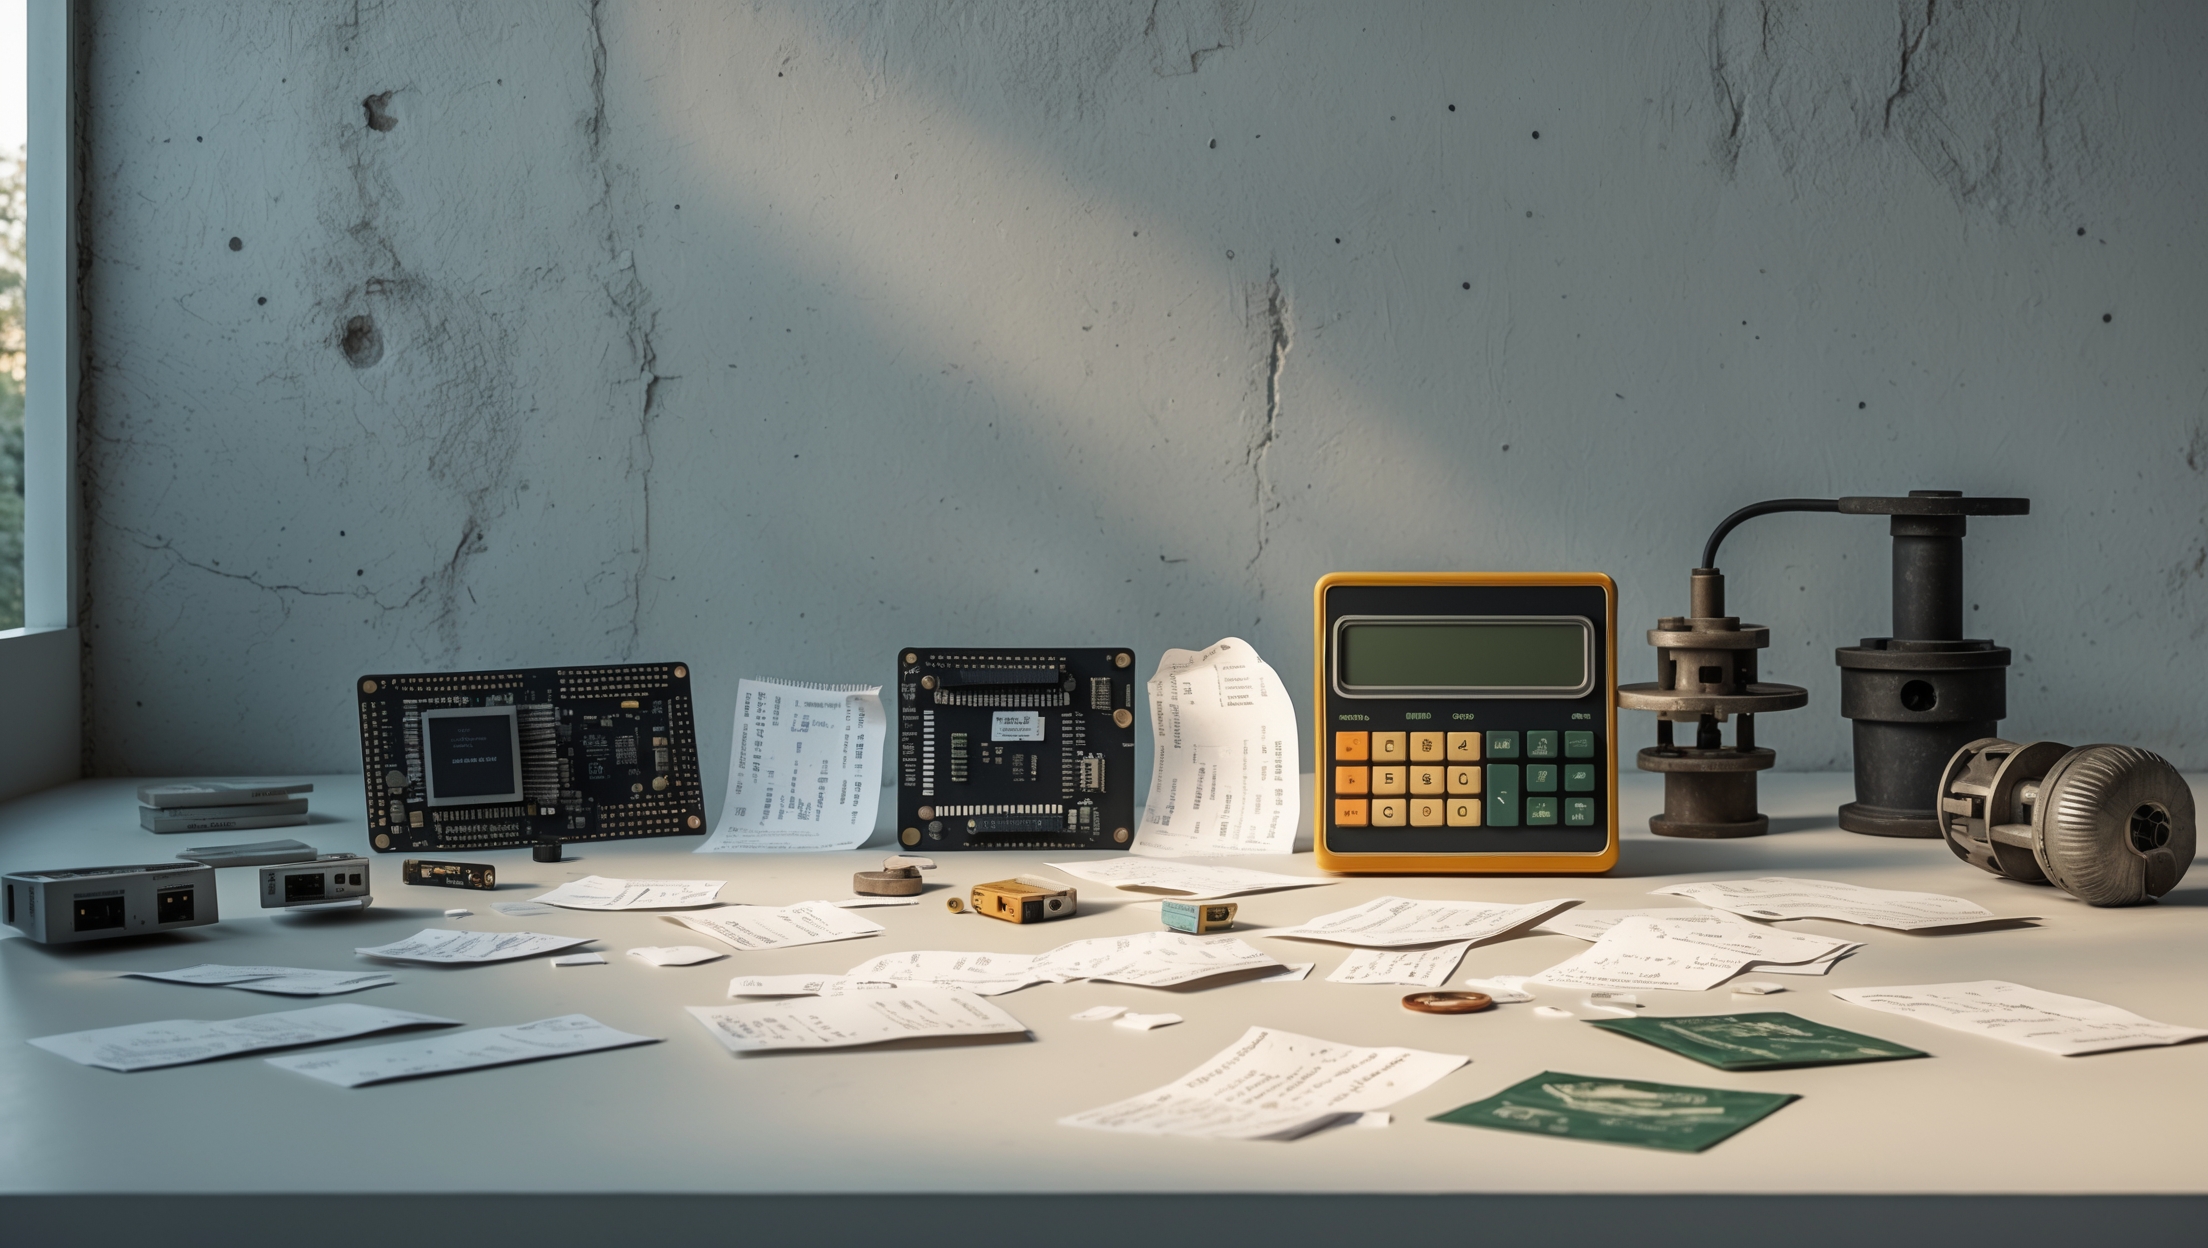
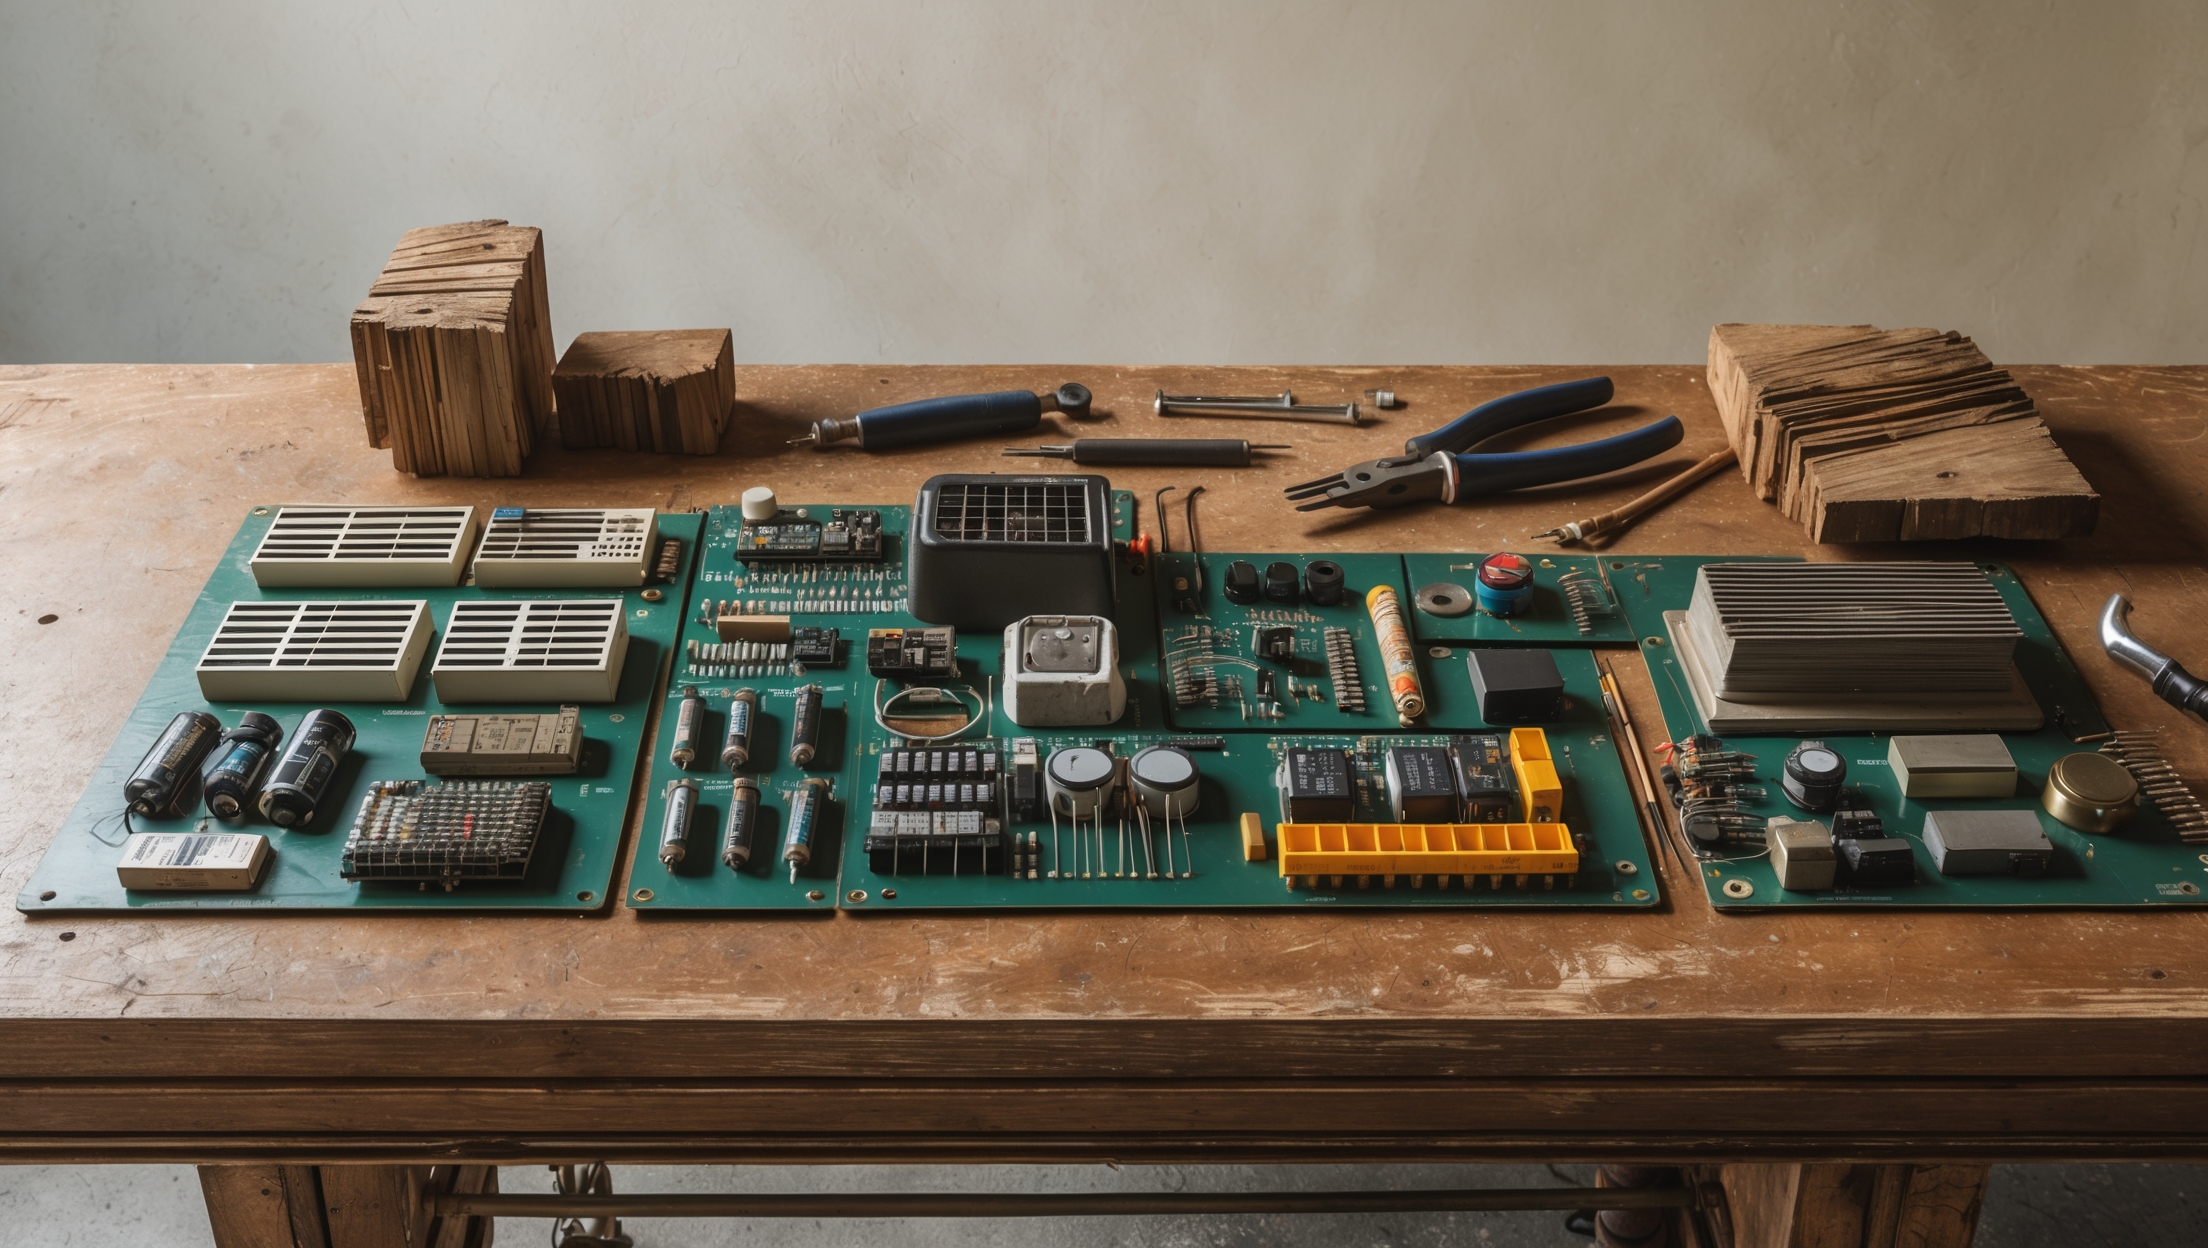
1. Hardware & Materials
For projects with a physical component (IoT devices, installations, DIY servers), hardware often eats up the largest chunk of your budget. Here’s what to consider:
- Development Boards & Microcontrollers: Raspberry Pi, Arduino, ESP32, etc. Prices range from $5 to $100+ per unit.
- Prototyping Supplies: Breadboards, jumper wires, sensors, displays, actuators. Estimate $30–$200 for a basic setup.
- Enclosures & Mounting: 3D printing, laser-cut parts, readymade cases. Varies: $15–$250 per project.
- Specialty Components: Custom PCBs, rare sensors, retro parts. These can quickly add $50–$500+.
- Tools: Soldering irons, screwdrivers, calipers. Consider $50–$300 for entry/mid-level gear.
2. Software & Digital Infrastructure
Even the most hardware-centric projects rely on software. Here’s where those costs crop up:
- Hosting: Shared hosting ($3–$15/mo), VPS ($5–$60/mo), or cloud services (pay-as-you-go, can spike quickly).
- Domain Names: $8–$40/year for standard domains, more for rare TLDs.
- APIs & SaaS Fees: Maps, payment gateways, analytics—often free tier, but scale costs $10–$100+/mo.
- Software Licenses: Premium plugins, design tools, IDEs. Open-source is your friend, but budget $0–$200/year for essentials.
- Backup & Security: Offsite backups ($2–$10/mo), SSL certificates ($0–$80/year, many are free now).
3. Design & Aesthetics
Post-industrial and offbeat projects often stand out visually. Don’t skimp on the design, but know where to save:
- UI/UX: DIY with Figma or Penpot (free), or hire a designer ($200–$2000/project, depending on complexity).
- Branding: Logo creation ($0–$400), icons (free packs or custom for $50–$300).
- Asset Licensing: Fonts, images, textures—use open-license sites or spend $10–$100 per project.
4. Marketing & Outreach
Getting your project noticed can be as costly as building it. Budget for:
- Launch Website: One-pagers (DIY: $0–$50, outsourced: $200–$1000).
- Social Media Tools: Scheduling ($0–$30/mo), analytics ($0–$20/mo).
- Content Creation: Blog posts, demo videos (DIY: free, pro: $100–$2000 depending on quality).
- Advertising: Optional, but even $50 on Reddit or Twitter can make a splash.
5. Legal, Compliance & Insurance
Often overlooked, but vital for public-facing or physical projects:
- Business Registration: Varies by country ($0–$500+).
- Compliance: GDPR, hardware certifications, accessibility audits (self-audit: free, pro: $200–$2000+).
- Insurance: Product liability (if you ship hardware), general liability for public installations ($200–$600/year).
6. Contingency & Unexpected Costs
Always set aside 10–20% of your budget for the unexpected: shipping delays, broken parts, surprise hosting bills, or last-minute pivots.
Real-World Example: Cost Breakdown of an Indie IoT Art Project
Let’s run numbers for a hypothetical but typical post-industrial indie project: a WiFi-enabled kinetic sculpture that posts sensor data online and has a striking industrial design.
- Microcontroller (ESP32): $12
- Sensors (temperature, humidity, motion): $22
- Actuators (servos, motors): $38
- Custom PCB & assembly: $65
- 3D-printed enclosure: $85
- Prototyping materials & tools: $120
- Domain name: $15/year
- Cloud hosting (VPS, 1 year): $60
- SSL certificate: $0 (Let’s Encrypt)
- Design assets (font, stock image): $30
- Launch website (DIY): $0
- Social media tools: $0 (using free tier)
- Insurance (art installation, 6 months): $120
- Contingency (15%): $75
Total estimated cost: ~$642
Notice how certain categories (tools, contingency, insurance) can be overlooked or underestimated. This breakdown can serve as a template for your own budget planning.
Beginner Mistakes to Avoid When Budgeting
- Ignoring Small Recurring Fees: Monthly services add up. Tally all SaaS, hosting, and API costs at an annual rate.
- Underestimating Prototyping Iterations: First builds rarely work perfectly. Budget for at least two rounds of hardware or design revisions.
- Forgetting Shipping & Customs: International part orders can incur hidden fees and taxes. Add a buffer if ordering from abroad.
- Not Accounting for Time: Your hours have value. If you plan to pay yourself or collaborators, include it in the budget—at least as an opportunity cost.
- Neglecting Marketing: “If you build it, they will come” rarely holds. Reserve at least 10% of your total budget for outreach and promotion.
- Skipping Insurance & Permits: For public installations or shipping products, this is non-negotiable. Liability claims can exceed all other costs combined.
Smart Savings: Where (and How) to Cut Costs Without Cutting Corners
1. Leverage Open Source Everything
From code libraries to design assets, open source can eliminate entire budget lines. Choose open hardware and software where possible, and contribute back when you can.
2. Buy Used, Recycle, or Salvage Materials
Maker spaces, surplus stores, and online marketplaces are goldmines for discounted parts and tools. Salvage from e-waste for enclosures, motors, or displays. It’s sustainable and on-theme for post-industrial projects.
3. DIY vs. Outsource
Do as much as you can in-house—especially design, prototyping, and marketing. Only outsource skills you lack or when hiring saves money in the long run (e.g., a legal compliance audit).
4. Choose Modular, Scalable Infrastructure
Pick cloud services that can grow with you, but start on the free or lowest tier. Avoid vendor lock-in; use containers and open standards for flexibility.
5. Use Free Trials and Community Editions
Many premium tools offer free starter tiers or open-source alternatives. Test before you buy, and cancel unneeded subscriptions early.
Budgeting Checklist: Indie Tech Edition
- Define your Minimum Viable Project (MVP) scope—what’s essential to launch?
- List every anticipated hardware, software, and service cost.
- Research and document prices from at least two vendors per item.
- Identify which costs are one-time vs. recurring.
- Allocate 10–20% for contingency.
- Set aside a fixed marketing/outreach budget.
- Review compliance, permit, and insurance needs.
- Track all expenses in a shared spreadsheet or budgeting app.
- Review and adjust monthly as the project evolves.
Recommended Budgeting Tools & Templates
- Tiller Money / Google Sheets: Flexible and free for tracking project expenses. Customize with categories for your unique needs.
- Notion or Airtable: For collaborative projects—track purchases, invoices, and milestones in one place.
- Open Source Budgeting Apps: Try Firefly III or Actual Budget for privacy-focused, self-hosted finance tracking.
- Budget Templates: Modify a small business or side hustle budget template to suit indie tech projects.
Case Study: The Cost Anatomy of a Niche Web Tool Launch
Let’s examine a real-world example: launching an offbeat online tool—a post-industrial-themed, AI-powered image filter web app.
- Domain & SSL: $18/year
- Cloud Hosting (App + Worker): $14/mo (Heroku, AWS, or similar, annualized $168)
- API Costs (AI inference): $25/mo (for 1000 users, annualized $300)
- UI Design (Figma DIY): $0
- Premium Font License: $49 one-off
- Launch Landing Page (No-code builder): $60 one-off
- Social Promotion (Twitter, Reddit): $100
- Contingency (10%): $69
Total estimated cost to launch: ~$764
This example highlights the distribution of costs and the value of using free/low-cost tools for design and marketing, while reserving funds for core infrastructure and feature delivery.
Conclusion: Crafting Sustainable Indie Projects Through Smart Budgeting
Building indie tech, post-industrial, or offbeat online projects is as much a creative endeavor as a financial one. A clear, realistic budget is your safeguard against burnout, debt, and project abandonment. By understanding the granular costs—from hardware and hosting to marketing and legal—you empower yourself to make strategic decisions, pivot when needed, and sustain your work long after launch day.
Remember, frugality doesn’t mean cutting corners; it means investing where it matters. Use open source assets, salvage and recycle, and lean on your community for skills and support. Always overestimate your contingency, under-promise on deliverables, and plan for at least one more iteration than you think you’ll need.
Your indie project deserves the same rigorous planning as any big-budget tech startup, but with more creativity and agility. Track every dollar, question every purchase, and maintain transparency with collaborators. The result: a project that stands out—both aesthetically and financially—while inspiring others in the indie tech and post-industrial communities to build smarter, braver, and more sustainably.
Budgeting isn’t just survival; it’s an act of creative empowerment. Here’s to your next great build—on time, on budget, and unlike anything else online.


You discuss development boards like Raspberry Pi and Arduino ranging in price. How do you recommend deciding between investing in more expensive boards versus sticking to entry-level options when the project’s long-term scale and user base are still uncertain?
When your project’s future scale and user base aren’t clear, it’s usually wise to start with an entry-level board. These boards let you prototype, test ideas, and gain experience without a big upfront investment. If your project eventually grows and needs more power or features, you can then consider upgrading to a more advanced board. This approach helps you minimize risk while keeping initial costs low.
When breaking down costs for things like custom PCBs or specialty components, how do you estimate expenses if you’re not sure exactly what parts you’ll need until you’re deeper into development? Do you suggest setting aside a contingency fund, and if so, what percentage of the total budget should that be?
When you’re unsure about specific parts early on, it’s smart to research similar projects or reach out to suppliers for ballpark pricing. For uncertainty, setting aside a contingency fund is a solid approach. A common practice is to reserve 10% to 20% of your total hardware budget for unexpected costs or design changes. This cushion helps cover surprises without derailing your whole project.
When setting up a project with both digital and physical elements—like a web-connected gadget—how do you decide early on what to prioritize in your budget? For example, is it more important to buy better prototyping tools or to put money toward digital infrastructure first if funds are limited?
When funds are limited, it’s wise to focus your budget on the element that poses the most risk or uncertainty for your project. If your physical prototype is crucial for validating your concept, prioritize investing in quality prototyping tools and materials. However, if your project’s value relies heavily on its digital features or connectivity, consider allocating more to digital infrastructure. In many cases, starting lean on both fronts and iterating based on feedback can help stretch your budget effectively.
You mentioned that hardware can be the largest expense, especially with components like custom PCBs and development boards. Do you have any tips for finding reliable used or surplus hardware to cut costs without sacrificing quality?
Absolutely, sourcing used or surplus hardware can help you save significantly. Look for reputable sellers on platforms like eBay, specialized electronics surplus sites, or local maker spaces. Always check seller reviews and request details on item condition. For development boards, consider certified refurbished options from official distributors. Also, join online forums or communities where members exchange or sell gently used components—these groups often vet hardware quality themselves.
As someone who wants to try a small IoT project at home, I’m wondering how accurate those hardware cost estimates are in practice. Have you found that first-time indie creators often end up spending more than they expect on things like prototyping supplies and specialty components?
It’s quite common for first-time indie creators to spend more than they initially expect, especially on prototyping supplies and specialty components. Hidden costs like extra cables, connectors, unexpected shipping fees, or needing to replace parts can add up quickly. A good tip is to build in a buffer of 20–30% over your estimated hardware budget to cover these surprises. Careful planning and researching alternatives can help keep costs in check.
For indie projects that need custom PCBs or rare hardware components, do you have any tips for keeping those costs in check, especially when the minimum order quantities seem high? I’m worried about overspending on specialty parts before I know if my prototype will work.
When dealing with custom PCBs or rare components, try prototyping first with development boards or off-the-shelf modules. For PCBs, many fabs offer low-quantity prototype runs or shared panel services, which keep minimum orders affordable. You might also check community groups or forums to split orders with others needing similar parts. This way, you avoid committing to high costs until your design is validated.
If my indie project is mostly software-based with only minimal hardware needs, would it be smarter to put more funds toward digital infrastructure instead of prototyping supplies? How do I figure out how much to allocate to each category when resources are really tight?
If your project relies heavily on software and only needs basic hardware, it makes sense to prioritize spending on digital infrastructure, like servers, cloud services, and essential development tools. To decide how much to allocate, clearly list your must-have costs for each category, then rank them by importance to your project’s core goals. Focus funds on areas critical for progress and postpone or minimize less essential spending until more resources are available.
For indie hardware projects in the US, what’s your take on buying components from domestic suppliers versus overseas (like AliExpress) when you’re on a tight budget? I worry about hidden shipping costs and customs delays, but the price differences can be huge.
Choosing between domestic and overseas suppliers depends on your priorities. Domestic suppliers often offer faster shipping, easier returns, and more predictable costs—helpful for avoiding unexpected customs fees or delays. Overseas options like AliExpress can save money, but factor in shipping times, potential customs charges, and quality variations. For tight budgets, some creators buy prototypes or small batches domestically for speed, then switch to overseas sources once they’re confident in the parts and timing.
When budgeting for prototyping supplies and entry-level tools, do you recommend buying everything up front or staggering those purchases as the project progresses? I am curious how this timing affects the overall budget and whether it helps with cash flow for small indie teams.
Staggering your purchases is usually the better choice for small indie teams. By buying supplies and tools only as they’re needed, you can keep your up-front costs lower and maintain more flexible cash flow. This approach also helps avoid overspending on items that might turn out unnecessary as your project evolves. It’s a good way to ensure resources are available for unexpected expenses later on.
On the software and digital infrastructure side, do you recommend budgeting for paid tools and cloud services from the start, or is it better to stick with free tiers until a project gains traction? I’d love to hear how others have balanced these costs in early indie projects.
It’s wise to start with free tiers or open-source tools where possible—many indie founders do this to keep costs low while validating their idea. But, consider budgeting for paid tools or cloud services if your project relies on features not offered in free plans, or if you expect rapid growth. Some balance this by starting free, then upgrading as user numbers or technical requirements increase.
For hardware and materials, how do you recommend estimating costs if I’m not sure yet which development board or components I’ll end up needing? Is it safer to budget based on high-end options, or should I start with the basics and adjust as I get further into prototyping?
When you’re unsure about the exact hardware or components you’ll need, a good approach is to research a range of options and budget for something mid-range—not the cheapest, but not top-of-the-line either. This gives you some flexibility if your needs change during prototyping. You can always revise your estimates as your project requirements become clearer.
Could you expand on how to allocate for prototyping versus final production in an indie tech project? For example, if my initial setup costs around $200 for supplies, should I expect a similar amount when scaling up, or are there common hidden costs I should watch for?
When moving from prototyping to final production, costs often increase beyond just multiplying your initial $200 setup. Prototyping expenses usually cover basic supplies and small-scale tools, but production can introduce hidden costs like bulk material pricing, manufacturing setup fees, quality control, packaging, and shipping. It’s smart to budget extra—often 2–3 times your prototype cost—to cover these surprises. Also, consider any tooling or molds that might be needed only for larger runs.
For indie tech projects that involve physical hardware, how do you suggest dealing with unexpected price jumps in specialty components like custom PCBs or rare sensors? Is it smarter to leave a certain percentage of your budget flexible just for these surprises?
For indie hardware projects, it’s wise to set aside a flexible portion of your budget specifically for unexpected component price jumps—typically 10–20% works well. Track which parts are most volatile, like custom PCBs or rare sensors, and regularly check their prices. When possible, identify backup suppliers or alternative components in advance to give yourself more options if prices spike or availability changes suddenly.
I’m curious how you suggest budgeting for hardware when prices for components like dev boards and specialty parts can fluctuate so much. Do you recommend buying in advance or waiting until you’re further along in the project?
When budgeting for hardware with fluctuating prices, it’s often wise to set aside a buffer in your budget to account for possible increases. For common components, buying early can lock in current prices and prevent shortages from derailing your timeline. For specialty parts, unless they’re hard to source, you might wait until you’re certain you’ll need them to avoid tying up funds unnecessarily. Researching price trends and suppliers can also help you decide the best timing for your purchases.
When estimating the initial hardware budget, how much buffer do you usually add for mistakes or dud components, especially if sourcing parts from overseas? I’m wondering if there’s a ballpark percentage that makes sense for indie projects.
It’s smart to add a buffer when estimating hardware costs, especially with overseas sourcing where returns or exchanges may be tricky. For indie projects, a common practice is to include a 10–20% cushion above your expected component costs. This helps cover dud parts, shipping surprises, or small mistakes without throwing your budget off-track.
Could you go into more detail about budgeting for specialty components like custom PCBs? I’m worried about underestimating those costs, especially if I need to iterate several times. Any tips for minimizing surprises or planning for revisions in this category?
Budgeting for custom PCBs can be tricky because prototypes and revisions add up quickly. Start by getting quotes from multiple PCB manufacturers, factoring in setup fees and minimum order quantities. Always add a buffer for at least 2-3 extra spins in your budget, since revisions are common. Ask manufacturers about combined orders or panelization to save costs, and consider using standard board sizes. Finally, clarify turnaround times to avoid paying for rush jobs if you hit a snag.
For indie projects that need specialized hardware, like custom PCBs or rare sensors, do you have any tips for sourcing these affordably within the US? I’m worried that the $50–$500 range could easily balloon if I have to order internationally or deal with minimum order quantities.
For specialized hardware like custom PCBs or rare sensors, try reaching out to local maker spaces or university engineering departments—they sometimes have group buys or spare components. US-based prototyping services like OSH Park can handle small PCB runs without high minimums. For rare sensors, check with domestic distributors who may offer sample quantities or open-box deals. Also, online electronics communities often share group orders to split costs and shipping.
When it comes to choosing between different microcontrollers like Raspberry Pi, Arduino, or ESP32, does your budget strategy change depending on the platform? I’m worried about picking something too expensive for my first indie hardware project.
Your budget strategy should definitely adapt depending on the microcontroller you choose. For instance, Arduino boards are generally less expensive and great for simple tasks, while Raspberry Pi boards can cost more but offer extra computing power. ESP32 is a good middle ground, offering Wi-Fi and Bluetooth at a low cost. Consider what features you really need, and factor in not just the board price, but also accessories, power supplies, and possible expansion options. Prioritizing what your project requires will help you stay within budget.
The article breaks down hardware and materials costs really clearly, but I’m wondering if you have any tips for budgeting tools like soldering irons or specialty calipers. Are there specific brands or price tiers you think hit the best balance for indie makers in the US?
For soldering irons, brands like Hakko and Weller offer reliable entry-level models around $40–$70 that many indie makers trust. For calipers, digital models from Neiko or iGaging in the $20–$40 range provide good precision without overspending. Consider starting in the mid-tier: these tools last longer and provide better results than the cheapest options, but you don’t need to splurge on pro-level gear unless your project requires it.
I see that prototyping supplies can range pretty widely in cost. How do you recommend estimating hardware expenses for a project that might change direction during development, especially if I’m trying to avoid overspending early on?
Start by identifying the minimum set of hardware you need to get a proof of concept working, and buy only those items first. Factor in some buffer money for unexpected needs, but avoid bulk purchases or expensive hardware until your direction is clear. Track expenses as you go and reassess hardware needs at each project milestone to stay flexible and avoid unnecessary costs.
I noticed the article breaks down hardware and materials costs really well, but I’m having a hard time estimating what unexpected expenses to budget for during prototyping. Are there any hidden costs that tend to surprise indie tech creators after they get started?
Unexpected costs during prototyping can often include things like shipping fees for replacement parts, expedited orders when deadlines are tight, extra components due to trial and error, and the price of specialized tools you might not realize you need at first. Also, software subscriptions or one-time licenses can pop up if your project relies on specific platforms. Factoring in a buffer of 15–20% above your initial estimate is a good way to account for these surprises.
I noticed the article says development boards like Raspberry Pi or Arduino can cost anywhere from $5 to $100 or more per unit. For a first-time project, how do I figure out which board is the most cost-effective without accidentally over- or under-spending?
To choose the most cost-effective board, start by listing the features your project truly needs, like processing power, connectivity, and input/output options. Compare entry-level boards (such as Raspberry Pi Zero or Arduino Uno) to see which matches your requirements. Don’t buy the highest-spec board unless you need its extra capabilities, but avoid the cheapest if it might limit your project. Reading user reviews and checking community support can also help you make a confident choice.
Could you give some examples of typical budgeting pitfalls that indie creators run into when estimating costs for enclosures or specialty parts? I’m worried about hidden expenses popping up late in the process.
A common budgeting pitfall for enclosures and specialty parts is underestimating prototyping costs, like multiple 3D prints or CNC runs to get the design right. Indie creators also often forget about minimum order quantities, lead times, and shipping fees—especially for custom or overseas parts. Changes in design late in the process can trigger new tooling or setup charges. It’s wise to build in a contingency fund, typically 10–20%, for these kinds of surprises.
When figuring out the costs for prototyping supplies and enclosures, how do you account for mistakes or failed attempts in your budget? I’m worried about unexpected expenses if I mess up a 3D print or have to reorder parts. Any tips for building a buffer into the budget?
It’s smart to plan for errors and rework. When budgeting for prototyping, add a contingency buffer—typically 10-20% extra—on top of your estimated costs for supplies, enclosures, and prints. Review past projects to gauge how often mistakes happen, and always round up when ordering basic materials. Tracking your actual spend versus your budget also helps refine your buffer for future projects.
As a parent with limited free time, I’m interested in starting a small web app project with my kid. Based on your breakdown, which core budget area is most likely to have hidden costs for a beginner, and how much should I realistically set aside for surprises?
For beginners, development and testing often have hidden costs, especially if you run into bugs or need unexpected features. You might also face extra expenses with hosting if your app grows or if you need premium tools. It’s wise to add a buffer—setting aside 20–30% above your expected budget is usually enough to cover these surprises without stress.
Could you elaborate on how you estimate costs for specialty components like custom PCBs or rare sensors? I imagine sourcing these can get unpredictable, especially for small production runs or prototypes.
Estimating costs for specialty components like custom PCBs or rare sensors usually starts with requesting quotes from multiple suppliers, even for small orders. Prices can vary widely depending on material, complexity, and order quantity. For prototypes or small runs, minimum order fees and setup charges often make each unit more expensive. Factoring in shipping, possible import duties, and lead times is important too. Adding a contingency budget of 10–20 percent helps cover unexpected price changes or sourcing delays.
When budgeting for hardware like Raspberry Pi or Arduino boards, do you recommend buying extras to account for accidents or failures, or is it better to stick strictly to what the project needs to save money?
When working with hardware like Raspberry Pi or Arduino boards, it’s wise to factor in at least one spare if your budget allows. Mistakes and hardware failures can happen, especially during prototyping or if the device will run for long periods. However, if funds are tight and you have experience handling the components, buying only what you need can help save costs. Consider your skill level, project timeline, and risk tolerance when deciding.
The breakdown highlights tools like soldering irons and prototyping supplies, but I’m wondering how to budget effectively if I already own some of these items. Is there a good rule of thumb for estimating upgrade or replacement costs for existing tools when planning for future projects?
If you already own basic tools, a good rule of thumb is to allocate 10–20% of the new tool cost as a contingency for upgrades, wear and tear, or replacements over time. Keep an inventory of your current tools and note their condition, then only budget for items that may need replacing soon or for any specialized gear your next project requires.
I noticed you mentioned that custom PCBs and rare sensors can add $50–$500 or more to a project. For someone new to hardware, how do you estimate these costs early on, and are there any beginner-friendly ways to avoid surprise expenses with specialty components?
Estimating costs for custom PCBs and rare sensors can be tricky at first. Start by looking up prices from major electronics suppliers; many offer instant quotes for PCBs based on size and features. For sensors, check community forums or open-source projects to see what similar components cost. To avoid surprises, stick to widely-used parts whenever possible and prototype with off-the-shelf modules before committing to any custom or specialty components.
You mentioned budgeting for tools like soldering irons and calipers—do you have advice on whether it’s worth buying these new or if used/refurbished gear is reliable enough for most first-time indie builds?
For most first-time indie tech builds, buying used or refurbished tools like soldering irons and calipers can be a smart way to save money. Many pre-owned tools are still in excellent condition. Just check for signs of wear, test them if possible, and buy from reputable sellers. For essential items that require precise accuracy or safety, consider buying new, but for standard tools, quality used options often work just as well.
I’m planning a side project that involves custom PCBs and some niche sensors, and it looks like those costs can add up fast according to your breakdown. Do you have any advice on how to estimate for unexpected hardware expenses or source components more affordably without sacrificing reliability?
Estimating for unexpected hardware expenses is wise—consider adding a 15-25% buffer to your hardware budget for surprises like extra prototypes or shipping fees. For sourcing, look into reputable surplus suppliers or group buys, which can offer lower prices on quality components. Also, check forums and maker communities for recommendations on reliable, budget-friendly vendors for niche sensors and custom PCBs.
If I want to keep my indie tech project sustainable beyond launch, are there any specific strategies for cutting down on recurring costs, particularly with digital infrastructure or tools, that you’ve seen work well?
To keep your indie tech project sustainable, consider switching to open-source tools where possible, as they often have no licensing fees. Opt for cloud services that let you scale resources up or down as needed, so you’re only paying for what you use. Also, regularly review your subscriptions and downgrade any services you don’t fully utilize. Automation can also help reduce manual tasks and associated costs over time.
Could you give more examples of what might fall under specialty components and how to actually estimate costs for those if I have no idea what I’ll need yet? I’m worried about missing hidden expenses in my hardware budget.
Specialty components can include items like custom circuit boards, sensors not found in basic kits, unique display modules, or specialized connectors. If you’re unsure what you’ll need, try to sketch out your project’s main features and research similar open-source builds for parts lists. Give yourself a 10–20% buffer in your budget to allow for hidden expenses or unexpected parts. You can also reach out to online maker communities for advice on typical component costs.
Can you elaborate on how to decide between investing in entry-level tools versus mid-tier equipment for a small hardware project? Is it usually better to start basic and upgrade if the project grows, or could skimping on tools end up costing more in the long run?
Choosing between entry-level and mid-tier tools depends on your project’s complexity, budget, and future plans. For beginners or prototypes, starting with basic tools can save money and let you test ideas. However, if your project requires precision or heavy use, investing in mid-tier equipment can prevent issues like tool failure or poor results, which could cost more to fix later. Consider your expected usage—if you plan to scale up, quality tools may be a smarter long-term investment.
For the software and digital infrastructure costs you mentioned, are there recommended free or low-cost alternatives to popular paid tools that you’ve found reliable for indie tech projects, or are there cases where it’s smarter to pay for premium services from the start?
For many indie tech projects, reliable free or low-cost alternatives exist for software and digital infrastructure—options like GitHub for code hosting, Netlify for basic deployments, and Figma’s free tier for design can be very effective starting points. However, it’s often wiser to invest in premium services early if your project needs advanced features, higher security, or better scalability. It really depends on your specific requirements and growth plans.
You mention that hardware can quickly become the biggest budget category, especially with custom PCBs or rare sensors. In your experience, is it more cost-efficient for an indie tech project to design custom PCBs right away, or to stick with off-the-shelf development boards until the concept is proven?
For most indie tech projects, it’s usually more cost-effective to start with off-the-shelf development boards. These let you test and refine your concept without the upfront investment and risk of custom PCB design. Once your prototype works as intended and you’ve validated your idea, then consider moving to a custom PCB for lower per-unit costs and a more compact design.
Could you elaborate on how to prioritize spending between development boards like Raspberry Pi versus investing in higher-quality tools, especially if the initial project budget is really tight? I’m not sure which area would give me the most value early on.
When working with a tight budget, it’s generally wise to prioritize a reliable development board like the Raspberry Pi first, since you need a stable foundation for your project to function. Basic, affordable tools are usually sufficient early on, and you can upgrade them later as needed. This way, you can start building and iterating without overspending, then invest in higher-quality tools as your project grows.
You mentioned that specialty components like custom PCBs and rare sensors can really increase hardware expenses. Are there any practical ways to mitigate these costs for indie creators, such as using off-the-shelf alternatives or pooling resources with other makers?
Absolutely, there are a few practical cost-saving strategies. Consider using off-the-shelf modules or development boards whenever possible; they’re often much cheaper and easier to source than custom components. Collaborating with maker communities or local hackerspaces can help you pool orders for better pricing or even share surplus parts. If a custom PCB is required, using online design tools and batch manufacturing services can keep costs manageable.
I noticed you mentioned that hardware often takes up the biggest part of the budget, especially for physical tech projects. How do you recommend prioritizing spending between development boards, prototyping supplies, and tools if you have a really tight initial budget?
When funds are limited, focus first on a reliable development board that matches your project needs, since it’s the core of your build. For prototyping supplies, start with essentials like breadboards, basic sensors, and jumper wires. As for tools, borrow or buy only the minimum required—think a soldering iron or multimeter if absolutely necessary. Gradually expand supplies and tools as your project progresses and more funds become available.
I noticed you mention that hardware can be a major expense, especially when dealing with things like custom PCBs or specialty sensors. How do you recommend estimating those kinds of unpredictable costs up front if the exact parts you’ll need might change during prototyping?
Estimating hardware costs when specs might change can be tricky. Start by researching the highest-quality components you think you’ll need and use those prices as your baseline. Add a contingency—often 20–30% extra—for unforeseen changes or multiple prototype iterations. As your design evolves, update your estimates. Reaching out to suppliers for sample pricing or minimum order quantities can also help with accuracy.
For hardware costs, the prices you mention for development boards and prototyping supplies seem to cover a pretty wide range. Do you have any advice on how to choose between cheap but possibly unreliable components versus investing more for durability, especially if you’re on a super tight budget?
When budget is tight, start by using affordable components for prototyping and early testing. This keeps costs down as you work out your design. As your project becomes more stable or if you plan to use it regularly, consider upgrading key parts—especially anything that will be hard to replace later—to more reliable, durable options. For one-off projects or demos, cheaper parts are usually fine, but for long-term use or production, investing in quality pays off.
For the prototyping supplies and specialty components, do you have any strategies for accurately estimating costs when your project requirements might evolve over time? I worry about scope creep impacting my budget unexpectedly.
When dealing with evolving project requirements, it’s wise to include a contingency buffer—usually 10–20% on top of your estimated supply and component costs. Start by listing the essential items you absolutely need, then research prices from multiple suppliers. Review similar projects for reference costs. Track your expenses as you go and regularly revisit your requirements list, updating estimates as your project evolves to help prevent scope creep from derailing your budget.
You mention that specialty components like custom PCBs can add hundreds to the hardware budget. For someone working on a limited budget, are there strategies or recommended sources for finding affordable alternatives or refurbished parts without sacrificing reliability?
When working with a tight budget, you can often find affordable alternatives by using off-the-shelf development boards instead of custom PCBs, at least for your prototypes. For components, consider reputable surplus electronics suppliers or specialized marketplaces that offer refurbished or gently used parts. Also, check online communities and forums where members sometimes sell leftover or secondhand hardware. Just be sure to verify the ratings of the sellers and the warranty or return policy to avoid unreliable parts.
When it comes to budgeting for tools like soldering irons and calipers, do you have any tips on what’s essential for a beginner versus what can wait until a project grows? I’m trying to keep costs manageable without missing something important.
For beginners, it’s best to start with the basics: a reliable, mid-range soldering iron, a simple digital caliper, and essential hand tools like wire cutters and a screwdriver set. Specialty tools and higher-end equipment can wait until your projects become more complex. Focus on versatility and quality in your first purchases, and upgrade or expand your toolkit only when you find a clear need as your skills grow.
For hardware-heavy indie projects, how do you recommend handling unexpected costs like needing extra prototyping supplies or replacing a failed component? Do you build a set percentage buffer into your initial budget, or just try to absorb those costs as they pop up?
For hardware-heavy indie projects, it’s wise to build a contingency buffer into your initial budget. Many project managers recommend setting aside an extra 10–20% specifically for unexpected expenses like additional prototyping supplies or component replacements. This way, you’re less likely to be caught off guard, and you won’t have to scramble to absorb surprise costs as they arise.
You mentioned that hardware can quickly eat up a large chunk of the budget, especially with things like custom PCBs and specialty components. Are there any strategies for sourcing affordable parts or group-buy options that are realistic for small, home-based projects?
For small, home-based projects, consider checking local electronics surplus stores or online marketplaces for excess or recycled components, which can be much cheaper than new parts. Hobbyist forums often organize group buys for components or PCBs, letting you split costs with others. Also, prototype services like PCBWay or JLCPCB sometimes offer discounts for small batches, and bulk purchasing basic components from suppliers like Digikey or Mouser can save money if you plan ahead.
Could you elaborate on how to budget for specialty components, like custom PCBs or rare sensors? I often find that these costs add up quickly, so I’m wondering if there are strategies for predicting or minimizing these expenses in early project stages.
Budgeting for specialty components like custom PCBs or rare sensors can be tricky, as costs can escalate due to small order quantities or unique requirements. Early on, get quotes from multiple suppliers and consider prototyping with off-the-shelf alternatives to test your design. Bulk ordering with other makers or through group buys can reduce per-unit costs. Also, factor in extra for unexpected revisions and shipping fees to avoid surprises later.
You mentioned that hardware costs can vary wildly depending on the need for specialty components like custom PCBs and rare sensors. Do you have any tips for sourcing these parts affordably in the US, especially for one-off or small-batch indie projects?
For one-off or small-batch indie projects, consider suppliers like Digi-Key or Mouser for a wide selection and competitive pricing. For custom PCBs, services like OSH Park and JLCPCB are popular for low-volume runs. Also, check local makerspaces or electronics hobbyist groups—members often have spare components or helpful sourcing tips. Don’t forget eBay or surplus stores for rare sensors, but always verify quality and authenticity.
When budgeting for tools such as soldering irons and calipers, how do you decide between investing in mid-level gear versus starting with cheaper, entry-level options? Does spending more upfront on tools usually translate to long-term savings for indie creators?
Choosing between entry-level and mid-level tools depends on your project’s scope and how often you’ll use them. If you’re just experimenting or unsure about long-term commitment, entry-level tools can be a cost-effective way to start. However, investing in quality gear often pays off over time, as better tools last longer and perform more reliably, reducing frustration and replacement costs. For frequently used items like soldering irons, spending a bit more upfront can definitely lead to savings and a smoother workflow in the long run.
When you talk about budgeting for prototyping supplies, the range is pretty broad. How do you recommend estimating these costs up front, especially for first-time makers who may not know exactly which parts they’ll need until they start building?
Estimating prototyping supply costs can be tricky, especially for newcomers. Start by sketching your project’s basic design and researching similar projects to create a list of likely components. Look up current prices for those items and add a buffer (usually 20–30%) to cover unexpected tools or materials. Joining maker forums or local groups can also give you insight into common supply needs and help refine your budget.
Can you elaborate on how to estimate hardware costs if you’re sourcing components from both local suppliers and international vendors? I sometimes find huge price differences and unexpected shipping or customs fees, so I’m wondering how best to factor those into the initial budget.
To estimate hardware costs accurately, start by listing every required component, then get quotes from both local and international sources. For each international option, include shipping charges, customs duties, and possible currency conversion fees. Compare the total landed cost per supplier. It helps to budget a buffer (around 10-15%) for unexpected fees or delays. Document all estimates and update them as you receive firm quotes to keep your budget as realistic as possible.
As a beginner trying to start a micro SaaS on a tight budget, I’m wondering how you prioritize between spending on development boards versus tools like soldering irons or 3D printing access. What would you suggest as the minimum kit to get started without overspending upfront?
For a micro SaaS project, especially at the beginning, prioritize development boards that directly support your core idea—these are often essential for prototyping. Basic tools like a soldering iron or breadboard can be handy, but you don’t need to invest in 3D printing or advanced equipment right away. Start with a reliable dev board, some jumper wires, and perhaps a multimeter. Only expand your toolkit as your project demands it, helping you keep upfront costs low.
For someone thinking about starting a micro SaaS or indie online service, how early do you recommend locking in tool purchases (like breadboards and soldering gear) compared to investing in digital infrastructure? I am trying to avoid overspending at the wrong stage.
It’s smart to hold off on buying physical tools like breadboards and soldering gear until you’ve validated your idea and know that hardware prototyping is essential. For most micro SaaS and online services, prioritize spending on digital infrastructure—such as hosting, domain, and core software—first. Only invest in physical tools if your concept truly requires hardware development. This approach helps prevent unnecessary early expenses.
When budgeting for prototyping supplies and tools, how do you decide which quality level is enough for an indie project? Is it better to invest in higher-end tools from the start, or start basic and upgrade only if the project gains traction?
For indie projects, it’s usually wise to start with affordable, reliable tools and basic supplies. This helps keep your initial costs manageable while you’re validating your idea. If your project shows promise and you find specific tools lacking, you can then justify investing in higher-end versions. Focus on quality where it directly affects your prototype’s function, but avoid over-investing before you see real traction.
When budgeting for development boards like Raspberry Pi or Arduino as you mentioned, how do you handle sudden price spikes or supply shortages? Is it better to buy in bulk early on, or wait until the project is more finalized before making hardware purchases?
When dealing with popular boards like Raspberry Pi or Arduino, sudden price changes and shortages can be a challenge. If your project absolutely depends on specific hardware, it’s safer to buy in bulk early—especially when prices are stable and supplies are good. However, if your design might change, it’s wiser to wait to avoid buying unnecessary stock. Some teams buy a small batch for prototyping, then order the remainder once the design is finalized.
When you mention hardware expenses like development boards and prototyping supplies, do you have any tips for sourcing these components cost-effectively in the US, especially for someone just starting out with limited capital?
For affordable hardware in the US, consider checking surplus electronics stores, online marketplaces like eBay, and community-driven sites such as Tindie. Makerspaces and local hackathons sometimes offer free or discounted parts. Bulk packs and starter kits can also save money compared to buying components individually. Don’t overlook forums or local tech groups, where you may find used boards or even donations from fellow hobbyists.
You mentioned that overspending on certain categories can threaten the sustainability of indie tech projects. Could you elaborate on common budgeting pitfalls specific to software and digital infrastructure, and how makers might avoid them when planning out their first project?
Overspending often happens with software licenses, cloud services, and unnecessary premium tools. Makers sometimes jump to expensive solutions before fully exploring what free or lower-tier options can offer. Another pitfall is underestimating ongoing costs, like monthly hosting or support fees. To avoid these traps, start with essential features, use free trials, and track every recurring expense. Revisit your budget frequently to see where you can optimize or scale back.
You mention that hardware is often the biggest expense, especially when it comes to stuff like development boards and specialty components. Do you have any advice on how to estimate hardware costs more accurately before starting, or maybe examples of hidden expenses that first-timers overlook?
To estimate hardware costs more accurately, make a detailed list of every component you’ll need—including boards, sensors, cables, and cases. Check prices from multiple suppliers, and don’t forget to add shipping, taxes, and possible import duties. Common hidden expenses include replacement parts for mistakes, extra tools like soldering irons, and prototyping materials. It helps to set aside a small contingency fund for unexpected costs.
When budgeting for hardware like Raspberry Pi or Arduino boards, do you have tips for finding reliable parts at lower prices, especially for someone who might only need a couple of units for a small at-home project?
For small at-home projects, consider checking reputable online marketplaces and official distributors for refurbished or open-box hardware, which can be significantly cheaper. Community forums and local maker groups sometimes offer gently used parts at fair prices. Also, compare prices across several well-known electronics sites, and keep an eye out for seasonal sales or bundle deals. Buying just a couple of units often means it’s worth paying slightly more for reliable sources to avoid counterfeit or defective boards.
I have a busy family schedule, so I need to watch both my time and money closely. If I’m building a small digital art installation using Arduino and some sensors, do you have any tips for prioritizing which hardware or prototyping supplies are worth splurging on versus going for budget options?
For a small digital art installation with Arduino and sensors, prioritize spending on reliable microcontrollers and quality sensors, since these are key to stability and accuracy. Go for budget options with wires, breadboards, and non-essential decorative parts. Starter kits can also save both time and money by bundling basics. Consider used or refurbished hardware for one-off prototypes to stretch your budget further.
I’m curious how you would suggest balancing spending on entry-level versus mid-level prototyping tools when starting out. Is it usually smarter to invest upfront in better gear, or should I stick with basics and upgrade as my project develops?
When just starting out, it’s often wise to begin with entry-level prototyping tools. This approach keeps costs low while you validate your ideas and learn what your project really needs. As your project gains traction or specific requirements arise, you can then justify investing in mid-level or advanced tools. Upgrading gradually helps avoid overspending on gear you might not truly need.
When you mention hardware taking up the biggest slice of the budget, do you have any advice for prioritizing which components to invest in first if funds are tight and I’m not sure which features will make it into the final version of my project?
If you’re unsure which features will be finalized, start by investing in hardware that’s crucial for your prototype to function at a basic level—think core processors or controllers. Avoid spending on specialized or high-end components until your project scope is clearer. Modular and widely compatible hardware can help you adapt as your ideas evolve, letting you upgrade or add features later without overspending upfront.
Could you clarify how much wiggle room I should leave in my budget for unexpected expenses, especially since things like rare sensors or prototyping supplies can vary so much? Is there a percentage or rule of thumb you recommend for indie makers?
It’s wise to build in a buffer of about 10–20% on top of your estimated costs to cover unexpected expenses, especially with hardware projects where parts and supplies can fluctuate in price. If your project relies on rare components, leaning toward the higher end of that range is safer. Tracking your spending closely will also help you adjust as the project evolves.
If I’m mostly building a web-based micro SaaS and I don’t need much physical hardware, would it make sense to skip most of the tools and prototyping supplies budget mentioned here? Or are there hidden costs I should watch out for even if my project isn’t hardware-heavy?
Since your web-based micro SaaS project doesn’t rely on physical hardware, it’s reasonable to minimize or skip budgets for tools and prototyping supplies. However, keep in mind potential hidden costs like premium software subscriptions, third-party service APIs, cloud hosting, and security tools. Also, budget for backups, testing environments, and unexpected software needs as your project scales.
When you mention that prototyping supplies can range from $30 to $200 for a basic setup, is that cost typically for a single prototype or does it cover the materials for multiple iterations? I want to avoid underbudgeting if I need to redo parts of my project.
The $30 to $200 estimate is generally for a single basic prototype, covering essential materials and components. If you anticipate needing multiple iterations or think you might want to redo parts, it’s wise to budget extra for additional supplies. Costs can add up with each new build, so planning for a bit more flexibility in your budget will help you avoid surprises.
When you mention budgeting for hardware like microcontrollers and specialty components, how do you factor in unexpected costs, like parts going out of stock or shipping delays, especially if you’re working with a really tight budget?
One way to handle unexpected hardware costs is to add a buffer—usually 10-20% extra—to your component budget. This covers price changes, out-of-stock parts, or rush shipping if delays happen. Also, research a few alternative suppliers in advance, so you’re not stuck if your first choice runs out. For very tight budgets, prioritize must-have parts and delay less essential features if needed.
As someone juggling a regular job and family, can you suggest ways to estimate upfront hardware expenses versus ongoing costs for things like digital infrastructure? I’m trying to avoid overcommitting at the start when my project scope might change as I go.
To keep things manageable, list all hardware you need right away—for example, a laptop or test devices—and tally those as upfront costs. For ongoing digital infrastructure, estimate monthly or yearly expenses for hosting, domains, and cloud services. Start with basic, scalable plans so you’re not locked into higher costs as your needs evolve. This approach lets you adjust spending as your project grows without overcommitting early on.
For the hardware and materials section, how do you decide when it’s worth it to pay more for higher-end components versus sticking to basic or secondhand parts? Are there situations where cutting corners on hardware ended up costing you more later?
Choosing between higher-end components and basic or secondhand parts depends on your project’s needs and long-term goals. If your hardware is mission-critical—like servers or parts that are hard to replace—it’s usually smarter to invest in quality to avoid costly failures and downtime later. However, for non-essential or easily swapped parts, secondhand can save money. In the article’s examples, cutting corners sometimes led to unexpected repair or upgrade costs, so consider the lifespan and support for each component before deciding.
I’m curious about budgeting for both hardware and digital infrastructure in one project. How do you suggest prioritizing spend between physical components like sensors and the software or hosting needed, especially if funds are pretty limited?
When funds are tight, start by defining the minimum viable product—what absolutely must work for your project to have value. If physical components like sensors are essential to data collection, allocate enough for reliable hardware first. For software and hosting, consider open-source solutions and entry-level hosting that can scale later. Always factor in long-term costs, like maintenance and upgrades, and avoid over-investing in either area before you have a working prototype.
For indie tech projects that involve both hardware and software, do you have any advice on how to balance the budget between prototyping physical components and setting up digital infrastructure? I often find that unexpected costs crop up on both sides, so I’d appreciate any tips on prioritizing spending.
When budgeting for projects with both hardware and software, start by listing your must-have features for each. Prioritize early hardware prototyping with basic, low-cost materials to test concepts before investing in final components. For digital infrastructure, use scalable, pay-as-you-go services to avoid large upfront costs. Set aside a contingency fund—about 10–15% of your total budget—to handle surprises on both fronts. Regularly review spending and adjust as you learn more during development.
You mention that specialty components can sometimes add $50–$500 or more to the budget. Do you have any tips on forecasting these unexpected costs early in the planning stages, or strategies for sourcing rare parts at a lower price?
To forecast specialty component costs early, make a detailed parts list as soon as possible and research prices from multiple suppliers. Reach out to forums or maker communities to learn about typical pricing and sourcing options. For rare parts, consider alternatives like refurbished items, surplus outlets, or group buys with other creators to reduce costs.
You mentioned that overspending can spell disaster for indie projects, especially in the hardware budget. Are there any warning signs or early indicators that a project is about to go over budget, and how can someone adjust quickly if that happens?
Some warning signs that your project might go over budget include frequent unexpected expenses, suppliers quoting higher prices than planned, or hardware prototypes requiring more iterations than anticipated. If you notice these happening, review your budget line by line, prioritize essential features, and consider substituting or delaying non-critical components. Regularly updating your cost estimates and maintaining a contingency fund can also help you adapt quickly when overruns appear.
You talk about the risk of overspending when working with a tight indie tech budget. What are some warning signs that costs are starting to get out of hand early on, and are there reliable methods for forecasting hidden expenses in the prototype phase?
Early warning signs of overspending include frequent unplanned purchases, scope creep, and using up your budget faster than scheduled milestones. To forecast hidden expenses during the prototype phase, track all minor costs and set aside a contingency fund. Break down tasks into small parts, estimate each, and regularly compare actual spending against estimates to spot issues as they arise.
When budgeting for hardware like development boards and specialty components, do you have any tips for estimating costs in projects where hardware specs might change as the concept evolves? I worry about blowing my budget if I need to switch parts midway.
When hardware requirements might change, it helps to build a buffer into your budget—often 20–30% over your initial estimate for parts. Research alternatives for critical components early on and check for restocking fees or return policies. Also, consider starting with more flexible, widely supported boards that can adapt to different needs as your project evolves.
Could you elaborate on how to estimate costs for a project that might shift from prototype to a small production run? For example, are there certain hardware or tooling costs that tend to increase unexpectedly when moving beyond a single prototype?
When transitioning from a single prototype to a small production run, costs can rise in areas like tooling, molds, and component sourcing. For prototypes, you might use off-the-shelf parts or 3D printing, but production often requires custom molds or assembly jigs, which have significant upfront costs. Also, minimum order quantities for components can increase your expenses. It’s wise to get quotes for both prototype and low-volume production early, so you can budget for these potential jumps.
If my project primarily relies on digital infrastructure and only minimal hardware, do you have any advice on how to prioritize expenses or avoid common pitfalls in the software and hosting side of budgeting?
When most of your costs are digital, focus your budget on reliable hosting, software licenses, and essential development tools. Start small with scalable cloud services so you only pay for what you use, and avoid committing to long-term contracts too soon. Watch out for hidden fees, like bandwidth overages or premium support, and always leave a buffer in your budget for unexpected software needs or usage spikes.
When estimating costs for hardware like custom PCBs or rare sensors, how accurate should we expect these estimates to be? Have you found any strategies for dealing with unexpected hardware expenses that pop up during a project?
Estimates for custom PCBs or rare sensors can fluctuate quite a bit, sometimes by 20-30% or more, due to factors like order volume, lead times, or supplier changes. To handle unexpected hardware costs, it’s smart to add a contingency buffer—typically 15-25% extra in your budget. Also, getting multiple quotes early and researching alternative suppliers helps reduce surprises and gives you options if costs spike.
Can you give any advice on how to estimate costs for software and digital infrastructure if the project might grow over time? I’m worried about budgeting for cloud services and other recurring expenses that could change as my indie web app gets more users.
When estimating costs for software and digital infrastructure, start by projecting your initial user base and then model how costs might increase as you add users. Most cloud providers offer calculators to simulate different usage scenarios, so use those to map out potential expenses for storage, bandwidth, and compute. Also, consider building in a buffer—say 20-30%—for unexpected growth. Keep an eye on tiered pricing and set up usage alerts so you’re not caught off guard by sudden spikes.
The article mentions that hardware parts like custom PCBs or rare sensors can get expensive fast. Do you have any tips on how to estimate these costs more accurately early on, or ways to source them more affordably for small batch projects?
To estimate costs early, start by listing every component your project needs and checking prices from several suppliers, including Mouser, Digi-Key, and smaller specialty shops. For small batches, consider reaching out directly to manufacturers for sample pricing or volume discounts. Also, look for group buys or community-driven sourcing platforms, which can offer lower prices for rarer parts. Don’t forget to include shipping and possible import fees in your estimates.
When you break down costs for prototyping supplies and tools, do you recommend budgeting for higher quality gear upfront, or is it better to start cheap and upgrade later as the project evolves?
When budgeting for prototyping supplies and tools, it usually makes sense to start with affordable, reliable options rather than investing heavily upfront. This allows you to iterate quickly and learn what you truly need as your project develops. Once you have a clearer sense of your essential tools or if you outgrow the basic gear, that’s a good time to consider upgrading to higher quality equipment.
When budgeting for prototyping supplies, you list a range of $30–$200 for a basic setup. Do you have any recommendations for reliable sources or strategies to keep these costs down, especially for someone building several prototypes before finalizing the design?
To keep prototyping costs low, consider buying components in bulk or starter kits, which often reduce the per-item price. Online retailers like Adafruit and SparkFun offer quality parts and bundle discounts. Reusing parts from previous prototypes can help, too. Local makerspaces sometimes provide access to shared supplies and equipment, which is especially useful if you plan to build and iterate on several designs.
The hardware section mentions a wide range for specialty components and tools. In your experience, how do you factor in unexpected expenses, like having to replace a tool mid-project or finding out a specific sensor is pricier than planned?
To handle unexpected hardware expenses, I usually set aside a contingency fund within my budget—typically about 10-20% of the estimated hardware costs. This buffer helps cover surprises like tool replacements or price hikes on specialty parts. It’s also helpful to get quotes from multiple suppliers early on and track prices to catch any changes before making final purchases.
I see you mention that hardware often becomes the biggest expense for indie tech projects, especially when specialty components or custom PCBs are needed. Do you have suggestions for reliable ways to source these kinds of parts affordably, or tips for minimizing unexpected costs during prototyping?
For affordable specialty components or custom PCBs, try established suppliers like Digi-Key, Mouser, or JLCPCB, which offer competitive prices and good quality. Ordering in small batches first can help you spot issues before larger runs. To keep prototyping costs down, reuse parts from previous projects when possible, and create detailed schematics and PCB layouts to avoid design mistakes that lead to reorders. Always factor in shipping and potential import fees early in your budget.
When budgeting for indie projects, how do you typically handle unexpected costs, like equipment breaking or needing extra prototype supplies? Is there a recommended percentage to set aside as a buffer in your experience?
When planning your indie tech project budget, it’s wise to include a contingency buffer for unexpected expenses like equipment repairs or extra materials. A common approach is to set aside about 10–20% of your total budget as a safety net. This helps cover unforeseen costs without derailing your project. Adjust this percentage based on how risky or unpredictable your project seems.
I noticed you mentioned development boards like Raspberry Pi and Arduino, which can vary widely in price. For someone just starting a micro SaaS project, is it smarter to start with entry-level boards or invest in more expensive options right away to avoid future upgrades?
For a micro SaaS project, starting with entry-level boards like basic Raspberry Pi or Arduino models is usually a smart move. These boards are affordable and powerful enough for prototyping and early testing. Once your project grows or requires more advanced features, you can then consider upgrading. This approach helps keep initial costs low and lets you learn what you really need as your project develops.
When you mention prototyping supplies costing between $30 and $200, does that typically include enough to cover multiple failed attempts or just one working version? I’m worried about unexpected expenses if I mess up a few builds while learning.
The $30 to $200 range is meant to cover a typical round of prototyping, which usually allows for a few iterations or failed attempts. However, if you’re completely new to the tools or materials, it’s wise to budget toward the higher end or set aside a little extra. That way, you’ll have enough supplies if you need to redo certain parts or experiment while learning.
Could you explain more about choosing between entry-level and mid-level tools? If I’m on a really tight budget and only planning to build one or two prototypes, would it be smarter to get cheaper gear or is it worth spending extra right away for quality?
If you’re only building one or two prototypes and your budget is very limited, choosing entry-level tools is usually sensible. They can handle most basic tasks and keep costs low. Investing in mid-level or higher-end gear makes more sense if you anticipate ongoing projects or need advanced features. For a short-term or one-off project, starting with affordable tools lets you test your ideas without a big upfront investment.
When planning a budget for something like a digital art installation, how do you recommend setting aside funds for unexpected costs, such as specialty components or tool replacements? Is there a typical percentage you suggest people add to their estimates as a buffer?
For projects like a digital art installation, it’s wise to include a contingency buffer in your budget for unexpected expenses such as specialty components or tool replacements. A common approach is to add 10–20% of your total estimated costs as a buffer. The exact percentage can depend on how complex or experimental your project is. Reviewing similar past projects can also help you decide on an appropriate amount.
You mentioned that overspending in one budget area can derail a whole indie tech project. How do you suggest balancing between investing in quality tools up front versus saving that money for component upgrades or unexpected costs later on?
Balancing upfront investments and future savings is key. Start by identifying which tools are essential for your project’s foundation—invest in quality where it directly affects your workflow or product stability. For less critical areas, opt for budget-friendly options. Always keep a contingency fund for upgrades or surprises, aiming to reserve at least 10–15% of your overall budget. This way, you’re prepared for both immediate needs and unforeseen costs.
When budgeting for hardware, you mention a big price range for things like development boards and specialty components. Do you have any advice for figuring out which components are genuinely worth investing more in versus where you can safely go for cheaper alternatives?
Focus on spending more where reliability and performance are crucial, like your main development board or any sensors critical to your project’s function. For non-essential parts, prototyping, or connectors, going with budget options is usually fine. Also, consider how easy it would be to replace or upgrade a part later—invest more in items that are hard to swap out or would cause major issues if they fail.
When budgeting for things like 3D printed enclosures or custom PCBs, how much should I set aside for unexpected overruns or mistakes? Is there a typical percentage you recommend adding as a safety margin for beginners doing a hardware-focused project?
For hardware-focused projects like 3D printed enclosures or custom PCBs, it’s wise to add a safety margin of 20–30% to your estimated costs, especially if you’re new to the process. Unexpected expenses can come from design tweaks, print failures, or order minimums. Setting aside this buffer helps you avoid surprises and keeps your project on track.
When budgeting for a small indie tech project, how should I account for unexpected expenses that might come up, especially with hardware or prototyping supplies? Is there a percentage you typically set aside as a contingency?
It’s wise to include a contingency fund in your budget, especially for hardware or prototyping costs where surprises are common. Many project managers recommend setting aside an extra 10% to 20% of your total estimated costs as a buffer. Adjust this percentage based on your project’s complexity and how familiar you are with the tools or suppliers involved.
When you mention that hardware can quickly become the biggest expense for indie tech projects, do you have strategies for sourcing components more cheaply in the US, like specific surplus suppliers or recycling parts from older devices?
Absolutely, sourcing hardware affordably is key. In the US, you can check out electronic surplus stores like All Electronics and Electronic Goldmine for discounted components. Local electronics recycling centers or e-waste events are also great for finding reusable parts from old devices. Online marketplaces, such as eBay or Craigslist, often have inexpensive used hardware. Always test reclaimed parts for reliability before using them in your project.
For someone building a micro SaaS product with mostly digital components, would you say the biggest surprise expenses come from software licensing or more from infrastructure like hosting and domains? I’m trying to figure out which line items need extra padding in my budget.
For most micro SaaS projects focused on digital components, unexpected costs often emerge from infrastructure—especially hosting, domains, and scaling as your user base grows. While software licensing can add up, it’s usually more predictable. I’d recommend adding extra padding to your infrastructure budget, particularly for cloud hosting and any third-party services you rely on. Regularly review usage to avoid surprise overages.
I’m considering a mix of 3D printed and readymade enclosures for my IoT device project. Based on your breakdown, are there situations where investing more upfront in higher-quality tools could actually save money in the long run, or is it better to stick to entry-level gear for indie projects like this?
Investing more upfront in quality tools can pay off if you plan to do multiple projects or need consistent, precise results—durable tools often reduce repair and replacement costs over time. However, for a one-off or prototype, entry-level gear may be enough, especially if you’re experimenting. Consider your project’s scale and how often you’ll use the tools before deciding.