
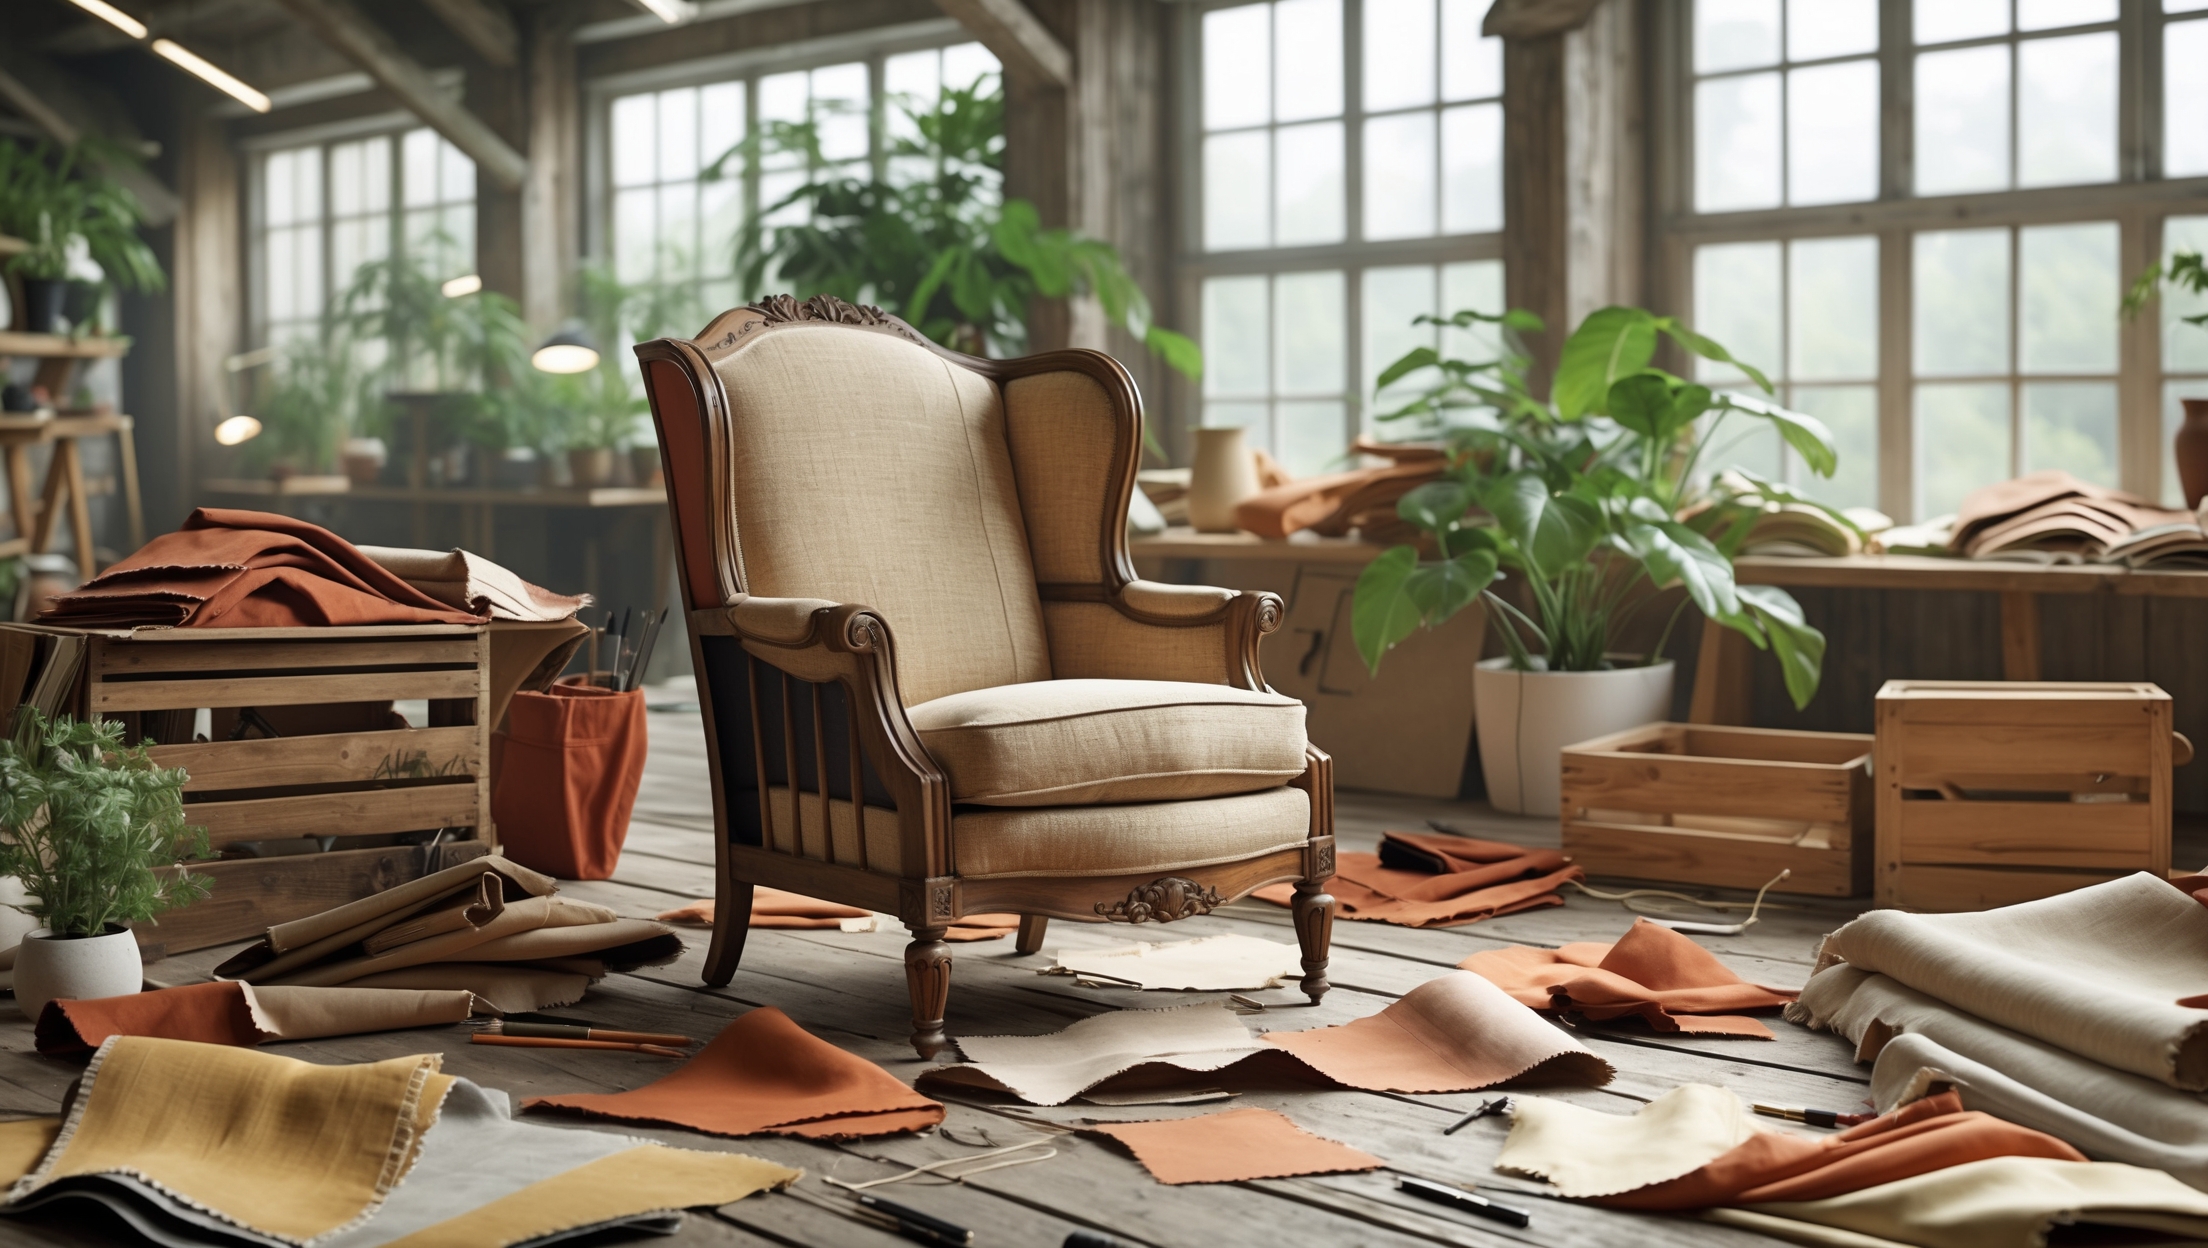
Introduction: The Art and Impact of Metal Salvage Refinishing
Salvaging and refinishing metal objects is more than a budget-friendly craft—it’s a powerful way to champion sustainability, preserve craftsmanship, and infuse living spaces with character. Whether you’ve rescued a rusty garden chair from a curbside, discovered ornate ironwork at a salvage yard, or inherited tarnished brass fixtures, learning how to properly refinish metal can transform forgotten pieces into practical art. Yet, metal restoration is often misunderstood or bypassed due to perceived complexity or fear of dealing with rust and corrosion. In reality, with the right approach and tools, anyone can restore metal salvage finds for years of new life, reducing landfill waste and honoring materials already in circulation. This guide will walk you through every step of the metal refinishing process, from assessing salvage potential to professional finishing touches. Along the way, you’ll learn practical techniques, safety essentials, budgeting strategies, and insider tips for achieving stunning, durable results—without harming the planet or your wallet.
Assessing Salvaged Metal for Restoration
Identifying Refinishable Metals
Not all metal salvage is created equal. Before investing time and resources, determine if your find can be safely and effectively restored. Common refinishable metals include:
- Iron & Steel: Durable and common in furniture, garden structures, and architectural elements.
- Aluminum: Lightweight, rust-resistant, often used in outdoor furniture and fixtures.
- Brass & Copper: Valued for their patina and used in hardware, lighting, and decorative items.
- Cast Iron: Heavier, often ornate, and susceptible to deep rust but rewarding to restore.
Red Flags: When to Walk Away
- Severe Structural Damage: Deep cracks, missing sections, or excessive corrosion may compromise strength and safety.
- Lead-Based Paint: Common on older pieces; removal should be done by professionals due to health risks.
- Extensive Pitting: While surface rust is manageable, deep pitting may require excessive material removal.
- Unknown Coatings: Mystery finishes or plating may release harmful fumes when stripped.
Essential Tools & Materials for Metal Refinishing
Basic Equipment
- Wire brushes (manual and drill attachments)
- Sandpaper (various grits: 80, 120, 220, 400+)
- Paint scrapers or putty knives
- Protective gloves and goggles
- Dust masks or respirators
- Drop cloths or tarps
Specialized Tools
- Angle grinder with sanding and wire wheel attachments
- Rotary tool (for detailed work)
- Sandblaster (optional, for heavy rust or ornate pieces)
- Heat gun (for softening old paint)
Eco-Friendly Chemical Supplies
- Non-toxic paint strippers (citrus or soy-based)
- White vinegar or citric acid (for rust removal)
- Baking soda (for neutralizing acids)
- Natural degreasers
Finishing Materials
- Eco-friendly primers (water-based or low-VOC)
- Metal paints (low-VOC, powder coat, or milk paint)
- Natural waxes or oils (for bare metal or patina preservation)
- Clear sealers (matte or gloss, water-based preferred)
Step-by-Step Metal Refinishing Process
1. Preparation & Safety
Set up a well-ventilated workspace, ideally outdoors or in a garage with open doors. Lay down drop cloths to protect surfaces. Always wear gloves, eye protection, and a dust mask or respirator to guard against debris and fumes. Keep a bucket of water or fire extinguisher nearby if using power tools or heat guns.
2. Cleaning & Degreasing
Remove dirt, grease, and loose debris using a degreaser and a stiff brush. Rinse thoroughly and allow the piece to dry completely to prevent trapping moisture under new finishes.
3. Paint & Finish Removal
- Manual Removal: Use paint scrapers and wire brushes for flaking paint or rust. For detailed areas, a rotary tool with a wire brush attachment is effective.
- Chemical Stripping: Apply non-toxic stripper according to manufacturer instructions. Let it sit, then scrape off softened paint. Repeat as necessary.
- Heat Gun: For stubborn paint, carefully use a heat gun and scrape as the paint bubbles. Avoid inhaling fumes.
- Sandblasting: For intricate or heavily corroded pieces, sandblasting quickly removes rust and paint but should be done outdoors or in a dedicated booth.
4. Rust Removal
- Mechanical: Sandpaper or wire wheels efficiently remove surface rust. Start with coarse grits and progress to finer ones for a smooth finish.
- Chemical: Submerge small items in white vinegar or a citric acid solution overnight. Scrub with a wire brush. Rinse and dry thoroughly.
- Baking Soda Paste: For light rust, apply a thick paste of baking soda and water, let sit, then scrub clean.
5. Surface Smoothing & Repairs
Inspect for deep pits or holes. Use metal filler or epoxy to repair minor damage, sanding flush when dry. Progressively sand all surfaces, finishing with 220-400 grit paper for a paint-ready surface. Wipe with a tack cloth to remove dust.
6. Priming & Painting
- Priming: Apply a thin coat of eco-friendly metal primer. This improves paint adhesion and prevents future rust. Allow to dry fully.
- Painting: Use a high-quality, low-VOC metal paint. Apply in thin, even coats with a brush or spray for best results. Allow each coat to dry before applying the next.
- Alternative Finishes: For a natural look, consider clear wax, oil, or a patina-preserving sealer. Brass and copper can be finished with beeswax or mineral oil to preserve shine and inhibit tarnish.
7. Curing & Reassembly
Let all finishes cure as recommended (often 24-48 hours). Reassemble any multi-part pieces only after finishes are fully hardened to prevent scratches.
Pro Tips for Stunning Results
- Test First: Always test strippers, paints, or sealers on a hidden area to check for adverse reactions.
- Patina Preservation: Don’t over-clean antique brass or copper. A touch of patina adds authenticity and value.
- Layering Techniques: For an aged look, layer colors and gently sand edges after painting to reveal hints of base metal or prior finishes.
- Rust Conversion: On pieces where rust can’t be fully removed, use a rust converter to stabilize and prime in one step.
- Eco-Finishes: Choose water-based or plant-derived products whenever possible to reduce environmental impact.
Budgeting for Metal Refinishing
Cost Breakdown
- Salvage Piece: Free–$50 (thrift, curbside, salvage yard)
- Basic Tools: $20–$100 (one-time investment)
- Supplies (strippers, sandpaper, paints): $30–$80 per project
- Eco-Finishes: $10–$40
While initial tool purchases add up, most items are reusable for future projects. Eco-friendly chemicals and finishes may cost slightly more upfront, but are safer for your health and the planet.
Saving on Supplies
- Share or borrow tools from local maker spaces or community tool libraries.
- Purchase supplies in bulk or split costs with fellow upcyclers.
- Repurpose old brushes, rags, and containers for mixing and applying products.
Maintenance Best Practices for Restored Metal Pieces
Regular Cleaning
Dust and wipe surfaces with a soft, barely damp cloth. Avoid harsh chemicals that can degrade finishes.
Protection from Moisture
- For outdoor items, touch up chips or scratches promptly to prevent rust from returning.
- Apply a fresh layer of wax or sealer annually for high-use or exposed pieces.
Storage Tips
- Store metal furnishings indoors or under cover during wet or freezing seasons.
- Elevate legs or bases to prevent pooling water.
Common Myths Debunked
- “Rust Means the Piece Is Ruined”: Most surface rust is cosmetic and fully reversible with basic tools and patience.
- “You Need Harsh Chemicals to Strip Paint”: Modern, plant-based strippers are effective and safer for you and the environment.
- “Metal Refinishing Is Only for Experts”: With careful preparation and the right tools, beginners can achieve professional results.
- “Eco-Friendly Finishes Aren’t Durable”: Today’s water-based primers and paints offer excellent protection and longevity when properly applied.
Case Study: Restoring a Salvaged Iron Bistro Set
Find: Ornate, rusted iron bistro table and two chairs retrieved from a demolition site.
Process:
- Scrubbed loose rust and paint with a wire brush
- Applied citrus-based stripper for stubborn paint layers
- Soaked small components in white vinegar overnight, then scrubbed clean
- Filled deep pits with epoxy, sanded smooth
- Primed with water-based anti-rust primer, then painted with low-VOC enamel in a cheerful color
- Applied two coats of clear matte sealer for weather protection
Result: The set now graces a patio, protected from the elements, with character and history intact.
Conclusion: Transforming Salvaged Metal—A Sustainable Skill for Life
Refinishing salvaged metal is a deeply rewarding practice that marries creativity, sustainability, and practical skill. Each piece you restore diverts waste from landfills, reduces the demand for new materials, and adds a unique story to your home or community. While the process may seem daunting at first, breaking it down into methodical steps—assessment, cleaning, stripping, repairing, refinishing—makes it accessible to anyone willing to invest time and care. With practice, you’ll develop an eye for pieces worth saving and confidence to tackle more complex restorations. Remember: eco-friendly products and conscientious techniques not only protect your health and the environment but also result in beautiful, long-lasting finishes. Whether you’re salvaging for personal use, gifting, or resale, the skills you hone in metal restoration empower you to see value where others see only rust. So, the next time you spot a weathered gate, a battered chair, or a forgotten fixture, imagine its potential and know you have the tools and know-how to bring it brilliantly back to life—one sustainable project at a time.


You mentioned that deep rust on cast iron can be rewarding to restore, but how do I know when corrosion is too severe and the piece isn’t worth the effort? Are there signs that even ambitious DIYers should look out for?
When assessing cast iron with deep rust, check for areas where the metal has thinned, flaked, or crumbles under light pressure—these signs mean structural integrity is compromised. Holes or major pitting that goes all the way through the metal usually make restoration difficult and less rewarding. If the piece feels fragile or parts break off easily while cleaning, it’s probably best to retire it or use it for decorative purposes.
The article mentions that lead-based paint is a red flag and should be removed by professionals. Are there any signs or quick tests you recommend for recognizing lead paint on metal items before starting a restoration project?
Lead-based paint can sometimes be recognized by its thick, chalky texture or the presence of many layers, especially on items made before the late 1970s. Color alone isn’t a reliable indicator. To test quickly, you can purchase lead test kits at most hardware stores; these usually involve rubbing a test swab on the paint surface to check for a color change. If you suspect lead, it’s safest to have a professional confirm before proceeding.
When it comes to restoring salvage pieces with ornate details, like cast iron garden chairs, do you have any tips for dealing with deep rust in those tricky crevices without damaging the design?
For ornate pieces with deep rust in detailed areas, use a small wire brush or a dental pick to carefully remove loose rust without harming the design. A rust dissolver gel can help soften stubborn rust; just apply it with a small brush and let it sit before gently scrubbing. For finishing, use fine steel wool or a soft cloth to preserve the intricate details while smoothing the surface.
When restoring old metal pieces with surface rust, is it usually enough to manually sand them down, or do you recommend using power tools for a more thorough prep? I’m trying to avoid damaging delicate details but want to make sure the finish lasts.
For delicate metal pieces with intricate details, starting with manual sanding lets you control the process and avoid accidental damage. Use fine-grit sandpaper or steel wool to gently remove surface rust. If you encounter more stubborn areas, a detail sander or a rotary tool with a soft brush attachment can help, but go slowly and check often. Always finish with a thorough clean before applying any protective coating to ensure durability.
For someone on a tight budget, which basic tools would you recommend as essential for refinishing common metals like iron, steel, or aluminum? I’m trying to get started without investing in a lot of specialty equipment right away.
To get started with metal refinishing on a budget, stick to the basics: sandpaper of various grits, a wire brush or wire brush attachment for a drill, safety gloves, a dust mask, and a good quality rust remover. These will help you clean, strip, and prep most iron, steel, or aluminum pieces. For finishes, a can of metal primer and spray paint are affordable and effective.
When you mention budgeting strategies for refinishing, what are some affordable but effective tools you recommend for someone just starting out with iron or brass restoration? I want to be sustainable but also not invest too much before knowing if it’s for me.
For beginners, a few affordable yet effective tools can go a long way. Start with wire brushes (manual or drill attachments), sandpaper in varying grits, and a basic set of files for surface prep. A mid-range hand drill helps with tougher rust, while a reusable drop cloth and natural cleaning agents keep things green. Most of these are budget-friendly and allow you to experiment without a big upfront investment.
Could you elaborate on how to determine if corrosion on cast iron is too extensive for DIY restoration? Are there specific signs that indicate a piece isn’t worth the effort or cost to refinish?
To decide if cast iron corrosion is too severe for DIY restoration, look for deep pitting, flaking, holes, or structural weakness—these are signs the metal is compromised. If large sections crumble with gentle pressure or the integrity of the piece is affected, restoration may be impractical. Surface rust and minor pitting are usually manageable, but extensive damage could require costly repairs or safety concerns, making it not worth the effort.
I often come across old metal chairs that are covered in layers of paint and a fair amount of rust, especially on the legs. When assessing whether these are worth the effort to restore, are there specific structural signs you’d recommend looking for beyond just surface rust or flaking?
Absolutely, when assessing old metal chairs, check for deeper issues like rust that has eaten through the metal, making holes or thin spots—especially at joints and stress points like the legs and seat supports. Also, look for weakened welds, bent frames, or unstable joints. If the chair feels wobbly or you see cracks in the metal, it may be more challenging and less safe to restore. Surface rust and flaking paint are workable, but structural damage may require advanced repairs.
You mention that aluminum is rust-resistant but used frequently in outdoor furniture. If I find aluminum pieces with surface discoloration or pitting, what refinishing techniques would you suggest to restore their finish without damaging the lightweight structure?
For aluminum with discoloration or pitting, start by gently cleaning the surface with mild soap and water. Use fine steel wool or a non-abrasive scouring pad to remove oxidation, being careful not to scratch the metal. For stubborn spots, a paste of baking soda and water can help. After cleaning, rinse well and dry. If the finish is dull, apply a metal polish designed for aluminum, then buff gently. Always avoid harsh abrasives or heavy sanding, as they can weaken or scratch the lightweight structure.
For someone restoring outdoor metal furniture, how do you decide whether aluminum or steel is a better candidate for long-lasting results? Does one generally require less upkeep after refinishing, particularly when it comes to rust and weather exposure?
When restoring outdoor metal furniture, aluminum is usually a better choice for long-lasting results because it does not rust and generally handles weather exposure better than steel. Steel can be very strong but requires regular maintenance and protective coatings to prevent rust, especially outdoors. Once refinished, aluminum typically needs less upkeep, making it a more practical option for outdoor use.
The article mentions that lead-based paint on older metal salvage pieces should be removed by professionals. How can a beginner reliably identify whether an item has lead paint before starting the refinishing process?
Identifying lead-based paint on metal salvage can be tricky, especially for beginners. Look for paint that appears very old, has an alligator-like texture, or cracks and peels easily—these can be signs of lead paint. To be sure, you can buy a lead test kit at a hardware store, which gives quick results. If in doubt, it’s safest to assume older painted items may contain lead and take precautions or consult a professional.
When assessing a salvaged metal item with some rust, how can I tell the difference between surface rust that’s easy to refinish and deep corrosion that makes restoration impractical? Are there quick tests or visual cues I should look for before committing the time and effort?
Look for rust that appears as a thin, flaky layer on the surface—this is usually surface rust and can be sanded or scrubbed off easily. Deep corrosion often shows as pits, holes, or areas where the metal feels weak or crumbles when pressed with a screwdriver. If the rust has eaten through or the metal feels brittle, restoration may not be practical. Gently tapping the area to listen for solid versus hollow sounds can also help you assess the damage quickly.
Can you recommend affordable tools or supplies for stripping rust off an ornate iron garden chair? I want to keep my costs down but still get solid results as the article suggests.
For affordable rust removal, consider using a wire brush or wire brush attachments for a drill, which are inexpensive and effective for detailed areas. Sandpaper or sanding sponges also work well for intricate spots. For chemical removal, look for budget-friendly rust dissolvers like white vinegar or a generic rust remover gel. Be sure to wear gloves and protective eyewear while working.
You mention assessing metals like iron, steel, and aluminum before starting restoration. In your experience, are there visible signs that help quickly differentiate between these metals, especially if labels or markings are missing?
Yes, there are a few visual clues that can help. Iron often looks dark gray and may have rust with a reddish tone. Steel usually appears silvery-gray and is heavier than aluminum, but can rust like iron. Aluminum stands out because it’s much lighter, has a dull silver look, and doesn’t rust, though it can develop a whitish, chalky surface. Checking weight and surface texture alongside color can help you tell them apart quickly.
I see you mentioned lead-based paint as a red flag that should be handled by professionals. If I’m not sure whether the paint on my metal salvage piece contains lead, are there safe ways to test it at home, or should I always assume older paint is a risk?
If you’re unsure whether the paint contains lead, there are home lead test kits available at hardware stores that can give you a quick indication. However, these kits aren’t always 100% reliable. If your salvage piece is old—especially from before the 1980s—it’s safest to treat the paint as potentially lead-based and use proper precautions or consult a professional before sanding or stripping it.
When assessing salvaged iron or steel items with moderate rust, what are the most effective budget-friendly tools or products you recommend for rust removal without damaging the underlying metal? I’m hoping to avoid costly equipment if possible.
For moderate rust on iron or steel, try using a wire brush or steel wool, both of which are inexpensive and widely available. White vinegar is also a budget-friendly option—soak smaller items or apply with a cloth for larger pieces, then scrub gently. Afterward, rinse thoroughly and dry to prevent new rust. These methods are effective and preserve the underlying metal without the need for expensive equipment.
You talk about different metals like iron, steel, aluminum, and brass being refinishable, but is the process or choice of tools very different between them? For example, would you use different rust removal or cleaning techniques for a cast iron piece versus something made of aluminum?
Yes, the process and tools can vary quite a bit based on the type of metal. For cast iron, you’ll likely need heavier-duty rust removers and wire brushes since it’s prone to deep rust. Aluminum is softer and can scratch easily, so gentler abrasives or non-abrasive pads are better. Also, avoid acidic cleaners on aluminum, as they can cause pitting. Always check what cleaners and techniques are safe for each metal before you start.
I’m interested in restoring some garden furniture, but I’m worried about deep rust on cast iron. Are there budget-friendly tools or specific techniques for dealing with heavy corrosion, or is it usually not worth the effort compared to just getting new pieces?
Restoring cast iron with deep rust is definitely possible and often worth the effort, especially for quality or unique pieces. Budget-friendly tools like wire brushes, sandpaper, and a drill with a wire wheel attachment can tackle heavy corrosion. After removing the rust, apply a rust converter or primer to prevent future issues. It does take time, but many people find it rewarding and more sustainable than buying new furniture.
When you talk about walking away from items with severe structural damage or lead-based paint, are there any safe DIY methods to handle minor rust or small spots of possibly hazardous paint, or should that always be left to professionals?
For minor rust, you can usually sand it off with protective gloves and a mask, then repaint the area. If you suspect small spots of lead-based paint, avoid dry sanding and instead use a chemical paint stripper labeled safe for lead, always wearing a certified respirator and working in a well-ventilated area. For larger affected areas or if you’re unsure, it’s best to consult a professional to stay safe.
If I find an old metal chair at a garage sale that has some rust but doesn’t seem structurally damaged, how do I know if I can safely restore it myself, or if I should be worried about issues like hidden lead paint?
If the chair feels sturdy with no obvious weak spots or cracks, you can likely restore it yourself. However, since older metal furniture might have lead-based paint, especially if it was made before 1978, it’s wise to test for lead paint using an at-home lead test kit from a hardware store. If the test is positive, wear protective gear and follow safety guidelines, or consider professional help for paint removal.
If I find an old garden chair with some surface rust but no deep cracks, how can I tell if the corrosion is too far gone to restore safely? Are there test methods or warning signs I should look for before I start sanding?
If the rust is just on the surface and the metal underneath feels solid, it’s usually safe to restore. Tap the affected areas with a small hammer—if you hear a dull sound or the metal dents easily, it could be weakened. Also, probe any spots with a screwdriver; if it goes through or flakes off in chunks, the corrosion may be too deep. Avoid restoring if you see holes or extensive pitting.
Could you give some advice on how to spot lead-based paint on older metal items before starting any refinishing work? I’m worried about accidentally dealing with hazardous materials.
To spot potential lead-based paint on older metal items, look for thick, cracking, or alligator-like textured paint, which is common in lead coatings. Paint from before the late 1970s is more likely to contain lead. For safety, use a lead test kit from a hardware store—these are easy to use and can quickly confirm the presence of lead so you can take proper precautions before refinishing.
I noticed you listed aluminum as rust-resistant and good for outdoor furniture. Is there a difference in the refinishing process for aluminum compared to something like iron or steel, especially when it comes to prepping the surface for paint or sealant?
Yes, there is a difference. Aluminum doesn’t rust like iron or steel, but it can develop oxidation, which appears as a dull white film. For aluminum, you’ll want to clean off this oxidation with a mild abrasive pad or fine steel wool before painting or sealing. With iron or steel, removing rust is usually more involved and may require heavier sanding or rust converters before proceeding. Always make sure the surface is dry and clean before applying any finish.
You mention that lead-based paint on older metal finds should be addressed by professionals. Do you have any tips for how to identify lead paint in the first place, especially when the original finish is heavily tarnished or covered in layers?
Identifying lead paint on old metal can be tricky, especially with multiple layers or heavy tarnish. One sign is a thick, chalky, or alligator-like cracked appearance. Colors like white, cream, or red from before 1978 are more suspect. For certainty, you can use an at-home lead test kit from a hardware store, which works even on hidden layers if you expose a small area. When in doubt, it’s safest to assume older finishes may contain lead and handle them with care.
If a metal chair has some surface rust but feels solid, is it always worth restoring, or are there times when deep rust isn’t immediately obvious? What’s your process for making sure a piece is structurally sound before starting the refinishing work?
Surface rust on a metal chair often looks worse than it is, but it’s important to check for hidden issues. I suggest tapping or gently pressing areas that look pitted—if the metal flexes or crumbles, there may be deep rust. Also, check joints and welds for weakness. If everything feels sturdy and you don’t spot soft spots or holes, it’s usually safe to restore. If in doubt, use a wire brush or sandpaper to reveal the underlying metal before deciding.
I noticed you brought up the risk of lead-based paint on older salvaged metal. If I suspect an item has lead paint, is there a safe DIY testing method, or is it always best to get a professional involved right away?
If you suspect lead-based paint on a metal item, you can use over-the-counter lead test kits from hardware stores for a basic DIY check. These kits are fairly simple to use and can give you a quick indication. However, for absolute certainty or if you plan major refinishing, it’s safest to have a professional assessment, especially if kids or pets will be around the item.
Regarding the point about lead-based paint on older metal pieces, can you elaborate on the safest way to determine if a salvage find has lead paint before starting refinishing? Are there reliable at-home testing methods, or is professional assessment always necessary?
You can use at-home lead test kits, widely available at hardware stores, to check for lead-based paint. These kits usually involve swabbing the painted area and observing a color change. While they’re helpful for initial screening, they’re not always foolproof. If your test is positive or if you’re unsure about the results, it’s safest to get a professional assessment before starting any refinishing work.
For someone new to metal refinishing, how can you tell if rust or corrosion on a piece is too severe to restore safely? Are there any beginner-friendly guidelines or signs, besides deep cracks, to watch out for when evaluating salvage yard finds?
When checking metal salvage finds, look for areas where rust has created holes or the metal feels thin and brittle when tapped. Severe flaking or pitting can also mean the metal is compromised. If you press gently with a screwdriver and it punctures or crumbles, that’s a sign restoration may not be safe or practical. Uniform surface rust is usually manageable, but avoid pieces where structure seems weak or unstable.
I work with a lot of old outdoor furniture and sometimes it’s hard to tell if aluminum or iron is the better candidate for refinishing in terms of durability and ease. Could you elaborate on how to decide which metal is worth the effort and resources?
When choosing between aluminum and iron for refinishing, consider a few key points. Aluminum is lighter, naturally rust-resistant, and easier to sand or paint, making it less work for outdoor use. Iron is stronger and more classic in appearance but prone to rust and often needs more prep and protective coatings. If the iron piece is structurally sound and has significant value, it may be worth the extra effort; otherwise, aluminum is usually more straightforward to restore and maintain.
I just found an old iron garden chair and I’m not sure how to tell if the rust is too deep or if it’s safe to restore. Are there any specific tests or signs I should look for before starting the refinishing process?
Check the chair for structural integrity by pressing on areas with visible rust—if the metal feels soft, flakes away easily, or you can poke holes through it, the rust may be too deep. Also look for cracks or areas where the metal has thinned. If most areas are still solid after light scraping, it should be safe to restore. For extra caution, tap suspect spots with a hammer; a dull sound or crumbling indicates severe rust.
I just picked up an old garden chair that seems to be iron, but there’s a bit of rust on the legs. The article mentions iron and steel are both good candidates for refinishing, but how can I tell if the rust is too deep to make it worth the effort?
To check if the rust is too deep, try gently scraping the affected area with a wire brush or screwdriver. If only flaky surface rust comes off and the metal underneath seems solid, it’s usually worth refinishing. However, if you poke the rusted spot and the metal feels soft, thin, or starts crumbling, the damage could be too deep and restoring it may not be safe or practical.
You mention that dealing with lead-based paint should be left to professionals. Are there any safe DIY methods for removing old paint if I don’t know for sure whether it contains lead?
If you’re unsure whether old paint contains lead, it’s safest to test a small chip using a lead test kit available at hardware stores. If the test is positive or you remain uncertain, avoid sanding, scraping, or using heat, as these release lead dust or fumes. Instead, consider painting over the old paint with a fresh, sealed coat. For actual removal, it’s best to let certified professionals handle it to ensure safety.
For someone trying to restore a heavily rusted cast iron piece found at a salvage yard, what tools or methods do you suggest for tackling deep corrosion without risking damage to ornate details? Is it worth investing in specialized gear for just a few projects?
For deep rust on ornate cast iron, start with a wire brush or soft-bristle rotary tool to gently remove loose corrosion—avoid harsh grinders that could harm details. You can also soak the piece in a 50/50 vinegar-water solution to loosen rust, then scrub carefully. For just a few projects, basic hand tools are usually enough, so specialized gear isn’t necessary unless you plan to do this often.
Could you elaborate on how to safely identify and handle lead-based paint on older metal salvage? For someone restoring at home rather than hiring professionals, what precautions are absolutely essential to ensure safety during the paint removal process?
To identify lead-based paint on metal salvage, look for thick, cracking, or alligator-like paint layers, especially on items pre-dating the late 1970s. You can use a lead test kit from a hardware store for confirmation. When removing lead paint at home, always wear a certified respirator, safety goggles, and disposable gloves. Work outside or in a well-ventilated area, use wet sanding or chemical strippers to minimize dust, and carefully collect all debris for hazardous disposal. Never use open flames or dry sanding, as these methods release toxic lead dust and fumes.
You mentioned that deep rust in cast iron can be a challenge but is rewarding to restore. How can a beginner tell the difference between removable surface rust and corrosion that’s gone too deep to fix safely?
To tell the difference, look closely at the rusted area. Surface rust is usually flaky or powdery and can be scraped or sanded off, revealing solid metal underneath. Deep corrosion feels rough, has deep pits or holes, and the metal seems thin or brittle. If poking with a screwdriver causes crumbling, the damage may be too extensive for safe restoration. Always check for structural soundness before proceeding.
You mention lead-based paint as a red flag, especially on older metal pieces. Is there a safe way for someone to test for lead paint at home before deciding to invest in professional removal, or is it always better to just skip those items?
You can safely test for lead paint at home using lead test swabs, which are available at most hardware stores. Simply follow the instructions on the packaging to check painted surfaces. If the test indicates lead, it’s wise to avoid sanding or scraping the piece yourself and consider professional removal, especially if you’re not experienced in handling hazardous materials.
When assessing salvaged metal for refinishing, how can you tell the difference between superficial rust that can be safely removed and corrosion that might compromise the piece’s structural integrity?
Superficial rust usually appears as a flaky, powdery, or thin surface layer that can be scraped off easily, revealing solid metal underneath. Deeper corrosion, however, may cause pitting, holes, or a crumbly texture—if the metal feels weak or bends under light pressure, structural integrity might be compromised. If you notice deep pits or significant loss of material, it’s best to proceed cautiously or consult a professional.
You mentioned that some older pieces might have lead-based paint. Are there any signs or quick tests to spot lead paint before taking on a project, or do you pretty much have to assume it’s there with anything vintage?
It’s safest to assume that any vintage metal piece, especially those made before the late 1970s, could have lead paint. There aren’t always obvious signs, but cracked, alligator-like patterns, or very thick paint layers can be clues. For a quick check, you can use a lead test kit from a hardware store; these kits usually involve swabbing the paint and checking for a color change to indicate lead.
The section about lead-based paint mentions that removal should be done by professionals. How can I tell if my metal salvage piece has lead paint, and what should I do if I’m not sure? Are there safe ways for a beginner to test for lead at home?
To check if your metal salvage piece has lead paint, you can use a lead test kit from a hardware store. These kits typically involve swabbing the painted surface and seeing if it changes color. While they are easy to use, they aren’t always 100% accurate. If you’re unsure or the piece is old, it’s safest to assume there could be lead and avoid sanding or scraping until a professional confirms it’s safe.
I have an old iron bench from my grandparents’ garden and I’m pretty sure it has some lead-based paint, like you mentioned in the red flags section. What’s the safest way for a beginner to test for lead paint before starting any refinishing work?
It’s wise to check for lead paint before starting. You can purchase a lead test kit at most hardware stores—look for ones approved by the EPA. Simply follow the kit instructions, which usually involve rubbing a swab on the painted surface and watching for a color change. If the test is positive or you’re unsure, consider consulting a professional for safe removal advice.
When assessing whether a piece has severe structural damage like deep rust or cracks, are there specific tools or techniques you recommend for beginners to accurately judge if a find is worth saving or if it’s time to walk away?
For beginners, start by using a wire brush or sandpaper to remove surface rust and reveal any hidden damage. A flashlight helps spot cracks or deep pitting. Gently tap the metal with a small hammer—dull or hollow sounds may indicate internal weakness. If you find extensive holes, deep rust that flakes off in chunks, or cracks running through load-bearing areas, these are signs it may not be worth restoring, especially for structural items.
I often find older outdoor furniture with layers of old paint. If I suspect some of the paint might be lead-based but can’t get it professionally tested right away, are there any immediate steps I should take to safely handle and store these pieces until I can get them evaluated?
If you think the old paint might contain lead, handle the furniture with gloves and avoid scraping or sanding it for now. Store the items in a well-ventilated area away from children and pets, ideally covered with a plastic sheet to contain any dust or paint chips. Try not to move or disturb the painted surfaces until you can have the paint tested or consult a professional for further guidance.
When restoring older metal pieces that might have lead-based paint, how can a small business safely assess and handle these items without bringing in outside professionals every time?
To safely handle older metal items that may have lead-based paint, use lead test kits available at hardware stores to check for lead before starting work. If lead is present, always wear a respirator and gloves, work in a well-ventilated area, and use wet sanding or chemical strippers instead of dry sanding to minimize dust. Clean up thoroughly with HEPA vacuums and dispose of debris properly. Regular training for your team on lead safety is also important.
I run a small vintage furniture shop and come across a lot of old iron and brass items. When the article mentions that deep cracks or excessive corrosion are red flags, how do I reliably assess whether corrosion is too severe to restore, especially if I want to avoid investing too much time in lost causes?
To judge if corrosion is too severe, start by checking if the metal is flaking or crumbly to the touch—this usually means it’s structurally compromised. Tap the item gently; a dull, uneven sound often indicates hidden damage. If the corrosion has eaten all the way through (visible holes or very thin areas), restoration is rarely worth the effort. Surface rust or tarnish, on the other hand, is usually manageable with cleaning and polishing.
I noticed you mention budgeting strategies for refinishing metal. Could you give a rough estimate of how much it might cost to restore something like an ornate cast iron garden chair, including tools and materials for a beginner?
Restoring an ornate cast iron garden chair as a beginner typically costs between $50 and $150. This includes essentials like wire brushes or a drill attachment, sandpaper, rust converter, primer, paint, and protective gear. If you need to buy basic tools, expect costs on the higher end. Many supplies, like brushes and paint, can be reused for future projects, helping you save over time.
Could you give more detail on how to safely identify and deal with lead-based paint on older metal furniture? I’ve found a few pieces at a salvage yard that might have old paint, and I want to make sure I handle them properly, especially with kids around.
To check for lead paint, use a lead test kit available at hardware stores—follow the instructions carefully. If paint tests positive, avoid sanding or scraping, as this creates hazardous dust. Instead, wear gloves, a mask, and gently remove paint with a chemical stripper made for lead paint, working outside or in a well-ventilated area. Always keep children away during the process, and thoroughly clean the workspace and tools afterward.
You mention that lead-based paint on old metal salvage should be handled by professionals. If I suspect a piece has this type of paint, what are some initial signs to look out for before deciding whether to proceed or walk away?
If you suspect a piece has lead-based paint, look for signs like cracked or alligatoring paint, thick layers from multiple recoats, or a powdery residue on the surface. Lead paint is common on items from before the 1980s. If you notice any of these, it’s safest not to disturb the paint further and to consult a professional for testing or removal.
For someone who’s new to refinishing metal and a little nervous about dealing with rust, what are the safest and easiest tools to start with? The article lists a few metal types—should I avoid anything like cast iron until I have more experience?
If you’re just starting out, using simple hand tools like wire brushes, sandpaper, and a gentle rust remover is a safe way to tackle rust without risk. Gloves and a dust mask help keep things safe, too. Cast iron can be trickier for beginners since it’s heavy and prone to pitting, so starting with lighter metals like aluminum or steel is a good idea until you gain more confidence.
When you talk about budgeting strategies in the metal refinishing process, are there particular tools or supplies that you suggest investing in upfront to save money over time, especially for someone restoring several pieces for resale?
For those restoring multiple pieces for resale, it’s wise to invest upfront in durable basics like an orbital sander, a high-quality wire brush set, and a rust remover or converter. These tools handle a range of projects and withstand frequent use. Buying sandpaper and safety gear in bulk can also save money. Prioritize versatile items that work across different metals and finishes, rather than specialized tools you’ll use less often.
When it comes to restoring aluminum versus cast iron, are there any big differences in the tools or refinishing techniques I need to know about? I have some old patio furniture and I’m trying to figure out which approach would be easiest for a beginner.
Restoring aluminum and cast iron does involve some key differences. Aluminum is lighter, won’t rust, and is usually easier for beginners—cleaning, sanding, and spray painting are straightforward. Cast iron is heavier, can rust, and often needs more thorough rust removal, sometimes with wire brushes or rust converters. For a beginner, aluminum furniture is typically easier to refinish and requires less heavy-duty equipment.
When trying to decide if a rusty garden chair is worth restoring, what are some practical ways to tell if the structural damage is too severe to fix on your own? Are there simple at-home checks before investing in tools and supplies?
You can start by gently pressing and wiggling different parts of the chair to check for weak spots or excessive movement. Look for deep rust holes or areas where the metal flakes away easily, as these may indicate structural compromise. Pay special attention to joints and legs—if they feel unstable or bend under light pressure, the damage may be too severe for a straightforward DIY fix.
I see you caution about severe structural damage and lead-based paint when assessing salvaged metals. Are there any affordable options for testing old metal pieces at home before deciding whether to invest in professional removal or walk away entirely?
Yes, there are affordable ways to test salvaged metal at home. For lead paint, you can buy lead test swabs at hardware stores; they’re easy to use and provide quick results. For structural integrity, gently tap the metal with a hammer or screwdriver—dull or hollow sounds can signal internal rust. However, if you see deep corrosion or cracks, it’s safest to consult a professional before restoring.
When you’re budgeting for refinishing a piece that might have lead-based paint, are there affordable or DIY-friendly ways to test for lead before deciding if it’s safe to restore the item myself?
Yes, you can test for lead-based paint affordably at home. Hardware stores often carry DIY lead test kits, which are simple swabs you rub on a painted surface; if the swab changes color, lead is likely present. These kits are relatively inexpensive and give quick results, making them a practical first step before starting any refinishing project.
I noticed you mention lead-based paint as a red flag for old metal pieces. If someone suspects their salvage find might have lead paint, what’s the safest way for a beginner to test or deal with it before attempting any restoration?
If you suspect lead-based paint on your metal find, it’s best to use a lead test kit from a hardware store—these are easy for beginners and give quick results. If the test is positive, avoid sanding or scraping. Instead, consider sealing the paint with a clear coat, or consult a professional for safe removal. Always wear gloves and a mask when handling suspected lead paint.
You mention safety essentials and budgeting strategies for restoring salvaged iron and steel. Are there affordable tools or products you recommend for removing rust from these metals, especially for those of us just starting out and trying to keep costs reasonable?
For removing rust from salvaged iron and steel on a budget, basic tools like wire brushes, sandpaper, and steel wool are very effective and inexpensive. White vinegar or lemon juice can be used as affordable, natural rust removers. You might also consider a handheld drill with a wire brush attachment if you want to speed things up without spending much. Always wear gloves and a mask for safety.
If I come across a metal chair at a yard sale that has some surface rust but no major cracks, how can I tell if there’s hidden structural damage before putting in the effort to refinish it?
To check for hidden structural damage in a metal chair, gently press and wiggle different parts of the chair to see if anything feels loose or creaks. Examine joints and welds for any signs of separation or movement. Tap suspect areas with a small tool—if you hear a dull thud instead of a clear ring, the metal may be compromised. If everything feels solid and stable, the chair is likely in good condition for refinishing.
I found an old garden chair that looks like it’s cast iron, but it has some deep rust patches. The article mentions that cast iron can be really rewarding to restore despite heavy rust. How do I know if the rust is too deep to make restoration safe, or is there a way to reinforce it?
Deep rust on cast iron can sometimes create structural weakness, especially if it has eaten all the way through, leaving holes or crumbling areas. Tap around the rust patches with a screwdriver handle—if the metal sounds dull or flakes away easily, it may be compromised. If the chair still feels sturdy and there’s no major loss of material, you can use metal fillers or epoxy putty to reinforce small weak spots before refinishing. Large holes or major soft spots might mean it’s unsafe for regular use, but decorative use is still possible.
I noticed you mentioned safety essentials and lead-based paint as a red flag. If I’m not totally sure whether the old paint on my salvage find contains lead, what’s the safest way for a beginner to check or handle it without spending a lot on professional testing?
If you’re unsure whether the paint contains lead, you can buy an affordable lead test kit at most hardware stores—these are simple swab tests you can use at home. While working, always wear a mask rated for dust and fumes, gloves, and eye protection. Avoid sanding or scraping old paint unless you know it’s lead-free; instead, use a chemical paint stripper designed for lead safety, and work outdoors or in a well-ventilated area.
You mention that some salvage finds, like those with lead-based paint, should be handled by professionals. If I suspect lead paint but am unsure, what are some recommended ways to confirm this safely before deciding how to proceed?
If you suspect lead-based paint on a salvage find, you can use a lead test kit, which is available at most hardware stores. These kits are easy to use and give quick results. For complete certainty, you can also have a certified professional test the item. Always wear gloves and a mask when handling potentially lead-painted items, and avoid creating dust or chips until you know for sure.
When assessing whether to refinish aluminum versus iron salvage finds, do you approach surface preparation or rust removal differently for each metal? I’m curious if certain tools or techniques are more budget-friendly or effective depending on the metal type.
Yes, surface preparation does differ between aluminum and iron. For aluminum, focus on removing oxidation using fine-grit sandpaper or a wire brush, taking care not to scratch the softer metal. Iron usually requires more intensive rust removal, such as using a wire wheel, rust converter, or even soaking in vinegar. Steel wool, sandpaper, and wire brushes are budget-friendly for both, but iron often needs more aggressive techniques. Always finish by wiping both metals clean before refinishing.
Can you talk a little more about how to spot lead-based paint on older metal items? I picked up some brass fixtures at a yard sale and I’m not sure how to tell if they’re safe to work on myself or if I should call a professional.
Lead-based paint is often found on older metal items, especially those painted before the late 1970s. Signs include thick, cracking, or alligator-like paint, but visual checks alone aren’t reliable. To be sure, you can use a lead test kit, available at hardware stores, following the instructions carefully. If the test is positive or if you’re unsure, it’s safest to call a professional for removal, as disturbing lead paint can release hazardous dust.
When deciding whether to refinish something like a rusty garden chair versus buying new, how do the costs of tools and materials for beginners really compare to just replacing the item outright?
For beginners, the initial costs of tools like wire brushes, sandpaper, rust remover, primer, and paint can add up, often totaling $40-$80. If you already have some supplies, it will be cheaper. Replacing a garden chair with a new one varies, usually $50-$150. Refinishing can be cost-effective if you plan to restore more items, but for a single project, buying new might be similarly priced or even less expensive.
If I come across a piece of old outdoor furniture with surface rust but no obvious structural damage, what is the best way to assess whether the corrosion is too deep to safely restore, especially when it comes to iron or steel?
To assess outdoor iron or steel furniture with surface rust, start by firmly tapping rusted areas with a hammer or screwdriver. If the metal feels solid and doesn’t dent or crumble, the corrosion is likely just superficial. For deeper pits or flaky sections, scrape with a wire brush—if metal comes off in chunks or you see holes, it may be too compromised. Always check joints and weight-bearing parts carefully, since hidden corrosion there can affect safety.
Could you elaborate on how to safely identify and deal with lead-based paint on older metal finds? I want to make sure I don’t accidentally harm my family when restoring architectural pieces for our home.
To safely identify lead-based paint on older metal items, use store-bought lead test kits on a small paint sample—these are simple and give quick results. If lead is present, always wear a mask, gloves, and work in a well-ventilated area. Avoid sanding or using heat, which can release lead dust or fumes. Instead, use chemical paint removers labeled safe for lead. Clean up thoroughly afterward and keep children and pets away from the work area.
When deciding whether to refinish aluminum outdoor furniture or stick to iron pieces, are there different tools or safety precautions I should consider for each metal? I’m not sure how to judge which one is easier or more budget-friendly for a beginner.
Aluminum and iron require some different tools and safety precautions. For aluminum, you usually need gentler abrasives and non-corrosive cleaners, since it’s softer and prone to scratching. Iron can handle heavier sanding and may need rust removers. Always wear gloves and a mask for both, but take extra care with iron dust and rust particles. For beginners, aluminum is often easier and cheaper to refinish because it rarely rusts and is lighter to work with.
Can you share any budgeting tips for sourcing effective yet affordable finishing products for aluminum and brass pieces specifically? I’d love to refinish some yard sale finds without spending too much but still want a professional-looking result.
For aluminum and brass, you can often find effective yet affordable finishing products at hardware stores in their house brands. Look for multipurpose metal polishes and clear spray lacquers, which usually cost less than specialty brands but deliver solid results. Consider buying small quantities to avoid waste. Also, check local online marketplaces for leftover or unused products. Sandpaper and steel wool from dollar stores can work well for prep. Just make sure to clean surfaces thoroughly before applying any finish for the best look.
If I come across an old garden chair with surface rust but no deep cracks, what’s the best way to determine whether it’s worth restoring or if it might have hidden structural issues that could affect safety later?
To assess if your old garden chair is worth restoring, check for firmness by gently rocking or pressing on joints and connections—any wobbling or creaking could point to weaknesses. Look for pitting where rust appears, as deep pits may weaken metal even if cracks aren’t visible. If the frame holds steady and rust is only on the surface, restoration is generally safe. If unsure, tap the metal lightly; dull, hollow sounds can indicate hidden thinning or weakness.
When you mention severe structural damage and deep rust as reasons to walk away from a project, how do I know if a rusty iron chair is worth salvaging or if it’s too far gone? Are there simple tests a beginner can do at home to check?
To check if a rusty iron chair is salvageable, look for holes, large cracks, or spots where the metal flakes away when you touch it—these are signs of deep rust or structural weakness. You can tap the chair gently with a screwdriver; if it sounds hollow or bits fall off, it may be too far gone. If most parts feel solid and rust brushes off without exposing big holes, restoration is usually possible.
Could you explain how to tell the difference between surface rust and corrosion that would count as ‘excessive’ or a structural red flag? Sometimes it’s hard to judge if a rusty metal chair is safe to refinish or better left alone.
Surface rust is usually flaky or powdery and sits on top of the metal, often rubbing off easily. Excessive corrosion, however, looks deeper—metal may feel pitted, brittle, or even have holes. Tap gently with a screwdriver; if the metal sounds solid, it’s probably just surface rust. But if it feels weak or crumbles, the damage is likely structural and might not be safe to refinish.
I’m interested in restoring some old brass hardware I found, but I’m on a tight student budget. Are there any budget-friendly tools or methods for removing tarnish and getting a durable finish without having to invest in expensive equipment?
You can restore brass hardware on a budget using simple household items. For tarnish removal, try a paste of baking soda and lemon juice or vinegar, gently rubbing it with a soft cloth. Toothpaste can also work in a pinch. To protect the finish, buff the piece and apply a clear coat spray or a thin layer of wax for durability. No need for specialized tools—just patience and a bit of elbow grease!
When assessing metal salvage finds, how can I tell the difference between aluminum and steel if there are no clear markings? Are there simple tests or signs I should look for to avoid investing time in something that isn’t ideal for restoration?
To distinguish aluminum from steel, try using a magnet—steel is magnetic, while aluminum is not. You can also check the weight: aluminum feels much lighter than steel of the same size. Look at the color and surface; aluminum typically has a dull gray finish, while steel is shinier. Scratching the surface lightly can help too—aluminum scratches more easily. These simple checks should help you identify your metal before starting restoration.
When checking out a rusty metal chair I found on the curb, how can I tell if the corrosion is too deep to make it worth restoring? The article talks about severe damage but I could use some more tips for spotting red flags before I start.
To judge if the chair’s rust is too deep, press a screwdriver or coin gently on the rusted spots—if the metal easily flakes, crumbles, or feels soft, it might be too far gone. Check for deep pitting or holes, especially at joints or legs. If structural parts are thin or break apart, restoring may not be safe or worthwhile. Surface rust is usually fine, but avoid pieces where the frame feels weak.
The article mentions lead-based paint as a red flag that might require professional removal. How can someone tell if the paint on a salvaged metal piece contains lead before starting a DIY refinishing project?
To check for lead-based paint on a salvaged metal piece, you can use a lead test kit, which is available at most hardware stores. These kits usually involve swabbing the painted surface and checking for a color change that indicates lead. It’s important to follow the instructions closely, and if the result is positive or you’re unsure, consider consulting a professional before starting your project.
For small businesses working with salvaged metal furniture, do you have tips on how to budget for tools and materials, especially if you’re just getting started? Which essential tools would you recommend prioritizing for the most versatility without breaking the bank?
When starting out, focus on multi-purpose tools like an angle grinder (with cutting, sanding, and polishing attachments), a cordless drill, and a set of hand files. For materials, buy sandpaper and rust converters in bulk to save money. Create a budget by listing tools you absolutely need first and compare prices for both new and used equipment. Prioritize durability and versatility, and expand your collection as your business grows.
I’m wondering if you have any advice on safely identifying and handling lead-based paint when working with older metal pieces. If I suspect it’s present, is it always necessary to hire a professional, or are there safe DIY methods for removal?
If you suspect lead-based paint on older metal pieces, it’s important to prioritize safety. You can use lead test kits from hardware stores to check for its presence. If lead is found, professional removal is the safest option, especially for large projects or if you lack proper equipment. For small items, some people use wet sanding and HEPA vacuums while wearing protective gear and ensuring good ventilation, but extreme caution is needed to avoid inhaling dust. Always follow local regulations and never use dry sanding or heat, as these can release dangerous lead particles.
In the section about assessing salvaged metal, you mention that lead-based paint should be removed by professionals. If I suspect my metal find has old paint but I’m not sure if it’s lead-based, are there any safe DIY tests I can do at home before bringing in a pro?
If you suspect your metal piece might have lead-based paint, you can use home lead test kits, which are available at hardware stores. These kits usually involve swabbing the painted surface and checking for a color change to indicate lead. However, while these tests can give you an initial idea, they’re not always 100% accurate. If the result is positive or you’re still unsure, it’s best to consult a professional for confirmation and safe removal.
The article mentions lead-based paint on older metal salvage pieces and that removal should be done by professionals. If I think my find might have lead paint but I’m on a tight student budget, what are safe ways to confirm this before investing in restoration supplies?
You can purchase an affordable lead test kit from most hardware stores. These kits usually come with swabs that change color when they detect lead. Just follow the instructions provided with the kit and test a small area of your metal piece. This will help you determine if lead is present before you invest in any restoration materials.
I just picked up an old metal bench with a lot of surface rust, and the article mentions that deep rust in cast iron can be tricky. How do I know if the rust has gone too far, and are there ways to repair small holes or pitting before refinishing?
Check the bench for areas that flake away easily, feel soft, or have holes—these signs mean the rust has penetrated deep. Light pitting can often be filled with metal epoxy or an automotive body filler, then sanded smooth before painting. If you find small holes, use epoxy putty made for metal repairs; for larger structural damage, welding may be necessary. Always make sure the rust is completely removed or neutralized before refinishing.
The article talks about budgeting strategies for refinishing metal salvage. Could you give an idea of what basic tools are really worth investing in at first, especially if I’m mostly working with iron or brass pieces?
For beginners working with iron or brass, it’s smart to invest in a few key tools. Start with a wire brush or wire wheel (manual or for a drill) for removing rust and old finishes, plus sandpaper in a range of grits. A good set of files is useful for smoothing edges. Safety gear like gloves and goggles is essential. If your budget allows, a basic handheld rotary tool can make detailed work much easier. These basics will cover most initial projects and let you tackle common restoration tasks effectively.
You mention that lead-based paint on older metal pieces should be removed by professionals. Do you have any advice on how to identify lead paint safely at home before deciding whether a salvage find is worth restoring?
You can often spot potential lead paint if the item is from before the late 1970s, especially if the paint is thick, cracking, or has a chalky texture. While home lead test kits are available at hardware stores, their accuracy can vary. If you suspect lead paint, avoid sanding or scraping and handle the item carefully. For a definite answer, it’s best to consult a professional before working on the piece.
For someone new to metal refinishing and trying to stick to a budget, which tools would you consider absolutely essential to start with? Are there any techniques in your guide that don’t require specialized or expensive equipment?
To start metal refinishing on a budget, you’ll only need a few basics: sandpaper in various grits, steel wool, a wire brush, and safety gear like gloves and goggles. These are inexpensive and versatile. Many techniques in the guide, such as hand-sanding, basic cleaning, and using natural rust removers (like vinegar), don’t require any specialized or costly equipment. Once you gain confidence, you can gradually add more tools if needed.
Could you clarify how to tell the difference between superficial rust and corrosion that makes a metal item unsafe or not worth restoring? Are there specific signs or quick tests you recommend before starting a refinishing project?
Superficial rust usually appears as a thin, flaky coating on the surface and can often be scraped or sanded off to reveal solid metal underneath. Severe corrosion, on the other hand, creates deep pits, holes, or crumbling areas. Tap the item gently with a tool—if it sounds hollow or the metal feels weak or brittle, it’s likely unsafe. Also, check for any structural warping or missing sections, which suggests the item may not be worth restoring.
When assessing salvaged metal for restoration, how can you tell the difference between surface-level rust that can be removed and corrosion that’s too deep to safely restore, especially on cast iron pieces?
To differentiate surface rust from deeper corrosion on cast iron, try gently scraping the area with a wire brush. Surface rust will flake off to reveal solid metal underneath, while deep corrosion leaves pits, holes, or weak spots. If the metal feels soft, crumbles, or shows structural weakness after cleaning, it’s likely too far gone for safe restoration. Always check the thickness—if much material is lost or you see deep pitting, replacement or reinforcement might be necessary.
I have a rusty outdoor aluminum chair from a yard sale, and I’m not sure whether deep rust or surface corrosion is a dealbreaker. What’s the best way to tell if it’s still worth restoring, or if the structural integrity is compromised?
To assess your aluminum chair, check if the rust is just on the surface or if it has caused deep pitting or holes. Aluminum itself doesn’t rust like iron, but it can corrode. If the metal feels solid, with no flaking, cracks, or soft spots, it’s likely just surface corrosion and safe to restore. If you see any bending, weakness, or severe damage, the chair’s structure may be compromised and isn’t worth the effort to restore.
You mention that deep rust on cast iron can make restoration more challenging but also rewarding. What are some specific tools or techniques you recommend for dealing with really stubborn rust without damaging the ornate details?
For deep rust on cast iron with intricate details, start with a stiff nylon or brass brush to avoid scratching delicate areas. You can use a rust remover gel applied sparingly with a small brush for targeted removal. Fine-grade steel wool (0000) helps on flat sections, while dental picks or wooden skewers can reach crevices gently. Always work slowly and check your progress often to preserve ornate features.
I noticed you mention the importance of assessing if a metal piece is safe to refinish, like checking for lead-based paint or severe corrosion. If I suspect old lead paint on a brass fixture, are there any quick at-home tests I could do before seeking out a professional?
If you suspect lead paint on your brass fixture, you can use a lead test kit, which is widely available at hardware stores. These kits usually involve rubbing a swab on the painted area and checking for a color change. While these tests provide a quick indication, they’re not always 100% accurate. If the result is positive or you’re still unsure, it’s safest to consult a professional for confirmation and guidance on safe removal.
You mentioned lead-based paint as a red flag. If I suspect an old garden chair has lead paint but I’m on a tight budget, is there a safe way for a DIYer to test for lead at home, or does that always require hiring a professional?
You can test for lead paint at home using lead test kits, which are available at hardware stores and are generally affordable. Follow the instructions carefully to get an accurate result. If the test is positive or you have concerns about safety, avoid sanding or scraping the paint and consider consulting a professional for removal options.
I just picked up an old iron bench from a curbside and noticed it has a lot of surface rust but feels sturdy. The article mentions assessing for deep rust and structural damage. Are there specific signs I should look for to tell if the rust is just cosmetic, or if it’s too compromised to restore safely on my own?
When checking your iron bench, look for rust flakes you can easily brush off—these are usually just surface rust. Pay extra attention to areas where the metal feels soft, crumbly, or where holes have formed, as that suggests deeper corrosion. Also, check joints, legs, and supports for cracks or heavy pitting. If the bench still feels solid with no significant weak spots, it’s likely safe to restore yourself.
You mention brass and copper salvage items are valued for their patina. If I want to keep some of the aged look but still refinish the piece, what techniques or finishes would you suggest to preserve that character while ensuring the metal is protected?
To maintain the aged patina while refinishing brass or copper, try cleaning the piece gently with a mild soap solution and soft cloth, avoiding harsh abrasives. Once clean, apply a clear protective wax or lacquer finish—this seals in the patina and shields the metal from further oxidation. Test a discreet spot first to ensure the finish won’t alter the appearance. This approach preserves the character while providing protection.
When refinishing salvaged metal pieces like brass or copper, how do you determine if the existing patina should be kept or removed? Are there certain restoration techniques recommended to preserve that natural aged look without compromising durability?
When deciding whether to keep or remove patina on brass or copper, consider both the aesthetic you prefer and the historical value of the piece. If the patina adds character or value, gentle cleaning with mild soap and water is best, avoiding harsh abrasives. To preserve the aged look while adding durability, you can apply a clear protective wax or lacquer after cleaning. This seals in the patina and protects the metal from further oxidation.
The article mentions the importance of recognizing lead-based paint on older metal pieces and suggests removal by professionals. Can you expand on how someone can safely identify lead paint at home before deciding whether a salvage find is worth restoring?
To safely identify potential lead paint at home, look for thick, cracking, or alligator-like paint layers, which are common signs of older lead-based coatings. You can also purchase lead test kits from hardware stores; these usually involve rubbing a chemical swab on the paint and observing a color change. If the test is positive or if you’re unsure, it’s safest to assume lead is present and consult professionals for removal.
When working with heavily rusted garden structures made of iron or steel, do you have any recommendations for affordable rust removal tools or techniques that balance efficiency and sustainability? I’m trying to keep costs down while still getting a quality finish.
For heavily rusted iron or steel garden structures, start with a wire brush or wire wheel attachment for a drill—both are affordable and reusable. White vinegar or a baking soda paste can dissolve light rust without harsh chemicals. After cleaning, wipe surfaces thoroughly and apply a protective finish like rust-inhibiting primer or paint to prevent future corrosion. These methods are both budget-friendly and environmentally conscious.
For someone who finds rusty cast iron garden furniture with intricate designs, how do you recommend getting into the small, detailed areas to remove corrosion without damaging the patterns? Are there certain tools or safer techniques better suited for delicate restoration?
For intricate cast iron pieces, start by using a small brass brush or an old toothbrush to gently scrub away loose rust in detailed areas. For stubborn spots, dental picks or wooden skewers can help reach tight crevices without harming the patterns. Avoid wire wheels or harsh abrasives, as they can flatten details. Applying a rust dissolver gel and wiping it off carefully can also help preserve the intricate design while removing corrosion.
I found an old wrought iron garden chair with some rust, but I’m not sure how to tell if the corrosion is too deep to restore or just on the surface. Are there any tricks or tests for figuring out if it’s still structurally sound before I begin refinishing?
To check if your wrought iron chair is structurally sound, tap the rusty areas with a small hammer or screwdriver—if you hear a solid ‘ring’ and the metal doesn’t dent, the rust is likely only on the surface. Deep pitting, flaking, or sections that crumble when pressed suggest more severe damage. Also, gently press or sit on the chair to check for wobbling or bending. If the frame holds steady and the metal feels strong beneath the rust, you’re probably safe to refinish it.
I just picked up an old metal patio chair, and I think it’s iron, but I’m not 100 percent sure. Are there any simple ways to tell the difference between iron, steel, and aluminum before I start the refinishing process?
You can use a magnet to help identify your chair’s metal. Iron and steel are both magnetic, while aluminum is not. If it’s magnetic, check the weight—iron is usually heavier than steel. For aluminum, besides being non-magnetic, it will feel much lighter than iron or steel. Also, look for signs of rust (typical for iron and steel) versus white corrosion (common on aluminum).
When assessing a piece for metal refinishing, how can you tell the difference between cosmetic surface rust and corrosion that’s too deep to safely restore? Are there specific signs I should look for before deciding whether to invest more time and supplies?
To tell surface rust from deep corrosion, start by gently scraping or sanding a small area. If the rust comes off easily and reveals solid metal underneath, it’s likely just cosmetic. However, if you see pitting, flaking, holes, or the metal feels soft or crumbly, the corrosion may be too deep to restore safely. Checking for structural integrity—like pressing gently to see if the metal flexes—can also help you decide.
Could you share more about assessing whether heavy rust on cast iron is worth tackling? I sometimes find ornate pieces with pretty deep pitting and I’m never sure if they’re salvageable or just a money pit when it comes to time and materials.
When evaluating cast iron with heavy rust and pitting, look for structural integrity first—if the metal is brittle, cracked, or flaking away, it’s probably not salvageable. Deep pitting can be smoothed with effort, but if detail has been lost or holes go all the way through, restoration becomes costly and time-consuming. Surface rust and moderate pitting are manageable; severe damage might be best left unless the piece is especially rare or meaningful.
In the section about identifying refinishable metals, you list cast iron as rewarding to restore but also mention it’s prone to deep rust. Does restoring cast iron usually require different tools or chemicals compared to brass or aluminum, and are there any extra safety precautions I should know about?
Restoring cast iron does involve some differences. Cast iron often needs heavier-duty tools for rust removal, such as wire brushes, grinders, or sandblasting, compared to the gentler polishing usually used for brass or aluminum. Chemical rust removers like phosphoric acid may be necessary for deep rust on cast iron. Always wear gloves, a dust mask, and eye protection, as cast iron dust and chemical removers can be hazardous.
You mentioned that lead-based paint is a red flag for DIY refinishing and should be handled by professionals. How can I tell if my salvage find has this kind of paint before I start working on it, and are there affordable ways to test for it?
To check for lead-based paint on your salvage find, you can use an at-home lead test kit, which is available at most hardware stores and is quite affordable. These kits typically involve rubbing a test swab on the painted surface. If the swab changes color, lead is present. If you want to be extra certain, you can also take a paint chip sample to a certified laboratory for analysis, though this may cost more.
You mentioned that some metals like brass and copper are valued for their patina. If I want to refinish a brass object but keep its aged look, what techniques or finishing products should I use to avoid stripping away all the character?
To refinish brass while preserving its patina, use a gentle cleaning method like wiping with a soft cloth dampened with mild soapy water. Avoid abrasive scrubbing or harsh chemicals. If you need to remove dirt without losing the aged look, try a paste of baking soda and water applied lightly. After cleaning, seal the surface with a microcrystalline wax or a clear, non-yellowing lacquer to protect the patina while keeping the character intact.
I noticed you mention budgeting strategies for refinishing metal finds. Could you share specific tips on sourcing affordable tools or materials, especially if someone is just starting out and doesn’t want to overspend but still get good results?
When starting out, try checking local thrift stores, garage sales, or online marketplaces for used tools—often you can find quality items at a fraction of retail price. For materials, hardware store off-cuts or surplus sections sometimes have paints and sandpapers discounted. Borrowing or sharing tools with friends or community workshops is also a great way to keep costs down while still getting good results.
When identifying salvaged metals, how can I tell the difference between brass and copper, especially if both have developed a patina? Are there easy at-home methods for telling them apart before I invest time in refinishing?
You can distinguish brass from copper at home with a few quick checks. Brass is usually more yellow-gold, while copper has a reddish tone, though patina can hide these colors. Try using a small magnet—neither metal is magnetic, but this helps rule out steel. Scrape a hidden spot lightly: copper reveals a reddish-orange surface, brass looks yellow. If you have white vinegar and salt, rub a bit on the metal; copper tends to clean to a pinkish shine, while brass appears golden.
I noticed you mentioned budgeting strategies for refinishing projects. For someone new to restoring brass or copper fixtures, what are some cost-effective ways to handle tarnish removal and finishing if you’re working with limited tools and supplies?
If you’re new to restoring brass or copper and want to keep costs down, you can use common household items like vinegar, lemon juice, and baking soda to remove tarnish. Apply with a soft cloth or an old toothbrush for gentle scrubbing. For finishing, use olive oil or beeswax as a simple polish. These methods are affordable, require minimal tools, and still produce good results for beginners.
You mentioned that aluminum is often used in outdoor furniture because it’s rust-resistant. Is the refinishing process for aluminum much different from what you’d do for iron or steel, especially when dealing with surface corrosion or old paint?
Yes, refinishing aluminum does differ from working with iron or steel. Aluminum doesn’t rust like iron or steel, but it can develop oxidation or pitting. You’ll usually need a gentler touch—use fine-grit sandpaper or a non-abrasive pad when removing old paint or oxidation. Avoid harsh chemicals that can discolor aluminum. For iron or steel, removing rust is a bigger focus, often requiring rust converters or wire brushes. Priming is important for all metals, but use a primer made specifically for aluminum for best results.
Could you clarify how to tell the difference between aluminum and steel when assessing a salvage find, especially if the piece is painted or has surface corrosion? I want to make sure I use the right refinishing technique.
To distinguish aluminum from steel, try using a magnet—steel is magnetic, while aluminum is not. If the surface is painted or corroded, you can scratch a small, inconspicuous area to reveal the bare metal; aluminum will appear silvery and is lighter in weight, while steel is heavier and more gray. These checks should help ensure you use the appropriate refinishing method.
When salvaging metal furniture that has both rust and old paint layers, is it better to remove all the material down to bare metal, or can some paint be safely left if it’s still adhering well? Also, how can you tell if the underlying paint might be lead-based?
If the old paint is still firmly adhering and not flaking, you can usually leave it in place, as long as you sand it smooth and feather the edges before refinishing. However, if you’re unsure about the paint’s age, it’s wise to test for lead, since many older paints—especially those from before the 1980s—may contain lead. Lead test kits are widely available at hardware stores and will help you check safely before you start sanding or stripping.
The article mentions watching out for lead-based paint on older metal pieces. If I suspect an item has lead paint but I’m not sure, are there any simple ways to test for it at home before deciding whether to invest in professional removal?
If you suspect lead paint, you can use a lead test kit, which is widely available at hardware stores. These kits include swabs that change color when they come into contact with lead. Simply follow the instructions included, and you’ll get a quick indication if lead is present. If the result is positive or you remain unsure, it’s best to consult professionals for safe removal.
You mention that some metals like iron, steel, and aluminum are commonly refinishable, but are there any specific signs that a piece made from these metals is too far gone to restore, even if it isn’t obviously cracked or corroded? I’m not sure how to tell when to give up on a salvage find.
Even if metal isn’t visibly cracked or heavily corroded, there are still signs it might be beyond restoration. Look for deep pitting, warping, or parts that have become very thin or brittle—these issues often mean the structure is compromised. If you notice persistent rust that returns after cleaning, or metal that flakes away when scraped, it’s likely too far gone. Also, if joints are loose and can’t be tightened, the piece may not be safe or practical to restore.
The article talks about different metals like brass, copper, and cast iron having unique challenges when restoring. Are there certain tools or cleaning products I should absolutely avoid using on softer metals like brass compared to iron, to prevent damaging the surface?
Yes, when working with softer metals like brass, you should avoid using steel wool, wire brushes, or harsh abrasives, as these can scratch or pit the surface. Stick to soft cloths and mild, non-acidic cleaners. For iron, tougher brushes and stronger rust removers can be used, but these would be too rough on brass or copper. Always test a small area first to check for any adverse reactions.
I noticed the article mentions lead-based paint as a red flag for DIY restoration. If I suspect an old garden bench has lead paint but want to keep the project affordable, what are the safest steps a hobbyist can take at home before involving professionals?
If you suspect lead-based paint, start by testing with a DIY lead test kit from a hardware store. If lead is present, avoid sanding or scraping since this creates hazardous dust. Instead, carefully clean the surface with a damp cloth and keep the area well-ventilated. Use plastic sheeting to catch any debris. For full removal, it’s safest and often required by law to consult professionals, but these steps can help minimize risk in the meantime.
Can you explain more about how to tell the difference between surface rust and severe structural damage on iron or steel pieces? Sometimes it’s hard to know if something is just ugly or actually unsafe to restore.
To tell the difference, start by looking at the depth and texture of the rust. Surface rust is usually flaky or powdery and can be scrubbed off, revealing solid metal below. Severe structural damage will show deep pitting, holes, or metal that crumbles when touched. Tap the area gently with a tool—if it sounds hollow or dents easily, the metal may be compromised. Always check weight-bearing sections extra carefully before restoring.
I noticed you mentioned budgeting strategies in the refinishing process. Do you have suggestions for affordable, eco-friendly products or tools that work especially well for beginners restoring brass or copper items? I’d love to keep costs down without sacrificing quality or environmental considerations.
For budget-friendly, eco-friendly restoration of brass or copper, look for natural cleaners like lemon juice and baking soda, which are effective and inexpensive. Reusable microfiber cloths are great for polishing. For tools, opt for hand sanders and brushes made from recycled or sustainably sourced materials. Local thrift stores or online marketplaces often have secondhand tools at low prices. Stick to water-based, low-VOC sealants or waxes to finish your pieces sustainably without breaking the bank.
You mentioned that some metals like cast iron can be really rewarding to restore, but they’re also prone to deep rust. What types of tools or products work best for removing heavy rust without further damaging decorative details on cast iron pieces?
For cast iron with heavy rust, it’s best to use a combination of gentle methods. Start with a wire brush or brass brush to remove loose rust—brass is softer and less likely to damage details. For stubborn spots, apply a rust dissolver gel that can be wiped away without scrubbing. Avoid harsh grinders or sanders, as they can wear down ornate features. Finish with fine steel wool or a nylon abrasive pad for detailed areas.