Creative salvage is about more than just repurposing timber or breathing new life into old furniture. The unsung heroes of upcycling are often the smallest components: handles, hinges, and knobs. These pieces of vintage hardware add character and authenticity to your projects, transforming a generic upcycle into a statement of history and craftsmanship. Whether you’re restoring a battered chest of drawers, giving a kitchen cabinet new flair, or assembling a one-of-a-kind coat rack, salvaged hardware can make all the difference. However, rescuing these pieces isn’t as straightforward as a quick polish—understanding their materials, knowing the right techniques, and choosing appropriate finishes are essential for both aesthetics and longevity.
In this comprehensive guide, we’ll walk you through every step of the process: sourcing, assessing, cleaning, repairing, and finishing salvaged handles, hinges, and knobs. You’ll discover practical tips for identifying valuable hardware, restoring metal and ceramic pieces, dealing with missing or mismatched sets, and integrating restored hardware into your upcycling projects. We’ll also cover the essential tools, safety considerations, and creative ideas to spark your imagination. By the end, you’ll be equipped to unlock the full potential of vintage hardware for sustainable living—turning overlooked details into celebrated features.
Why Salvaged Hardware Matters in Sustainable Upcycling
The Environmental Impact
Each year, tons of perfectly functional hardware ends up in landfills. By salvaging and restoring handles, hinges, and knobs, you help reduce waste and decrease the demand for newly manufactured products. This not only conserves resources but also lessens the environmental footprint of your upcycling projects.
Preserving Craftsmanship and Character
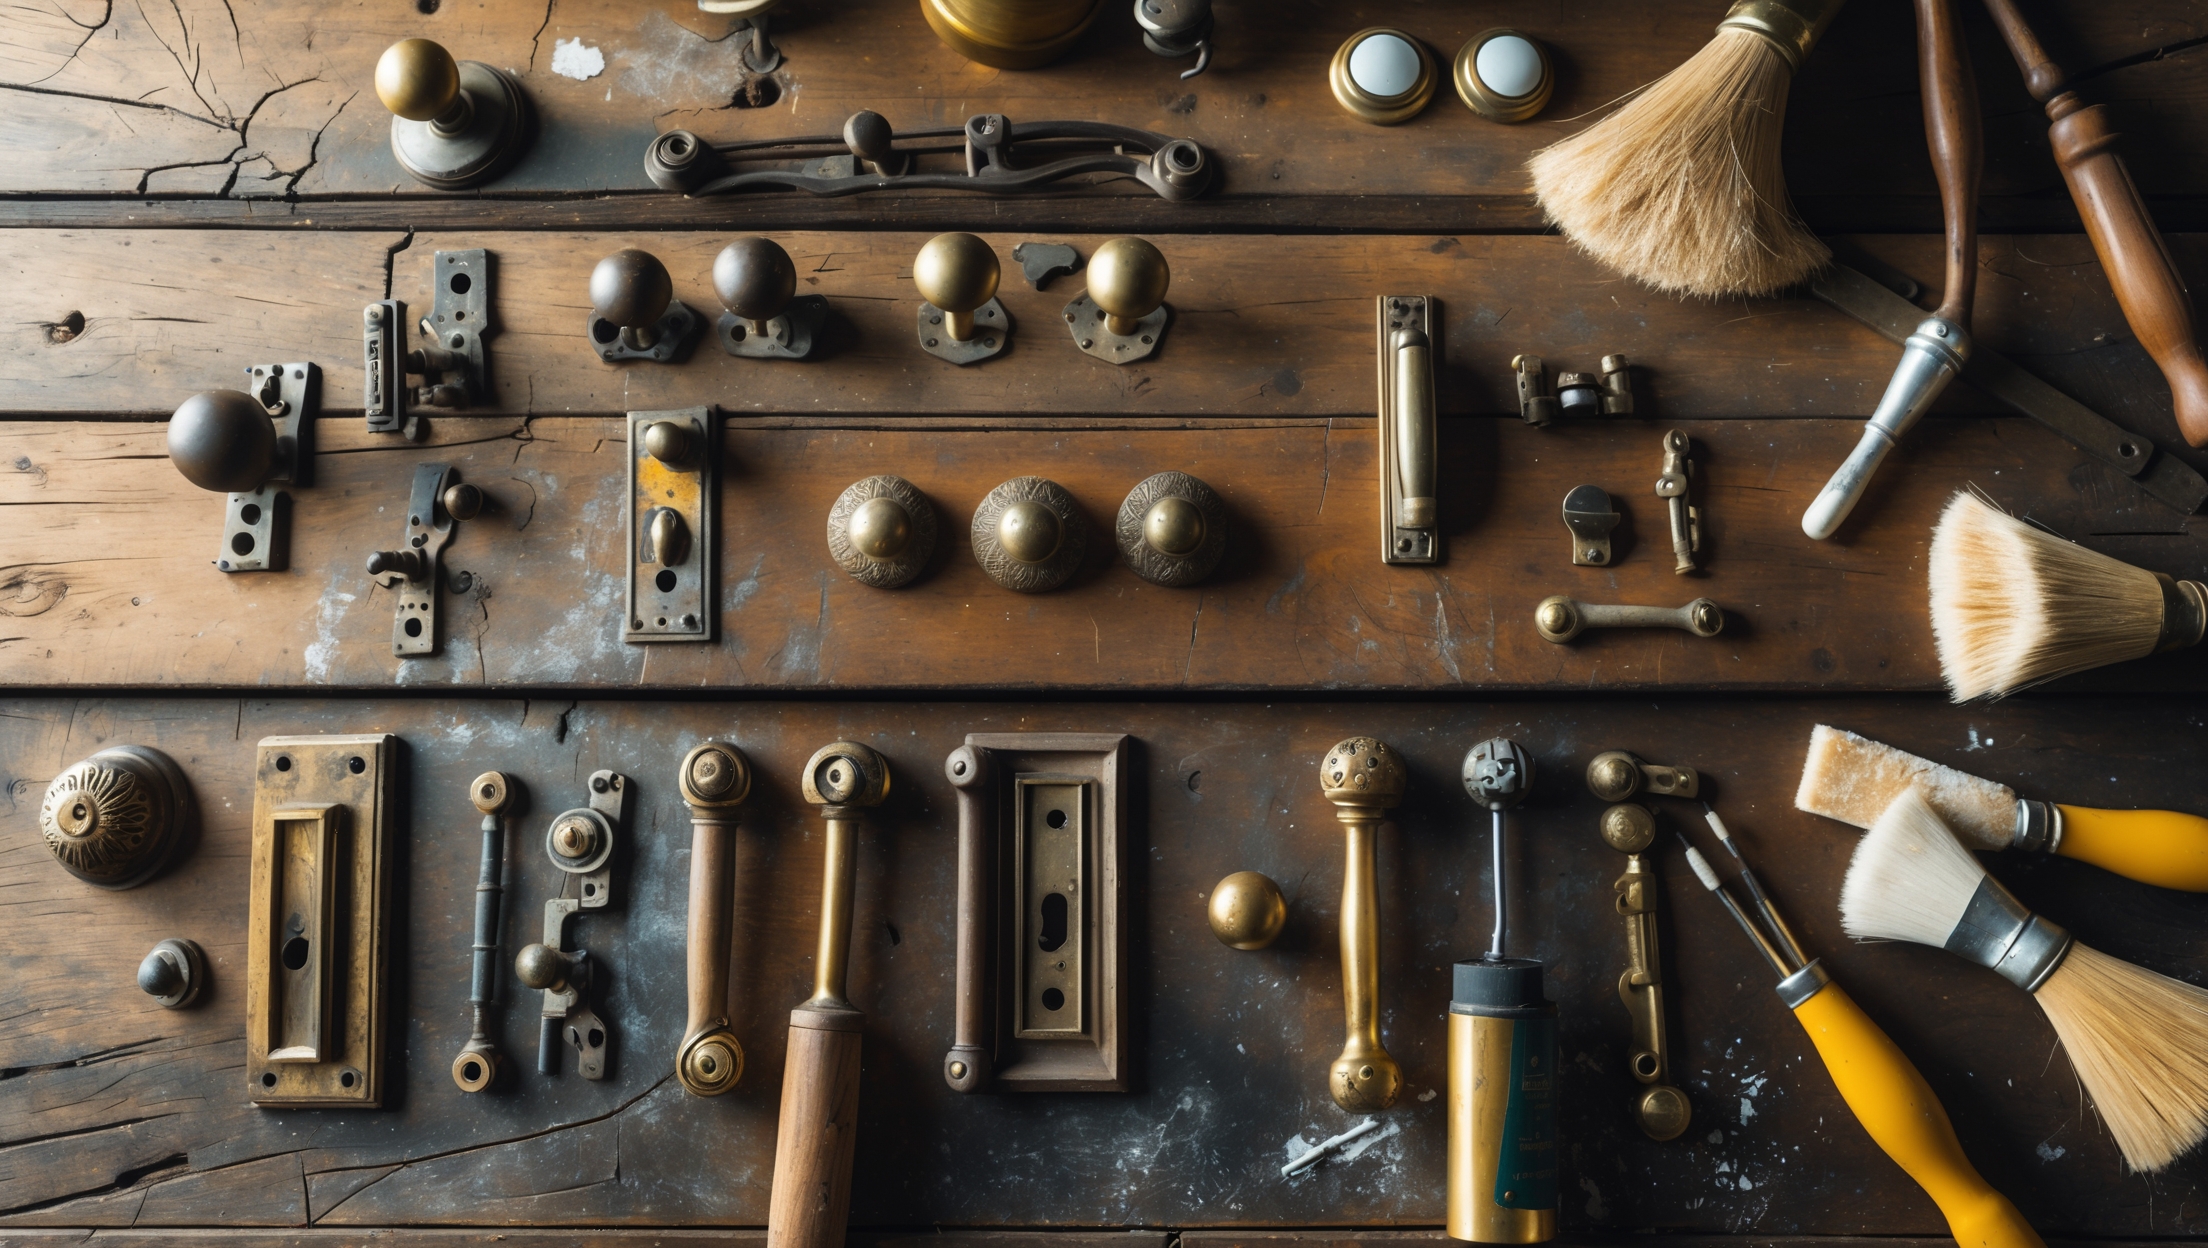
Older hardware often features materials and designs no longer found in today’s mass-produced options. Intricate patterns, solid brass components, and hand-finished details lend authenticity and charm to your creations. Salvaged hardware tells a story—one that can be continued in your home or passed on to others.
Cost-Effective Enhancement
New hardware, especially quality pieces, can be expensive. Salvaged items, often sourced from demolition sites, thrift stores, or architectural salvage yards, deliver high style at a fraction of the cost. With a bit of restoration, these treasures can rival or surpass their modern counterparts.
Where and How to Source Salvaged Handles, Hinges & Knobs
Architectural Salvage Yards
These specialized shops are treasure troves of vintage hardware. Items are often sorted by type, material, or era, making it easier to find matching sets or unique pieces. Inspect hardware in person to assess condition and authenticity.
Demolition and Renovation Sites
Builders and contractors sometimes allow salvagers to remove hardware before demolition. Always request permission and follow site safety rules. Equip yourself with screwdrivers, pliers, and containers for safe transport.
Online Marketplaces
- eBay, Etsy, and Facebook Marketplace: Great for rare and unusual pieces. Look for clear photos and detailed descriptions.
- Specialist forums and groups: Many upcycling communities trade or sell salvaged hardware.
Thrift Stores and Flea Markets
Old furniture destined for disposal often features hidden gems. Even if the furniture is beyond repair, the hardware can be removed and repurposed.
Tip: Keep a Hardware Kit
Carry a small kit with screwdrivers, pliers, zip bags, and a notepad for measurements. This makes it easy to remove and safely store hardware on the spot.
Identifying Valuable and Restorable Hardware
Material Matters
- Brass: Heavy, non-magnetic, and often tarnished to a dark gold. Can be cleaned and polished beautifully.
- Copper: Reddish-brown, develops a green patina with age. Highly sought after for its warmth.
- Iron and Steel: Prone to rust but extremely durable. Look for ornate Victorian or industrial styles.
- Ceramic and Porcelain: Popular for knobs, especially with painted or glazed designs. Check for chips or cracks.
- Glass: Faceted or smooth, often used for knobs. Inspect for chips and ensure the fixing thread is intact.
Assessing Condition
- Check for bent, broken, or missing parts. Some issues are repairable; others may render the piece unusable.
- Look for excessive pitting, corrosion, or stripped screw holes.
- Mismatched sets can be creatively paired or used for eclectic projects.
Signs of Quality
- Solid, weighty feel
- Intricate patterns or hand-finished details
- Original maker’s marks or stamps
Essential Tools & Supplies for Hardware Restoration
- Soft and wire brushes (brass and nylon)
- Fine steel wool (0000 grade)
- Microfiber cloths
- Brass or metal polish
- White vinegar and baking soda
- Old toothbrushes
- Lubricating oil (e.g., WD-40 or sewing machine oil)
- Small files and sandpaper (400–2000 grit)
- Replacement screws, backplates, and mounting hardware
- Non-abrasive cleaners
- Protective gloves and eye protection
Step-by-Step: Cleaning & Restoring Salvaged Handles, Hinges & Knobs
1. Initial Cleaning
Remove loose dirt with a soft brush. Submerge metal hardware in warm, soapy water for 10–15 minutes, then scrub gently with a toothbrush. For ceramic or glass, use only mild soap and avoid soaking if hand-painted.
2. Removing Old Paint and Grime
- Soaking: Place metal hardware in a slow cooker with water and a dash of baking soda. Heat on low for several hours to soften paint for easy removal.
- Manual scraping: Use wooden or plastic tools to avoid scratching ornate surfaces.
3. Addressing Rust and Corrosion
- Light Rust: Rub with fine steel wool or a brass wire brush.
- Heavy Rust: Soak in white vinegar for several hours, then scrub. Rinse thoroughly and dry immediately.
- For stubborn areas: Apply a paste of baking soda and water, let sit, then scrub.
4. Polishing Metal Hardware
Apply a suitable metal polish (brass, copper, or chrome) with a soft cloth. Buff until shine returns. For a matte or aged look, polish lightly and avoid over-buffing.
5. Repairing Minor Damage
- Bent Handles or Hinges: Gently straighten using padded pliers.
- Loose or Stripped Threads: Use thread tape or epoxy to secure. For severely damaged threads, consider drill-and-tap kits.
- Missing Screws: Source period-appropriate replacements from salvage shops or specialty suppliers.
6. Restoring Ceramic, Porcelain & Glass
- Cleaning: Avoid abrasives. Use a soft cloth and non-abrasive cleaner.
- Repairing Chips: Small chips can be filled with ceramic repair paste and color-matched with enamel paint.
- Loose Mounts: Secure with gentle epoxy—but avoid excess glue to prevent visible residue.
Finishing Techniques: Protecting and Enhancing Vintage Hardware
Sealing the Finish
Once cleaned and polished, most metals benefit from a protective coat to prevent re-tarnishing. Options include:
- Clear spray lacquer (for brass, copper, steel)
- Renaissance wax (a microcrystalline wax polish for a subtle sheen)
- Natural oils for wood-accented hardware (e.g., tung or linseed oil)
Patina Preservation vs. Restoration
- Preserve patina for a timeworn, authentic look. Clean gently but avoid aggressive polishing.
- Full restoration if you want a like-new finish—polish until the surface gleams, then seal.
- Mix and match: Keep some patina in crevices for character while cleaning raised details.
Color Customization
For mismatched sets or to suit a particular style, you can paint hardware using specialty metal paints. Always clean and lightly sand before applying primer and paint. Consider finishes like matte black, antique gold, or vibrant colors for modern twists.
Creative Uses for Restored Hardware in Upcycling
- Drawer Pulls: Instantly elevate thrifted furniture with unique salvaged handles.
- Wall Hooks: Mount ornate knobs or handles on reclaimed wood for custom coat racks or towel holders.
- Cabinet Upgrades: Mix and match salvaged knobs for a playful, eclectic kitchen or bathroom.
- Hinges as Decorative Accents: Use vintage hinges as part of gallery wall arrangements or as bookends.
- Furniture Feet: Larger knobs can serve as legs or feet for small boxes, planters, or trays.
- Art and Sculpture: Combine different hardware pieces for industrial-style art or functional sculptures.
Dealing with Incomplete or Mismatched Sets
Embracing Eclectic Styles
Don’t be afraid to mix different shapes, materials, and eras. Arrange by color or finish for cohesion, or go for a deliberate contrast. Odd numbers and asymmetry often look more intentional than forced symmetry.
Creative Pairing Tips
- Pair ornate knobs with minimalist handles for visual balance.
- Use matching backplates to unify mismatched knobs.
- Stagger different hardware styles on wide drawer fronts for a whimsical look.
Mounting and Installation Best Practices
Measuring and Marking
Use a ruler or template to ensure even spacing. Pre-drill holes to avoid splitting wood or cracking finishes.
Securing Hardware
- Use screws of appropriate length and material (brass screws for brass hardware, etc.).
- If mounting to thin or fragile surfaces, reinforce with washers or backplates.
- Tighten screws firmly but avoid over-tightening, which can strip threads or crack ceramic/glass.
Dealing with Oversized or Undersized Holes
- Fill oversized holes with wood filler or dowels, then re-drill to size.
- If holes are slightly off, use adjustable mounting plates or washers to compensate.
Maintenance Tips for Long-Lasting Results
- Wipe hardware with a soft, damp cloth regularly to remove dust and prevent grime buildup.
- Reapply wax or oil finishes every 6–12 months, depending on use and exposure.
- Inspect for loosened screws or mounts and retighten as needed.
- For moving parts (hinges, swivels), apply a drop of lubricating oil to prevent squeaks and rust.
- Address scratches or chips promptly with touch-up paint or finish.
Safety Considerations in Salvage Hardware Restoration
- Always wear gloves and eye protection when cleaning metal or using chemicals.
- Work in a well-ventilated area, especially when applying polishes, paints, or sealants.
- Be cautious of sharp edges and corroded metal, which can cause cuts.
- If salvaging from old buildings, be aware of potential lead-based paints or asbestos—clean hardware outdoors and wash hands thoroughly.
Conclusion: Transforming Details Into Design Statements
Restoring salvaged handles, hinges, and knobs is both an art and a practical skill. These pieces, often dismissed as mere hardware, have the power to transform your upcycling projects into captivating works of sustainable design. By learning how to properly source, clean, repair, and finish vintage hardware, you’re not just saving materials from landfill—you’re rescuing history, craftsmanship, and character for a new generation of use. Whether you prefer the gleam of polished brass, the patina of aged copper, or the playful mix of eclectic styles, your restored hardware will speak volumes about your commitment to creativity and the environment.
As you continue your upcycling journey, remember that every handle, hinge, and knob you salvage is a small act of sustainability. Each restored piece reduces waste, preserves heritage, and adds an irreplaceable touch to your creations. Don’t let missing screws or rusty surfaces discourage you—armed with the right tools, knowledge, and a bit of patience, you can turn the overlooked into the outstanding. Embrace the process, experiment with combinations, and let salvaged hardware become the signature detail in your sustainable living story.


When you’re dealing with vintage hardware that’s got layer upon layer of old paint or finish, what’s the safest way to strip it off without damaging details, especially on brass or ceramic pieces? Are there methods that work better for specific materials mentioned in the article?
For vintage hardware, a gentle method is to soak metal and ceramic pieces in a solution of warm water and mild dish soap, then carefully use a soft brush to remove loosened paint. For brass, avoid harsh chemicals; instead, try using a paste of baking soda and water or even soaking in vinegar for a short time. For ceramics, stick to gentle scrubbing only. Always test on a small, inconspicuous area first to ensure no damage to fine details or finishes.
Do you have any suggestions for finding matching vintage hinges when you only have part of a set? I often come across beautiful pieces at local salvage yards, but it’s tough to complete a full set for larger projects.
Finding matching vintage hinges can be a challenge, especially for larger projects. Try taking detailed photos and measurements of your existing pieces to compare at salvage yards or antique shops. Online marketplaces and specialty hardware forums can also be great resources—posting a photo may help collectors or sellers identify matches. Sometimes, cleaning and refinishing similar but not identical hinges from the same era can create a cohesive look if exact matches aren’t available.
You mentioned sourcing salvaged hardware for upcycling projects. What are some reliable places or strategies for finding older, high-quality pieces, especially if I’m looking for matching sets for a larger furniture restoration project?
For matching sets of vintage hardware, try architectural salvage yards, estate sales, and antique shops—they often have larger quantities or sets available. Online marketplaces specializing in antiques, like dedicated vintage hardware shops, can be helpful too. It’s also worth reaching out to local contractors or demolition companies, as they sometimes save older fixtures when renovating buildings. Always check the condition and measurements to ensure a good match for your restoration project.
You mention dealing with missing or mismatched hardware sets—do you have tips for finding compatible vintage pieces or creative ways to mix and match them so the final project still looks cohesive? I’m struggling to source identical knobs for a dresser makeover.
When you can’t find identical knobs, try grouping similar styles or finishes in a consistent pattern—like alternating two types across the drawers. Look for vintage pieces at salvage yards, online marketplaces, or antique shops, and focus on matching key details such as size, material, or color. Unified backplates or a single finish (like all brass) can also tie different shapes together for a charming, intentional look.
I’m interested in using salvaged brass handles for a project, but I’m worried about lead in old hardware. Are there any tips in the guide for testing or sealing vintage metals to make them safer for everyday use?
The article does address safety concerns with vintage hardware, including the possibility of lead in older brass pieces. It suggests using lead test kits, which are widely available at hardware stores, to check for lead content. For added safety, sealing the cleaned hardware with a clear lacquer or specialized metal sealant is recommended. This creates a protective barrier, reducing direct contact and making the handles safer for regular use.
You mentioned dealing with missing or mismatched sets of vintage knobs and handles. If I can’t find exact replacements, what are some creative ways you suggest making a mix of hardware look intentional and cohesive on a piece of furniture?
Blending different vintage hardware can look stylish with a few tricks. Consider unifying them with a single paint or finish, like brushed brass or matte black. You can also arrange mismatched knobs in a deliberate pattern, or use similar shapes even if the details differ. Another idea is to echo one design element—such as round knobs throughout, or all handles in a similar size—to create visual harmony while still showcasing their unique character.
When you’re working with salvaged hardware like old handles or hinges that are missing some screws or have mismatched sets, what are some practical ways to find replacements that are still period-appropriate and look cohesive on a finished piece?
To find period-appropriate replacement screws or hardware, you can check architectural salvage shops, antique stores, or online marketplaces that specialize in vintage hardware. Bring one of the original pieces with you to match size, style, and finish. If exact matches are tough to find, choose new screws in similar finishes—like brass or iron—and age them using patina solutions for a cohesive look.
The article mentions mismatched or missing sets of salvaged handles and knobs. Do you have suggestions for creatively integrating different styles together so they look intentional on a piece, or is it better to search for matching ones?
Mixing different styles of handles and knobs can actually add unique character to your piece if done thoughtfully. Try unifying the look by using a common color or finish, arranging similar shapes symmetrically, or alternating styles in a repeating pattern. This approach makes the mix look intentional and cohesive. Matching sets work well for a uniform look, but blending styles can make your upcycled piece truly stand out.
If I end up with a set of salvaged knobs but a few are missing and I can’t find perfect matches, do you have any creative tips for mixing and matching hardware on something like a dresser so it still looks intentional and cohesive?
Absolutely! Mixing and matching hardware can look stylish if you create a sense of unity. Try grouping similar shapes or finishes together, such as using all round knobs on one row and handles on another. You can also paint or refinish all the pieces in a single color or metallic tone to tie them together. Repeating patterns—like alternating two styles—helps the mix look deliberate and cohesive.
I’m curious about your recommended techniques for cleaning vintage metal hardware without damaging any original patina or finish. Are there particular cleaning solutions or tools you avoid, especially for solid brass or hand-finished details mentioned in the article?
For vintage metal hardware like solid brass or hand-finished pieces, gentle cleaning is key to preserving the original patina. I recommend using mild soap mixed with warm water and a soft cloth for general dirt removal. Avoid harsh chemical cleaners, abrasive pads, or steel wool, as they can strip or scratch the finish. For stubborn spots, a soft toothbrush works well. Always dry thoroughly to prevent water spots or corrosion.
When restoring brass handles that have old lacquer or layers of paint, what’s your preferred method for stripping them without damaging any hand-finished details? I’m always worried about losing that original patina you mentioned.
To strip old lacquer or paint from brass handles while protecting hand-finished details and original patina, I suggest using a gentle approach. Soak the hardware in a solution of hot water with a little dish soap to soften layers, then carefully use a soft brush or wooden stick to remove loosened coatings. Avoid harsh chemicals or abrasive pads, as they can strip the patina. If needed, acetone can help with stubborn spots, but use it sparingly and rinse promptly.
You mention dealing with mismatched sets of salvaged hardware. If I can’t find identical replacements, do you have recommendations for mixing different styles or finishes so the final project still looks cohesive?
Mixing different styles or finishes can actually add character to your project. To keep things cohesive, try sticking to a consistent color palette or similar metal tones, even if the shapes differ. You can also repeat one element, like using the same type of knob on all drawers and mixing handles on doors. Grouping similar finishes together or balancing them evenly across the piece helps everything feel intentional rather than random.
I’ve run into a bunch of old drawer handles at estate sales that have layers of paint and even a bit of rust. What’s the safest method for stripping these without damaging any original patterns or metal underneath, especially if I’m not sure if they’re brass or another alloy?
To safely strip old paint and rust from vintage handles, try soaking them in a mixture of warm water and mild dish soap overnight, then gently scrub with a soft toothbrush. For stubborn paint, use a plastic scraper instead of metal. If rust persists, apply a paste of baking soda and water, leave it for 30 minutes, and scrub gently. Avoid harsh chemicals or wire brushes, as these can scratch or remove original finishes or patterns, especially if you’re unsure of the metal type.
You mention that understanding the materials is important for both aesthetics and longevity. How can I tell what kind of metal or ceramic an old piece of hardware is made from, and are there any cleaning techniques I should avoid for certain materials to prevent damage?
Look for visual cues and weight to help identify materials—brass is often yellowish and non-magnetic, while iron and steel are magnetic and heavier. Ceramics will feel cool and smooth, and may have glazing. For cleaning, avoid harsh chemicals on brass or copper (use mild soap and water) and never use abrasive pads on ceramics or plated metals to prevent scratches or removing finishes. When in doubt, test a small inconspicuous spot first.
If I have a set of salvaged knobs that don’t match exactly, do you have any tips for working them into a single project so the look still feels intentional? I’d love some creative ideas for mixing different styles or finishes.
Mixing mismatched knobs can look great if you create a sense of unity. Try grouping them by a common element, like shape, material, or finish, even if each knob is a bit different. Arranging them in a deliberate pattern—such as alternating finishes or sizes on drawers—also helps. You could even paint all the knobs in one or two coordinating colors, or use metallic paint to tie together different styles for a cohesive, artistic effect.
When restoring older metal hardware like handles or hinges, are there any specific cleaning solutions you recommend to avoid damaging intricate patterns or original finishes? I’d love some tips for getting rid of stubborn grime without losing the vintage character.
For cleaning older metal hardware with delicate patterns or original finishes, start with a mild dish soap diluted in warm water and a soft brush, like a toothbrush. Avoid harsh chemicals or abrasive pads, as these can damage details and patina. For stubborn grime, try a paste of baking soda and water, gently applying it and rinsing thoroughly. Test any method on a small, inconspicuous area first to ensure it doesn’t affect the finish.
When restoring vintage metal hardware, are there specific cleaning agents or techniques you recommend to avoid damaging original finishes, especially with intricate patterns on older handles or knobs?
To preserve original finishes on vintage hardware, especially those with intricate patterns, use mild, non-abrasive cleaners like diluted dish soap and warm water. Gently scrub with a soft toothbrush to reach crevices. Avoid harsh chemicals, steel wool, or abrasive pads, as these can strip finishes and damage details. For stubborn grime, try a paste of baking soda and water, applying gently, and always dry thoroughly after cleaning.
I often run into the problem of missing or mismatched handles when restoring old furniture. Do you have any suggestions for finding or creating replacements that blend in with authentic vintage hardware, or should I just embrace the mix-and-match look?
Finding replacement handles that match authentic vintage hardware can be tricky, but antique shops, architectural salvage yards, and online marketplaces are good places to search. If exact matches aren’t available, you can try aging new hardware with patinas or paint to blend them in. Embracing a mix-and-match look is also a popular approach—it often adds character and tells the story of the piece.
You mention that older hardware often has materials and designs that aren’t made anymore. If I find a vintage knob that’s missing its matching set, do you have tips for blending it into a project without it looking out of place next to modern or mismatched pieces?
Blending a unique vintage knob with modern or mismatched pieces can add character if done thoughtfully. Try echoing its finish or shape elsewhere in your project—such as using similar metal tones or repeating a design motif in other decor. Another option is to make the vintage knob a deliberate focal point, placing it front and center, so the contrast feels intentional rather than accidental.
When dealing with missing or mismatched sets, do you have any tips for sourcing compatible vintage hardware, or is it better to mix styles intentionally? I usually struggle to find a full matching set when upcycling older furniture pieces.
Finding a full matching set of vintage hardware can be tough, especially for older pieces. One approach is to visit salvage yards, flea markets, or online marketplaces—sometimes, you can piece together similar items from different sources. However, mixing styles intentionally can look fantastic if you choose pieces with compatible finishes or shapes. Embrace the opportunity to add unique character to your upcycled furniture, whether you go for a uniform look or a thoughtfully curated mix.
I run a small woodworking business and often find mismatched or incomplete sets of vintage handles and knobs. Do you have any suggestions for making these odd pieces look cohesive on a finished piece, or is it better to stick to matching sets for a professional look?
Mixing mismatched vintage handles and knobs can actually add character and charm to your finished pieces. To create a cohesive look, you might consider unifying them with a consistent paint or finish, or using backplates that match across all hardware. Grouping similar styles or metals together can also help. While matching sets offer a classic, professional appearance, embracing thoughtful mismatching often resonates with customers who appreciate unique, upcycled designs.
You talked about dealing with missing or mismatched sets of hardware. Do you have tips for creatively blending different styles or periods so they still look cohesive on a single piece of furniture, or is it better to search for exact matches?
Blending different hardware styles can give furniture a unique character, as long as you keep some elements consistent. Try unifying pieces through a shared finish, like painting all handles the same color or using the same type of metal polish. You can also choose hardware with similar shapes or motifs, even if their origins differ. This approach often looks more intentional than mismatched sets, while still celebrating the salvage aesthetic.
When restoring old metal handles or hinges that have surface rust, do you recommend any specific cleaning agents or techniques to preserve the original patina without damaging the underlying metal? I’m especially interested in tips for brass components mentioned in the article.
For brass handles or hinges with surface rust, try gently scrubbing with a soft brush and a mixture of mild dish soap and warm water. If further cleaning is needed, apply a paste of baking soda and water, let it sit briefly, then buff lightly. Avoid harsh chemicals or abrasive pads, as these can strip the original patina. After cleaning, dry thoroughly and consider applying a microcrystalline wax to protect the finish.
Could you elaborate on how to approach repairing salvaged hardware when you have an incomplete set, like a few missing knobs or mismatched hinges? Are there creative strategies for blending different pieces so the end result still looks cohesive?
When working with incomplete sets, you can create cohesion by unifying hardware with a consistent finish—paint, polish, or patina can help mismatched pieces blend together. If knobs or hinges differ in style, try arranging them symmetrically or alternating patterns for a purposeful look. Mixing vintage and new hardware in repeating motifs can also tie everything together, making the variety feel intentional rather than accidental.
I’m curious about sourcing matching sets of vintage handles and knobs, since you mention mismatched hardware in the article. Are there any strategies or tips for making a mixed set look intentional and cohesive on a single piece of furniture?
Absolutely, you can make mismatched hardware look purposeful with a few tricks. Try unifying the pieces with a common finish by painting or refinishing them in the same color or metallic tone. You can also group similar shapes or styles on each side or drawer, creating balanced symmetry. Even mixing different sizes can look great if you keep the overall palette and style consistent across the piece.
You mentioned that older hardware sometimes comes in mismatched sets or with missing pieces. As a beginner on a budget, do you have tips for creatively working with incomplete hardware collections, or should I wait until I find complete matching sets before starting a project?
You definitely don’t need to wait for complete matching sets to start your project. Mixing and matching vintage handles, hinges, and knobs can actually add a lot of character and charm to your piece. Try grouping similar styles or finishes together for a cohesive look, or deliberately alternate different pieces for an eclectic effect. If some pieces are missing, consider filling gaps with simple modern hardware or use paint to unify mismatched items.
When sourcing vintage knobs and pulls, do you have any advice for matching up odd sets or filling in for missing pieces, especially for folks in smaller towns with limited salvage shops? Are there creative ways to blend mismatched hardware into a cohesive look for modern upcycling projects?
When dealing with odd sets or missing pieces, try mixing and matching hardware of similar styles or finishes to create an intentional eclectic look. Painting all knobs and pulls in a unified color can help tie mismatched pieces together. Also, consider using hardware from old furniture, or checking thrift stores, yard sales, and even online marketplaces. Arranging different styles symmetrically or in a repeating pattern can provide visual harmony, even with varied pieces.
I’m curious about your process for dealing with mismatched hardware sets, especially when you’re restoring something like a chest of drawers but only find three out of four original knobs. Do you recommend trying to track down a match, or is it more authentic to mix and match period-appropriate pieces?
When you’re missing a knob from a set, you can go either way. Tracking down a perfect match adds authenticity, but it can be time-consuming. Mixing and matching period-appropriate hardware can look stylish and intentional, especially if you arrange the odd piece in the center or use similar finishes. Both options are valued in upcycling, so it depends on whether you prefer uniformity or a bit of eclectic charm.
You mentioned dealing with missing or mismatched hardware sets. If I can only find singles or pairs at thrift stores, do you have any creative suggestions for making an intentionally mismatched look work on something like a set of kitchen cabinets?
Absolutely, intentionally mismatched hardware can add a lot of charm and personality to kitchen cabinets. Try grouping knobs and handles by color, material, or style for a subtle cohesion, or go bold by mixing completely different designs on each door and drawer. Arranging similar pieces in a pattern—like alternating types or placing matching pieces on upper or lower cabinets—can help make the look feel intentional rather than random.
When restoring old brass hinges that have layers of paint and corrosion, are there specific cleaning methods or products you’d recommend to avoid damaging any hand-finished details mentioned in the article? I want to preserve that original character but still get them fully functional.
To preserve hand-finished details on old brass hinges, start by gently scraping off loose paint with a wooden or plastic tool. Soaking the hinges in a mixture of warm water and mild dish soap can help soften stubborn paint without harsh chemicals. For corrosion, use a soft toothbrush and a paste of baking soda and water, rinsing thoroughly. Avoid abrasive pads or strong chemical strippers, as these can damage original finishes and delicate detailing.
When restoring old brass handles or knobs that have a lot of tarnish but also some fine details, do you recommend a specific cleaning technique that preserves the original patina without damaging the intricate patterns? I find it tricky to strike the right balance between cleaning and keeping that vintage character.
For tarnished brass with fine details, try using a mild paste made from baking soda and water, gently applied with a soft toothbrush. Focus on light brushing rather than scrubbing, which helps lift tarnish without removing the original patina or damaging delicate patterns. Avoid harsh chemicals or abrasive pads, as these can strip the finish and erase vintage character. Working slowly and checking progress often is key to preserving that authentic look.
When working with salvaged handles and hinges, how do you determine whether it’s worth the effort to repair versus replace, especially if you’re dealing with missing pieces in a set? Is there a rule of thumb for assessing the value or authenticity of older hardware before starting restoration?
When deciding whether to repair or replace salvaged hardware, first consider rarity and quality—solid brass or iron pieces, or ones with unique designs, are usually worth restoring. If a set is incomplete but features distinctive or period-appropriate styles, repairing is often worthwhile. As a rule of thumb, original maker’s marks, weight, and craftsmanship help gauge authenticity and value. If replacement parts are easily sourced or the missing pieces are generic, replacement may be more practical.
I’m interested in restoring some mismatched sets of vintage knobs for my kitchen cabinets. Do you have any creative ideas or techniques for making different styles look cohesive together in a modern upcycling project?
Blending mismatched vintage knobs can look stunning with a few creative approaches. Try unifying them through color—use the same metallic spray paint or a coordinating palette. You can also bring cohesion by mounting all knobs on matching backplates or adding similar decorative details like stenciling or decoupage. Consistent placement on your cabinet doors helps tie the look together, even if the styles vary.
You mentioned dealing with missing or mismatched sets of vintage knobs. Do you have suggestions for how to blend different styles together so they look intentional on a piece, especially if I can’t find exact matches at salvage stores?
Blending different vintage knobs can look intentional and stylish if you repeat certain elements. Try choosing knobs with similar metal finishes, shapes, or color tones even if their designs differ. Arranging them in a deliberate pattern, like alternating styles or grouping similar ones together, can also create a cohesive look. Adding a unifying detail, like matching backplates or repainting them in the same color, helps tie the mix together.
I get overwhelmed when I end up with a bunch of salvaged knobs and hinges that don’t quite match. Do you have tips for making mismatched hardware work together visually on the same piece, or is it better to stay consistent?
Mixing mismatched hardware can actually add unique charm to your project. To make them work together visually, try unifying mismatched pieces with a consistent paint or finish, or by grouping similar shapes and sizes on the same drawer or section. Consistency can look clean, but don’t be afraid to embrace the character that comes from a coordinated mix—it often gives upcycled pieces their personality.
I often find beautiful old handles at estate sales, but they’re rarely part of a complete matching set. Do you have any creative suggestions for making mismatched hardware look intentional when used together on a single piece of furniture?
Mixing mismatched handles can add real character to your furniture. Try unifying them by painting all pieces the same color or finish, or by grouping similar shapes or materials together in a pattern. Another option is to alternate different styles symmetrically, so the overall look feels thoughtfully eclectic rather than random. This way, every piece of hardware becomes a unique feature rather than an odd one out.
The article mentions dealing with missing or mismatched hardware sets. What are some creative ways to blend salvaged knobs or handles that don’t match exactly but need to look cohesive on something like a dresser or a row of cabinets?
To create a cohesive look with mismatched knobs or handles, try unifying them with paint or a common finish, such as spraying them all in the same metallic tone. Another option is to arrange the hardware symmetrically or in a pattern—alternating styles across drawers, for example. You can also use backplates or decorative bases to tie varying designs together visually.
When restoring vintage handles or knobs that have intricate patterns and some corrosion, do you recommend any specific cleaning methods that preserve the detailing without damaging the original material? I often worry about losing those hand-finished touches mentioned in the article.
To clean vintage handles or knobs with detailed patterns, start with a soft toothbrush and mild soap to gently remove surface dirt. For corrosion, make a paste of baking soda and water and apply it sparingly with a cotton swab, focusing on affected spots. Avoid abrasive pads or strong chemicals, as these can wear down original finishes or delicate hand-worked details. Always test any cleaning method on a small, inconspicuous area first.
Could you share some advice for small business owners trying to source matching vintage knobs or hinges for commercial upcycling projects? Finding complete sets seems tough, so are there creative solutions for dealing with mismatched hardware when consistency is important for selling the final product?
Sourcing complete sets of vintage knobs or hinges can definitely be a challenge. One approach is to mix and match hardware within a similar style or finish, then use paint or patina treatments to create a unified look. Alternatively, consider using mismatched pieces as a unique design feature and highlight the story behind each item. For larger projects, partnering with salvage yards or networking with other upcyclers can help widen your sourcing options or facilitate trades to build matching sets.
I’m interested in incorporating salvaged handles and knobs into a new furniture project, but a lot of the sets I find at thrift stores are missing pieces or don’t match. Do you have any advice for mixing and matching different styles or finishes so the end result still looks cohesive?
Mixing and matching salvaged handles and knobs can add unique character to your furniture. To keep the look cohesive, try to stick to a unifying element, such as similar shapes, sizes, or materials. You can also spray paint all the pieces the same color or finish to tie them together. Arranging mismatched hardware in a deliberate pattern, like alternating styles, can help the design feel intentional rather than random.
When restoring vintage hardware, how do you safely deal with old finishes or coatings that might contain lead or other hazardous materials? I want to make sure my upcycling projects are safe, especially if they’ll be used around kids.
To handle old finishes with possible lead or hazardous materials safely, always wear gloves and a mask rated for lead dust. Work in a well-ventilated area or outdoors. Use wet sanding or chemical strippers instead of dry sanding to minimize dust. Carefully collect any debris, and clean surfaces with a damp cloth afterward. Dispose of all waste properly according to local hazardous material guidelines to keep your projects safe for everyone, especially children.
When cleaning old brass handles or hinges that have a lot of caked-on grime, is there a safer method for beginners to avoid damaging any original finish or patina? I want to keep their vintage look but still get them clean enough to use.
To clean old brass hardware while preserving the original finish and patina, try soaking the pieces in a mix of mild dish soap and warm water for about 15–20 minutes. Use a soft toothbrush to gently scrub away grime. Avoid harsh chemicals or abrasive pads, as they can strip the patina. If some grime remains, repeat the process rather than scrubbing harder. This gentle approach should retain the vintage character.
Could you elaborate on the best way to deal with restoring a set of vintage knobs when a few are missing or too damaged to use? I sometimes end up with incomplete sets and would love to know creative or practical solutions for mixing and matching hardware without compromising the look of my upcycled furniture.
When restoring vintage knobs with missing or damaged pieces, try grouping similar styles or finishes together for a cohesive look. You can mix metals, shapes, or colors intentionally—arrange them in a pattern or alternate knobs for visual interest. Another option is to use replacement knobs that complement the originals, such as simple glass or ceramic ones that echo vintage designs. Unifying all knobs with a common feature, like matching backplates or a consistent color, can also help blend mismatched hardware seamlessly into your project.
You mention creative ideas for mismatched hardware sets—do you have any tips for making a collection of different handles and knobs look intentional and cohesive on something like a kitchen cabinet? I’m aiming for something stylish, not haphazard.
To create a cohesive look with mismatched handles and knobs, try unifying them through color or finish—painting them all the same shade or using a consistent metal tone works well. You can also arrange them in a deliberate pattern or repeat certain shapes across the cabinets for balance. Mixing styles is great as long as you keep an underlying theme, like all vintage or all geometric designs.
You mentioned dealing with missing or mismatched sets of hardware. What are some creative ways to handle incomplete sets so everything still looks intentional and cohesive, especially if the original designs are really different?
Mixing mismatched hardware can look intentional by choosing a unifying element such as color, finish, or shape. For example, you can paint all the pieces the same color or use a consistent metal polish to match the patina. Another option is to arrange the different pieces in a pattern—for instance, alternating styles on drawers—or group similar ones together for balance. Mixing styles can add character if you keep one design element consistent across all the items.
When you’re cleaning or restoring old brass handles from a thrifted dresser, how do you know if it’s safe to use regular household cleaners, or should I be looking for something more specialized to avoid damaging unique finishes?
When cleaning old brass handles, it’s important to check if there’s any special finish or lacquer. If the handles have a shiny, even coating, they may be lacquered—using harsh cleaners can damage this. For most vintage brass, gentle soap and water are a safe start. If you’re unsure about the finish, avoid abrasive cleaners and test any product on a small, hidden area first. For unique or ornate pieces, a brass-specific cleaner is often the safest option.
How do you usually deal with mismatched sets of vintage hardware from different eras or styles when upcycling a project? Is there a way to unify their look, or do you embrace the eclectic mix for more character?
When working with mismatched vintage hardware, you have two main options. To create a unified look, you can use paint or patina finishes to give all the pieces a similar color or texture. Alternatively, you can embrace the variety and let each piece stand out for an eclectic, character-rich effect. Sometimes mixing styles adds charm, especially if you balance the arrangement across the project.
You mention dealing with missing or mismatched sets of salvaged hardware. What are some creative ways to make a project look cohesive if I can’t find enough identical vintage handles for something like a dresser or kitchen cabinet?
Mixing different vintage handles can create a charming, intentional look if you keep some elements consistent. Try unifying the hardware by painting them all the same color or finish, or group similar shapes or sizes together in a pattern across the piece. Another approach is to use matching pairs on each side or drawer, creating symmetry. Adding backplates or decorative bases can also help tie mismatched pieces together visually.
You mentioned dealing with mismatched sets of salvaged knobs—what are some creative ways to integrate different designs into a cohesive upcycled project, especially for things like kitchen cabinets where uniformity is usually the norm?
Mixing mismatched knobs can add a unique charm to your kitchen. Try organizing them by color family, material, or shape to create a subtle theme. Alternating patterns—like using two styles in an intentional sequence—can also look cohesive. Another idea is to use matching knobs on upper cabinets and varied ones on lowers, or to paint all the knobs one color for unity while keeping their different shapes as a feature.
I’m curious about your process for identifying what metals old hardware is made from, especially when restoring mixed sets or heavily painted pieces. Are there reliable tests or tips you use for distinguishing brass, bronze, or plated steel before selecting cleaning or finishing methods?
Identifying metals in old hardware can be tricky, especially with paint or grime. For a quick test, use a magnet—brass and bronze aren’t magnetic, but steel is. Brass often has a yellow tone, while bronze appears more reddish-brown. If you scrape a hidden spot, brass will show a bright gold color, bronze is duller. For plated steel, look for signs of flaking or rust underneath. Testing a small area before cleaning ensures you choose the right method for each piece.
When restoring old handles or knobs, how can you tell if they’re made from solid brass versus a plated or more modern material? Are there simple ways to identify the difference before starting on cleaning or refinishing?
You can usually tell if a handle or knob is solid brass by checking the weight—solid brass feels heavy for its size. Try using a magnet; brass isn’t magnetic, so if the magnet sticks, it’s likely plated or another metal. Sometimes, you can also gently file a hidden spot; if the yellowish brass color shows through, it’s probably solid brass.
When sourcing vintage hardware for a project, how do you figure out if an old hinge or knob is actually worth restoring versus being too damaged or worn out? Any tips for beginners so we don’t waste time or money on pieces that can’t be saved?
When checking vintage hardware, look for solid construction and avoid pieces with severe rust, deep cracks, or missing parts that are hard to replace. Surface rust or old paint can often be cleaned up, but structural damage usually isn’t worth the trouble. Beginners should start with brass, iron, or solid wood items rather than plated or plastic pieces, as these are easier to restore. Always check if moving parts still work or could be loosened up with oil or cleaning.
When restoring vintage handles or knobs that have a layer of stubborn paint or rust, are there certain cleaning or stripping techniques you recommend that won’t risk damaging delicate details or original finishes on brass or ceramic pieces?
For vintage brass or ceramic hardware, start by soaking the pieces in warm, soapy water to loosen dirt and paint. Use a soft toothbrush to gently scrub away residue. For stubborn paint or rust, try applying a paste of baking soda and water, letting it sit, and carefully rubbing with a soft cloth. Avoid harsh chemicals or abrasive pads, as they can damage delicate finishes or detailing. Always test any method on a small, inconspicuous area first to ensure it won’t harm the original surface.
When you’re restoring old handles or knobs that have missing or mismatched pieces, are there creative ways to fill in gaps, or should I look for replicas to keep the look consistent? Any tips for blending originals with replacements without it being obvious?
You can definitely get creative when filling gaps or mismatched spots. Epoxy putty can be shaped and painted to match missing parts, making it ideal for filling small gaps. If you need replacements, look for vintage or reproduction pieces in similar styles and finishes. To blend originals and replacements, try aging new hardware with patina solutions or gentle sanding, and use matching paint or stain to unify the look. Mixing old and new can add unique character if done thoughtfully.
I’m curious about your cleaning techniques for really stubborn rust or old paint on metal hinges. What are the safest methods to get them looking good again without accidentally damaging any details or the original finish?
For stubborn rust, I recommend soaking the hinges in a solution of white vinegar for a few hours, then gently scrubbing with a soft-bristle brush. For old paint, use a mild paint remover or even baking soda paste, but always test in a small area first. Avoid harsh abrasives—they can scratch delicate details. Rinse thoroughly and dry completely to prevent new rust from forming.
I’m pretty new to restoring old hardware, and I’m not sure how to tell if metal handles or knobs are solid brass versus brass-plated. Are there easy ways to spot the difference before I start cleaning them, so I don’t accidentally damage anything?
One simple way is to use a magnet—solid brass isn’t magnetic, but brass-plated items often have a magnetic base metal underneath. You can also look for worn spots or scratches; if you see a different color metal beneath, it’s likely brass-plated. Being gentle with cleaning is safest until you’re sure.
When restoring old brass handles or knobs that have a lot of worn plating or stubborn corrosion, do you recommend fully stripping them back to bare metal or is it better to preserve some of that aged patina? I want my projects to look authentic but also want the hardware to last.
For a balance between authenticity and durability, it’s usually best to clean the hardware thoroughly but preserve some of the original patina if you like the aged look. Carefully remove any flaking plating or active corrosion, then seal the surface with a clear lacquer or wax. This approach maintains character while protecting the metal for long-term use.
I have a mix of metal and ceramic vintage knobs from an old dresser—are there different cleaning products or methods I should use for each material, or is there a universal approach that works well for both?
It’s best to clean metal and ceramic knobs using different methods. For metal knobs, use a mild metal cleaner or a mix of water and gentle soap, drying them well afterward. For ceramic knobs, stick with warm soapy water and a soft cloth; avoid abrasive cleaners which can scratch or damage the glaze. Cleaning them separately ensures each material stays in great shape.
You mention that salvaged hardware can add authenticity to upcycling projects, but what do you suggest for situations where I can only find one or two matching knobs or handles? Are there creative ways to mix and match these pieces without it looking mismatched or accidental?
Absolutely, mixing and matching single pieces can look intentional and stylish with a bit of planning. Try grouping similar finishes—like all brass or all porcelain—or use a consistent motif such as all floral or geometric designs. You can also place unique knobs in symmetrical positions or use them as feature pieces, such as on a central drawer. This approach creates a cohesive yet eclectic look rather than appearing random.
When restoring old handles or knobs that have a lot of paint or rust built up, do you recommend any specific cleaning methods or materials that won’t damage delicate details or older finishes? I’ve had trouble getting into grooves without scratching them.
To clean old handles or knobs with lots of paint or rust, try soaking them in a mixture of mild dish soap and warm water first, then use a soft toothbrush to get into grooves. For stubborn paint, a bit of rubbing alcohol on a cotton swab can help, and for rust, a paste of baking soda and water gently brushed on works well. Avoid steel wool or harsh abrasives, as these can scratch delicate details.
If I find an interesting set of mismatched vintage knobs at a salvage yard, do you have tips for making them look cohesive on a single piece of furniture? Or is it better to lean into the mix-and-match look for upcycling projects?
Both approaches can work beautifully, depending on the style you want! To make mismatched knobs look cohesive, try unifying them with a common paint color, metallic finish, or by using similar backplates. Alternatively, embracing the mix-and-match look adds character and charm—just space out contrasting styles evenly for visual balance. Trust your eye and have fun with the creative process.
You mention dealing with missing or mismatched sets of vintage hardware. What are some creative approaches for integrating those odd pieces into a cohesive project, especially when the designs or sizes are noticeably different? Any tips for balancing practical use with a unified look?
Mixing different vintage hardware can add unique character, but for a unified look, try grouping similar finishes or shapes together on the same side or section. You could paint all pieces in a common color or use a patina treatment to standardize their appearance. If sizes differ, install larger handles or knobs in focal areas and smaller ones in less prominent spots. Always test functionality to ensure each piece is comfortable and practical to use.
You mention integrating mismatched or missing hardware sets into upcycling projects. Do you have any creative ideas or examples for mixing different styles of vintage knobs and handles so they still look cohesive on something like a kitchen cabinet?
Absolutely! To keep a cohesive look when mixing vintage knobs and handles, try choosing pieces with a unifying element—like a consistent metal tone, finish, or era. For example, blend glass knobs with brass handles if both have similar patina, or use different shapes in the same color family. Arranging mismatched hardware in a deliberate pattern (alternating styles across drawers) can also make the mix look intentional and stylish.
I sometimes come across vintage hardware sets that are missing a piece or two. Do you have suggestions for creatively dealing with mismatched handles or hinges so the final upcycled project still looks intentional and cohesive?
When dealing with mismatched hardware, consider painting all the pieces a single color or finish for a unified look. Alternatively, arrange mismatched handles in a deliberate pattern or alternate them across drawers to create a playful, eclectic style. Using similar shapes or complementary styles can also help make the mix look intentional rather than accidental. Mixing metals or styles intentionally can become a design feature rather than a flaw.
You mention that matching missing hardware or dealing with mismatched sets can be a challenge. Are there effective strategies for sourcing replacements that blend well with the existing vintage pieces or ways to unify the look when exact matches aren’t available?
When you can’t find exact matches for vintage hardware, try searching architectural salvage stores, antique markets, or online marketplaces specializing in reclaimed items. If you still end up with mismatched pieces, you can unify the look by painting or refinishing all the hardware in a consistent color or finish. Swapping knobs or pulls between locations can also help achieve a cohesive appearance.
For people new to upcycling, how do you recommend identifying which old handles or knobs are actually worth salvaging? Are there specific signs of quality or types of damage that should make a cautious buyer think twice before purchasing vintage hardware at a flea market or salvage yard?
When picking vintage hardware, look for solid materials like brass, bronze, or iron—these tend to last and clean up well. Check for smooth movement in hinges and handles, and avoid pieces with deep corrosion, bent parts, or missing screws that are hard to replace. Surface grime is fine, but be wary of cracks or heavy pitting, as these can weaken the hardware or make restoration difficult.
When you’re restoring vintage knobs and hinges made of different materials, like mixing brass with ceramic pieces on the same project, how do you approach finishing and sealing them so they look cohesive but still retain their unique character?
To achieve a cohesive look while mixing materials like brass and ceramic, I suggest using a similar finish or tone across all pieces—for example, choosing warm brass and pairing it with off-white or cream ceramics. For sealing, use a clear wax or satin polyurethane that works on both materials, which will unify their sheen without masking their character. Clean each piece thoroughly before sealing, and avoid heavy coatings to preserve any patina or detail.
You mention the importance of understanding the materials and choosing the right finishes for longevity. Are there particular cleaning or finishing products you recommend for older brass hardware to prevent tarnishing, especially if it’s going to be used frequently in a kitchen or bathroom?
For older brass hardware, especially in moisture-prone areas like kitchens or bathrooms, use a gentle brass cleaner or a homemade mix of lemon juice and baking soda to clean without damaging the patina. After cleaning, apply a high-quality clear lacquer or a microcrystalline wax to seal the surface. This helps prevent tarnishing and keeps the hardware looking bright despite frequent use.
I’m curious about how you deal with salvaged hardware that comes in incomplete or mismatched sets, like if you find only three knobs for a dresser that needs four. Do you have any strategies for making these odd pieces look cohesive on a finished project?
When you have incomplete or mismatched sets, one approach is to mix and match different knobs or handles intentionally to create a unique, eclectic look. You can unify them by painting all the pieces a single color, or by using a common finish, like polished brass or matte black. Another option is to use the odd piece as an accent on a central drawer, turning the mismatch into a design feature rather than a flaw.
If I find a set of salvaged kitchen cabinet hinges and a couple are missing, what are some creative ways to deal with that? Is it better to search for matching replacements, or should I consider mixing styles, and how do I make that look intentional instead of mismatched?
If a few hinges are missing, you can try hunting for close matches at salvage yards or online—sometimes you’ll get lucky. If you can’t find exact replacements, mixing styles can actually add character. To make it look intentional, use a consistent finish or color across all the hinges, or alternate the styles in a repeating pattern so it feels like a design choice rather than a last-minute fix.
You talked about integrating salvaged hardware into modern upcycling projects. Do you have any advice for matching up mismatched vintage pieces so they look intentional together, especially if I can’t find a full set with the same style or finish?
When working with mismatched vintage hardware, focus on creating a cohesive look through color or finish. You can unify different pieces by painting them the same color, using a matching patina, or applying a consistent metal polish. Mixing styles purposefully—like pairing ornate knobs with simple handles—also gives a collected, intentional feel. Balancing placement and repeating certain shapes or finishes throughout your project helps everything look thoughtfully curated.
You talked about identifying valuable hardware and restoring both metal and ceramic pieces. Are there specific cleaning techniques or products to avoid with certain materials, especially if I’m worried about damaging delicate finishes or old patinas?
Yes, some cleaning methods and products can harm delicate finishes or old patinas. For metals like brass or bronze, avoid harsh abrasives or strong chemical cleaners—they can strip away original patina. Use gentle soap, warm water, and a soft cloth. For ceramics, steer clear of acidic cleaners and rough pads; instead, use mild detergent and a non-abrasive sponge. Always test any cleaner on a small, hidden area first to make sure it won’t damage the surface.
When restoring vintage handles or knobs that have layers of old paint or corrosion, what are the safest methods to clean them without damaging intricate patterns or original finishes? Are there specific tools or products you recommend avoiding for delicate metals or ceramics?
For vintage handles or knobs with old paint or corrosion, gentle methods work best. Soak hardware in warm, soapy water to loosen debris, then use a soft toothbrush for cleaning. Avoid harsh abrasives, steel wool, or strong chemical strippers, as these can damage delicate metals or ceramics. For stubborn paint, a mild citrus-based paint remover is safer than traditional solvents. Always test cleaning products on a small, inconspicuous area first to prevent harm to original finishes or intricate patterns.
I often find that salvaged handles and knobs come in mismatched sets or are missing pieces entirely. Do you have any creative suggestions for making a cohesive look when you don’t have a full matching set, particularly for something like kitchen cabinets?
Absolutely, you can create a cohesive look with mismatched hardware by using unifying elements. Try painting all the handles and knobs the same color or finish so they visually tie together. Another option is to arrange similar shapes or sizes in a pattern, like alternating styles across cabinet doors. Mixing metals can also work if you repeat the same two or three finishes consistently throughout. These small tricks make your collection feel intentional and stylish.
If I come across a vintage knob or hinge that’s missing its matching pair, do you have tips for either finding a close replacement or ways to mix mismatched sets so the end result still looks intentional and cohesive?
If you can’t find an identical replacement, try searching architectural salvage shops or online marketplaces for similar shapes and finishes. For mixing mismatched hardware, unify them by painting or refinishing all the pieces in the same color or metallic tone. Another approach is to arrange the different knobs or hinges in a repeating or mirrored pattern to give the design a deliberate, curated feel.
If I find a set of vintage hinges that’s missing a few pieces or has mismatched components, what are some creative solutions for integrating them into a modern project without it looking cobbled together? Are there specific techniques you recommend to blend or highlight differences?
Mixing vintage hinges can add character if done thoughtfully. One approach is to intentionally highlight the differences by arranging mismatched pieces symmetrically, or painting them all the same color for a cohesive look. You might also use patina or metallic finishes to create a unified tone. Alternatively, leverage the contrast by making the unique pieces focal points on your project. Combining old and new hardware sparingly can also create balance without appearing accidental.
You mention that restoring materials like metal and ceramic requires different techniques. Could you elaborate on the best cleaning methods for delicate ceramic knobs, especially if they have hairline cracks or old paint residue?
For delicate ceramic knobs, especially those with hairline cracks or old paint, use a soft brush or cloth with mild dish soap and warm water. Avoid soaking, since water can seep into cracks. For paint residue, gently rub with a damp cloth or use a plastic scraper; avoid harsh chemicals or abrasives to protect the glaze and prevent further damage.
You mention that salvaged hardware can sometimes be mismatched or incomplete sets. Do you have suggestions for creatively integrating odd pieces into a project, or should I only use matching hardware for the best result?
You don’t have to limit yourself to matching hardware—using mismatched pieces can add unique character and interest to your project. Try grouping similar finishes or shapes for a cohesive but eclectic look, or use odd pieces as statement features. Mixing vintage handles and knobs often enhances the charm of upcycled furniture, turning imperfections into design highlights.
When cleaning and repairing old metal hardware, how can I tell if something is actually solid brass versus just brass-plated? Does the cleaning method change depending on which it is, and are there certain finishes I should avoid so I don’t ruin the original look?
To check if hardware is solid brass, hold a magnet to it—solid brass won’t attract magnets, while brass-plated steel will. You can also lightly scratch an inconspicuous spot: solid brass is gold all the way through; plating will reveal a different metal underneath. For solid brass, gentle polishing works, but for plated pieces, avoid abrasive cleaners or heavy polishing to prevent wearing through the thin brass layer. Stay away from harsh chemicals or steel wool on both types to preserve the finish.
You mentioned dealing with different materials like metal and ceramic when restoring salvaged hardware. Are there specific cleaning or repair techniques I should avoid with certain finishes, especially if I’m concerned about preserving any original patina or delicate details?
Absolutely, some finishes require special care. For metal with original patina, avoid harsh chemicals or abrasive scrubbing, as these can strip the finish. Stick to gentle soap and water or a mild metal polish designed for antiques. For ceramic pieces, skip acidic cleaners and abrasive pads, as they can scratch or dull glaze and painted details. Always test any cleaner on a small, inconspicuous area first to ensure it won’t damage the surface.
You mention that older hardware can have solid brass components with hand-finished details. Do you have any tips for cleaning and restoring brass hardware specifically without stripping away its patina or damaging these unique finishes?
To clean brass hardware while preserving its patina and hand-finished details, use a mild soap and warm water with a soft cloth—avoid harsh chemicals or abrasive pads. For stubborn spots, a little diluted vinegar on a cotton swab can help, but test a small area first. Make sure to dry thoroughly and avoid over-polishing, so the unique aged finish remains intact.
I’m curious if you have any tips for finding replacement parts when you come across a vintage knob or hinge set with missing pieces. Is it usually better to search for matching old hardware, or are there effective ways to blend new pieces in without losing the vintage feel?
When a vintage knob or hinge is missing parts, your best bet is often to check salvage shops, architectural recyclers, or online marketplaces for matching old hardware. If you can’t find an exact match, consider using new pieces that have a similar finish or style—aging them with patina solutions or paint can help blend them in so they still fit the vintage aesthetic. Sometimes, mixing in a thoughtfully chosen new part can add unique character without detracting from the overall look.
When restoring vintage handles or knobs, what do you suggest for situations where you have an incomplete or mismatched set? Are there creative strategies or sources for finding similar pieces so the final upcycled project still feels cohesive?
When dealing with incomplete or mismatched vintage hardware, try mixing different pieces with a common element, like matching finishes (all brass, all aged iron) or similar shapes. Antique shops, architectural salvage yards, and online marketplaces often have loose vintage hardware you can sort through. For a creative touch, you can also intentionally use a mixed set but repeat one or two details, such as a shared motif or color, to pull the look together.
You mentioned sourcing vintage hardware for upcycling projects—do you have suggestions on where to find matching sets or how to creatively use mismatched pieces so the final result still looks cohesive? Sometimes it’s tricky to get everything to work together visually.
Finding matching sets can be tough, but antique shops, salvage yards, and online marketplaces often have batches or pairs. If you end up with mismatched pieces, try unifying them by painting everything the same color or using a consistent metal finish. Arranging them in a balanced, symmetrical way can also help the overall look feel intentional and cohesive.
I have a set of salvaged knobs, but a couple are missing from the collection. Does the article suggest any creative ways to handle mismatched or missing pieces so the final project still looks intentional and cohesive?
Yes, the article suggests embracing mismatched or missing hardware by arranging the knobs in patterns or mixing in complementary styles and finishes. You can alternate the salvaged knobs with new or different vintage pieces, creating a deliberate, eclectic look. Grouping similar shapes or colors together also helps everything feel intentional and cohesive rather than random.
What are some effective but safe techniques for cleaning old ceramic knobs without risking cracks or fading the patterns? I’ve picked up a few with beautiful detailing, but I’m nervous about using harsh cleaners or soaking them too long.
To safely clean old ceramic knobs, start by gently wiping them with a soft, damp cloth and a mild dish soap solution. Avoid soaking, as prolonged moisture can weaken glazes or loosen adhesives. For stubborn grime, use a soft-bristled toothbrush. Steer clear of abrasive pads, bleach, or strong cleaners, as these can scratch surfaces or fade patterns. Always dry the knobs thoroughly after cleaning to prevent water spots or cracks.
If I find a set of vintage knobs but one is missing or badly damaged, are there tips for mixing and matching salvaged hardware so it still looks intentional on a piece of furniture? Or is it better to search for a matching replacement?
Mixing and matching salvaged hardware can absolutely look intentional and stylish, especially if you balance the placement or stick to a common theme, like using knobs with a similar finish or era. If you prefer a uniform look, searching for a matching replacement works too. Sometimes embracing the mismatched look gives your piece unique character—just make sure the different knobs share some visual connection, such as color, material, or shape.
Do you have any recommendations for cleaning vintage ceramic knobs without damaging the finish, especially if they have painted patterns or glazing that might be delicate?
For vintage ceramic knobs with delicate painted patterns or glazing, use a soft, damp cloth with mild dish soap. Gently wipe the surface and avoid scrubbing. Do not soak the knobs or use abrasive cleaners, as this can damage the finish. If there’s stubborn dirt, a soft toothbrush can help, but use light pressure. Always dry the knobs thoroughly with a soft towel.
Do you have any tips for matching up missing or mismatched knobs from a set if I can’t find exact replacements? Is it better to mix styles creatively or try to replicate originals using modern hardware?
If you can’t find exact replacements, both approaches have their advantages. Mixing styles can look intentional and add unique character to your project—just keep finishes or colors consistent for a cohesive feel. If you prefer uniformity, look for modern hardware in similar shapes and finishes, or consider refinishing all knobs for a matching look. Ultimately, choose what best suits your style and the piece’s setting.
I’m curious about dealing with mismatched handles or knobs you find during salvage. Do you have any creative ideas for making an intentionally mixed set look cohesive on something like a dresser or cabinet, or is it better to stick to matching pieces for a unified look?
Mixing mismatched handles or knobs can add a lot of character to a piece if you tie them together in some way. You could paint all the hardware in a single color or finish for a cohesive look, even if the shapes differ. Arranging them in a repeating pattern or grouping similar styles together can also create intentional visual balance. It’s really about your preference—matching creates a classic feel, while a coordinated mix gives a unique, curated vibe.
When you mention restoring metal and ceramic hardware, are there any specific cleaners or approaches you recommend for delicate finishes? I found some old brass handles with a lot of tarnish, and I want to avoid damaging any intricate details or original patina.
For delicate finishes on brass or ceramic hardware, it’s best to start with the mildest cleaning methods. Use a soft cloth with warm, soapy water to gently remove dirt. For tarnish on brass, a paste of baking soda and water applied with a soft toothbrush works well, but avoid scrubbing hard to preserve the patina. Always test your cleaner on a small, inconspicuous area first. If the original finish or patina is important, avoid harsh chemical cleaners or abrasives.
When restoring old metal handles or hinges, do you have tips for safely removing stubborn layers of paint without damaging any intricate patterns or the underlying metal? Some pieces I find at salvage yards are totally covered, so I’d love advice on best practices or products to use.
To remove paint from intricate metal hardware, try soaking the pieces in a gentle paint stripper or even hot, soapy water for several hours to loosen old layers. Use a soft toothbrush or wooden pick to avoid scratching details. Avoid harsh abrasives or metal tools. For stubborn spots, a paste of baking soda and water can help. Always rinse thoroughly and dry to prevent rust.
You mentioned that salvaged hardware can have intricate patterns or materials that aren’t common today. Do you have any advice for matching mismatched sets or finding missing pieces so the finished project still looks cohesive? I’m worried it’ll look too random if I can’t find exact matches.
To create a cohesive look with mismatched hardware, try grouping pieces by a common feature, such as metal tone, overall shape, or decorative style. You can also paint or refinish all items in a unified color or patina to tie them together. For missing pieces, consider mixing similar vintage styles or using reproduction hardware that blends well. Consistent placement and spacing will also help your finished project feel intentional rather than random.
I often come across vintage hardware that has layers of old paint or lacquer, especially on handles and knobs. What are the safest methods and products for stripping these coatings without damaging delicate details or underlying metal finishes?
For delicate vintage hardware, start by soaking the pieces in a mixture of warm water and mild dish soap to loosen paint. If more is needed, use a plastic scraper or a soft-bristle brush to gently remove the softened layers. For stubborn coatings, try using a citrus-based paint stripper, which is gentler than chemical strippers. Always avoid harsh abrasives and strong solvents, as these can damage fine details and original finishes. Rinse thoroughly and dry completely before reinstalling.
I’m often missing just one knob or hinge from a vintage set. Do you have tips for matching or creatively integrating mismatched hardware so it still looks cohesive on a piece of upcycled furniture?
Blending mismatched hardware can be a creative opportunity! You might try unifying different knobs or hinges by painting them all the same color or finish. Alternatively, arrange mismatched knobs in a deliberate pattern, like alternating styles or creating symmetry, so it looks intentional. Sometimes, vintage shops or online marketplaces offer close matches. Mixing metals or shapes thoughtfully can also add charm while keeping the overall look cohesive.
When restoring older cabinet hinges, how do you decide between keeping the original finish for character versus updating it with a new one for longevity? Are there specific situations where one option is definitely better than the other?
Choosing between keeping the original finish or updating hinges depends on both condition and your project goals. If the original finish has a lot of charm and isn’t badly worn or rusted, preserving it can highlight the vintage character. However, if the finish is damaged or you need more durability—like for kitchen cabinets—a new finish can protect the hardware and give a fresh look. For historically significant pieces, keeping the original finish is usually best, but for heavy-use or mismatched items, updating often works better.
When restoring vintage handles and knobs, how do you figure out if a piece is solid brass or just coated metal? The article mentioned the importance of knowing what materials you are working with, but I’m not sure how to identify them as a beginner.
To tell if a handle or knob is solid brass or just brass-coated, you can use a small magnet—solid brass isn’t magnetic, but steel underneath a coating will attract the magnet. Also, look for worn spots: if you see silver or dark metal showing through, it’s likely brass-plated. Solid brass feels heavy for its size and will show a consistent golden color even on scratched or filed spots.
When restoring vintage handles and knobs, how do you recommend identifying the original finish or material, particularly with older pieces where the surface is worn or painted over? I want to avoid accidentally damaging anything historical while cleaning them.
To identify the original finish or material on vintage handles and knobs, start by examining any hidden or less-worn areas, such as the underside or edges, for clues about the original look. Use a magnifying glass if needed. If the piece is painted, try gently testing a small, inconspicuous spot with a mild solvent to see what’s underneath. Avoid harsh chemicals and aggressive scraping. If you’re unsure, consulting a restoration expert or testing on a similar, less valuable item can help prevent accidental damage.
I’m curious about integrating salvaged hardware into projects with modern finishes. Are there any tips for making vintage knobs or hinges look cohesive on newer furniture, or would you recommend highlighting the contrast between old and new materials?
Both approaches can look fantastic, depending on your style. If you want a cohesive look, try refinishing vintage hardware with paints or finishes that match or complement your furniture. You can also use metal polishes to freshen up the original finish. If you prefer to highlight the contrast, let the aged patina of the hardware stand out against modern materials for an intentional, eclectic effect. Test placement and combinations before final attachment to see what feels best for your project.
Could you give more details on how to identify the materials used in vintage handles or knobs, especially when they’re heavily tarnished or painted over? I’m worried I might damage something if I use the wrong cleaning technique.
When handles or knobs are heavily tarnished or painted, start by checking any exposed areas for signs of the base material, like a silvery shine for chrome or a yellow tint for brass. If safe, use a small, hidden spot to gently scrape or file a bit to reveal what’s underneath. Avoid harsh chemicals until you’re sure; instead, use warm soapy water and a soft cloth for initial cleaning. If you’re still unsure, magnets can help—steel and iron are magnetic while brass and copper are not.
Sometimes I find a set of vintage knobs or handles but a few pieces are missing or completely different. Do you have suggestions for how to handle mismatched sets so the overall look still feels cohesive when upcycling furniture?
Mixing vintage knobs and handles can create a unique, curated look if you use a few tricks. Try arranging mismatched pieces symmetrically—like pairing similar shapes or colors on each side of a drawer or door. You can also unify different pieces by painting them all the same color or using matching finishes. Grouping by material, such as all brass or all ceramic, also helps keep the style cohesive across the furniture.
When restoring vintage metal handles or knobs that have intricate patterns, are there any specific cleaning products or methods you recommend to avoid damaging the details while still removing years of grime or rust?
For vintage metal handles or knobs with intricate patterns, use a soft toothbrush and a mild soap solution to gently clean the surface without harming the details. For tougher grime or light rust, try a paste of baking soda and water, applying it carefully with the brush. Avoid harsh abrasives or strong chemicals, as these can erode fine patterns. If rust persists, a bit of white vinegar dabbed on with a cotton swab can help, but rinse thoroughly and dry to prevent further corrosion.
If I find a set of salvaged hinges where one is missing or damaged, are there recommended methods for blending in a similar but not identical replacement so the overall look of my upcycled piece still feels cohesive?
You can blend in a similar but not identical hinge by painting all the hinges in a matching finish, such as matte black or aged brass, to unify their appearance. Lightly distressing or antiquing the new hinge can help it match the patina of the originals. Placing the replacement in a less noticeable spot, like the bottom of a cabinet door, also helps maintain a cohesive look.
When working with vintage handles and knobs that are missing pieces from a set, do you have any tips for finding or creating replacements that still maintain the overall character of the original hardware?
When you’re missing pieces from a vintage hardware set, try checking architectural salvage shops, flea markets, or online marketplaces for similar styles and eras. If you can’t find exact matches, consider mixing with pieces that have similar shapes or patinas to maintain a cohesive look. For truly unique or rare items, local metalworkers or artisans can sometimes replicate designs. Blending subtle differences can add character without losing the original charm.
The article mentions dealing with missing or mismatched hardware sets. In your experience, what’s the best way to blend newly sourced or reproduction handles with original vintage ones, especially when matching patina or finish for a cohesive look on upcycled furniture?
Blending new or reproduction hardware with vintage pieces can look seamless if you focus on consistent finishes. You can use metal patina solutions or rub n’ buff waxes to darken new hardware and mimic aged surfaces. Sometimes lightly sanding or distressing the shiny new pieces helps, too. Mixing hardware styles works best when you keep the shapes or materials similar, even if the exact details differ.
How do you know if vintage hardware like brass hinges actually needs a protective finish, or if a good cleaning is enough? I want to preserve the patina, but also make sure the pieces last when used daily, especially in a kitchen.
If the brass hinges already have a stable, attractive patina and show no signs of active corrosion (like green verdigris or powdery residue), a thorough cleaning with mild soap and water is usually enough. For kitchen use, where moisture is common, applying a clear wax or a microcrystalline wax can help protect the metal while letting the patina show. Avoid harsh chemicals or lacquers if you want to keep the aged look.
When identifying valuable vintage hardware for upcycling, are there certain materials or markings I should look for that indicate better quality, especially when it comes to older brass or ceramic handles?
Yes, when searching for quality vintage hardware, solid brass items usually feel heavier and often have a warm gold tone that develops a natural patina over time—look for faint seams or stamped markings like ‘solid brass’ or a manufacturer’s name. For ceramics, check for a smooth, even glaze and crisp painted designs. Markings from well-known makers or countries like England, Germany, or France can also suggest higher quality.
Can you give advice on cleaning old brass hardware without harsh chemicals? I want to maintain the original patina you mention, but also make sure they’re safe for everyday use on kitchen cabinets.
To clean old brass hardware gently and preserve the patina, try mixing mild dish soap with warm water. Use a soft cloth or sponge to wipe away grime, then rinse and dry thoroughly. For stubborn spots, a paste of baking soda and water applied gently with a soft toothbrush works well. This method cleans without stripping the original finish, keeping the vintage look while making the hardware safe for daily kitchen use.
I’m just getting into upcycling and have a set of old brass handles that are pretty tarnished. The article mentions knowing the right cleaning techniques, but I’m not sure how to safely clean brass without damaging it. Could you share your go-to method for restoring brass hardware?
To safely clean tarnished brass handles, start by mixing equal parts of lemon juice and baking soda to make a gentle paste. Rub this onto the brass with a soft cloth, avoiding anything abrasive that could scratch the surface. Rinse with warm water, dry thoroughly, and buff gently. If the handles are lacquered, stick to mild soap and water instead. This method helps restore shine without harming the metal.
You mentioned dealing with missing or mismatched sets of salvaged handles and knobs. If I can’t find an identical replacement, do you have creative suggestions for mixing styles so it still looks intentional, especially for a child’s bedroom dresser?
Mixing styles can look intentional and fun, especially for a child’s dresser. Try painting all the handles and knobs in matching or coordinated colors to unify different shapes. You could also arrange them in a repeating pattern, or group similar styles on each drawer. For a playful touch, choose whimsical pieces like animal shapes or bright colors and alternate them. The key is to repeat certain elements, like color or shape, so the mix feels purposeful rather than random.
You mentioned dealing with missing or mismatched sets of salvaged knobs and handles. Do you have any creative suggestions or guidelines for mixing different vintage hardware styles without losing visual harmony in an upcycling project?
Mixing different vintage hardware styles can work beautifully if you pay attention to a few key details. Try unifying mismatched pieces by choosing a consistent finish or patina, like all brass or all aged iron. Consider keeping shapes or sizes similar even if the designs differ. Arranging hardware in a balanced, intentional pattern—alternating styles or grouping similar pieces—also helps maintain harmony. Finally, echoing certain elements from your hardware elsewhere in your project, like repeated motifs or colors, can tie everything together visually.
If I find a set of vintage hinges but a couple are missing or heavily damaged, do you have advice on mixing salvaged hardware styles so my upcycled project still looks cohesive? Are there tricks for blending mismatched finishes or shapes?
You can definitely mix salvaged hardware styles and still achieve a cohesive look. Try unifying the pieces by painting all the hardware in the same color or finish, such as matte black or antiqued brass. If you prefer keeping their original metal tones, lightly distress or buff all pieces to create a similar patina. For shapes, aim for hardware with similar proportions or design motifs, even if they’re not identical. This intentional mix can actually add character and charm to your upcycled project.
If I have a set of vintage brass hinges but a couple are missing from the set, are there tips for finding good replacements that will blend in, or ideas for mixing and matching hardware so it still looks cohesive on a finished piece?
When searching for replacement vintage brass hinges, try local salvage shops, architectural reuse stores, or online marketplaces for the closest match in size, style, and patina. If perfect matches aren’t available, consider using similar shapes and aging them with a brass patina solution. For a cohesive look when mixing hardware, choose pieces with consistent finishes or repeating design elements, and position mismatched hinges symmetrically across the piece to create an intentional, balanced effect.
The article mentions that cleaning vintage hardware involves understanding different materials, like metal and ceramic. Could you elaborate on which cleaning solutions or techniques work best for common materials without damaging their finish, especially if the original patina is something I want to preserve?
For metal hardware, use mild dish soap and warm water with a soft cloth to gently clean without removing the original patina. Avoid harsh abrasives or chemical cleaners, as these can strip finishes. For ceramic pieces, a mix of mild soap and water works well, using a soft brush for crevices. Always dry thoroughly to prevent moisture damage. If you want to keep the patina, steer clear of polish or anything abrasive.
You mention dealing with missing or mismatched sets of vintage hardware. Are there any reliable ways to source individual replacement pieces that match, or tips for integrating mismatched hardware so it still looks cohesive on a project?
Finding exact vintage hardware replacements can be tricky, but it’s worth checking architectural salvage shops, online marketplaces, and local flea markets for individual pieces. If you can’t find a perfect match, consider unifying mismatched hardware with a consistent finish using paint or metal polish, or arrange them in a deliberate pattern so the mix looks intentional. This can give your project character while still feeling cohesive.
Could you give some advice on finding affordable vintage knobs or handles if there aren’t good salvage yards nearby? Are there specific online places or estate sales that tend to have hidden gems, or is it more about luck and patience?
If salvage yards aren’t nearby, you can check online marketplaces like eBay, Etsy, or Facebook Marketplace, where people often sell vintage hardware. Local estate sales, flea markets, and thrift shops are also excellent for finding unique pieces—sometimes at great prices. It does take some patience, but setting up saved searches and alerts online can help you spot hidden gems quickly when they pop up.
Could you elaborate on the best way to tell if vintage hardware like brass handles or ceramic knobs contain any finishes or coatings that should be removed before restoration? I’ve run into trouble with paint and old lacquer before and would love some tips on identifying these before I start cleaning.
To check for old finishes on vintage hardware, look for uneven color, cloudiness, or a yellowed tint—these are signs of lacquer or varnish. Gently scratch a hidden spot with your fingernail; if a layer peels, it’s likely coated. For paint, look for brush marks or chips around edges. If unsure, wipe a hidden area with acetone on a cotton swab—if residue comes off, there’s a finish present.
The article mentions dealing with missing or mismatched sets of hardware. If I can’t find an exact match for a vintage cabinet knob, what are some creative ways to keep the look cohesive without losing that authentic character?
If you can’t find an exact match for a vintage cabinet knob, you can use a few creative approaches. Try mixing knobs with complementary shapes or finishes, arranging them in a visually balanced way across your cabinets. You could also use the mismatched knob on a less prominent spot, like an inside door, or group similar styles in pairs or clusters. Another idea is to paint or refinish the knobs in a uniform color to tie the look together, while still showcasing their unique details.
When cleaning and restoring old handles or knobs made from different materials like brass versus ceramic, do you recommend specific techniques or products for each? I want to avoid accidentally damaging any unique finishes or details while removing years of grime.
For brass handles, use a mild dish soap and warm water first, then gently polish with a non-abrasive brass cleaner. Avoid harsh chemicals or steel wool, as these can scratch the surface. For ceramic knobs, stick to a soft cloth with warm soapy water and avoid soaking them, since water can seep under any glaze or into cracks. Always test a small hidden area before cleaning the whole piece to protect delicate finishes.
The article mentions dealing with missing or mismatched hardware sets—what are some creative ways to make different handles or knobs look cohesive on one piece of furniture while still showcasing their vintage character?
You can unify mismatched handles or knobs by painting them all the same color or finish, such as matte black or brushed brass, while keeping their original shapes. Alternatively, arrange them in a deliberate pattern—like alternating styles across drawers—to make it look intentional. Mixing similar materials, like all metal or all porcelain, can also help tie the look together while celebrating their unique vintage details.
What’s your advice for dealing with sets that are missing a knob or have mismatched hinges? Is it better to search for exact matches, or do you have creative suggestions for blending different vintage pieces seamlessly in one project?
When you have missing or mismatched hardware, you can either hunt for an exact match at salvage shops or online marketplaces, but that can be time-consuming. An alternative is to embrace the mix by using similar colors, finishes, or shapes to create a coordinated, eclectic look. Arranging mismatched knobs in a deliberate pattern, or painting them in the same shade, can also help unify the design while celebrating vintage character.
When you’re restoring vintage metal hardware like brass handles, how do you tell if the original finish is worth preserving or if it’s better to strip and refinish it? Are there signs of historical value I should look for before starting the cleaning process?
When assessing vintage brass handles, look for unique details like ornate patterns, maker’s marks, or patina that suggests age—these can indicate historical value. If the finish is mostly intact with only minor wear, it’s often best to preserve it. However, if there’s heavy corrosion, deep scratches, or flaking, refinishing may be necessary. Always research the hardware’s origin before cleaning, as original finishes can add character and collectibility.
You mention salvaging hardware from mismatched sets, but what’s the best way to make them look cohesive on a project like a cabinet or dresser? Are there specific finishes or design tricks that work well for creating a unified look out of different vintage pieces?
To create a cohesive look with mismatched vintage hardware, try using a unified finish—spray painting all pieces in matte black, antique brass, or brushed nickel works well. Another trick is to arrange the hardware in a repeating pattern or alternate types symmetrically. If finishes differ but you like the patina, lightly sand and apply a tinted wax or clear coat to tone down contrasts. This helps unify the pieces while retaining their character.
When restoring old metal handles and knobs, how do you determine if the finish should be left as-is for character or if it needs to be fully polished or refinished for longevity? Are there specific signs of damage or wear that mean you should go beyond just cleaning?
When deciding whether to keep the original finish or refinish old hardware, look closely for signs like deep corrosion, active rust, flaking metal, or structural weakness. If the patina is stable and attractive, you can usually keep it for character after a gentle cleaning. But if you see pitting, metal fatigue, or areas that are rough to the touch or deteriorating, it’s best to fully refinish or polish to ensure the hardware lasts and functions well.
The article mentions cleaning and finishing metal and ceramic hardware—are there specific safety precautions to consider when dealing with old finishes, like lead-based paint or tarnished brass, and what products do you recommend for safe restoration without damaging original details?
When working with old hardware, always check for lead-based paint, especially on pieces from before the 1980s. Wear gloves, a dust mask, and work in a well-ventilated area. Use mild cleaners like dish soap, vinegar, or baking soda for metal and ceramic. For tarnished brass, a paste of lemon juice and baking soda works gently. Avoid harsh abrasives and strong chemical strippers to preserve original finishes and details.
If I find a set of vintage ceramic knobs but a few are chipped or missing, what’s the best way to repair or supplement them so the finished piece still looks cohesive? Are there creative ways to work with mismatched sets in a family room upcycle?
If some ceramic knobs are chipped, you can carefully fill small chips with epoxy putty, let it dry, and touch up with matching paint. For missing knobs, try mixing in new or salvaged ones that share a color, shape, or decorative theme. Creatively mismatching knobs in a repeating pattern or painting them in coordinated colors can bring a playful, unified look to your family room upcycle.
I’m curious about cleaning delicate metal finishes—like brass with antique patina—without removing their character. Is there a best way to clean and preserve these surfaces for longevity, especially if I want them to stay kid-friendly in a busy household?
To clean delicate metal finishes like antique brass without stripping the patina, gently wipe with a soft, damp cloth and mild soap. Avoid abrasive cleaners or scrubbing pads. Once dry, you can apply a microcrystalline wax (like Renaissance Wax) to protect the surface and minimize fingerprints. This keeps the finish intact and adds a barrier against grime, making it safer and easier to maintain in a household with kids.
When restoring vintage handles or knobs that have missing pieces or mismatched sets, do you have any strategies for either finding matching replacements or making the most of the mix-and-match look without it feeling out of place in a modern project?
One option is to check architectural salvage shops, flea markets, or online marketplaces for matching vintage hardware. If you can’t find exact matches, try grouping similar styles or finishes together—repeating a few key elements, such as shape or material, can help unify the look. For an intentional mix-and-match effect, keep hardware within a cohesive color palette or theme so the assortment feels curated rather than random.
You mention dealing with missing or mismatched sets of vintage hardware. Do you have any suggestions for blending salvaged pieces that are similar but not identical, so that the finished project still looks cohesive and intentional?
When working with non-matching salvaged hardware, try unifying them with a consistent finish—such as painting or antiquing all pieces in the same color or patina. Arranging similar shapes or styles symmetrically can help, or alternating them in a pattern that feels purposeful. Mixing metals can also look intentional if repeated elsewhere in the space. The key is to repeat visual elements so the differences feel like a design choice rather than a mismatch.
The article mentions dealing with missing or mismatched sets of salvaged hardware. What are some creative ways to integrate odd pieces into a cohesive design for kitchen cabinets without it looking accidental or disorganized?
One creative approach is to group similar hardware by function or location—use one style for upper cabinets and another for lower, for example. You can also unify mismatched pieces by painting them all the same color or finish. Arranging hardware in a deliberate pattern, like alternating styles across cabinets, makes the mix look intentional. Incorporating a common element, such as a shared shape, material, or era, can help tie everything together visually.
You mention using the right techniques and finishes for salvaged hardware, but I’m a little lost on how to actually clean off old paint or heavy tarnish without damaging the pieces. Are there safe methods or products you’d recommend for beginners attempting this on a budget?
Absolutely, there are gentle and affordable ways to clean salvaged hardware. For old paint, try soaking pieces in a mixture of hot water and mild dish soap overnight, then scrub with a soft brush. For tarnish, a paste of baking soda and water applied gently can work wonders. Avoid harsh chemicals or steel wool, as they may scratch or damage vintage finishes.