
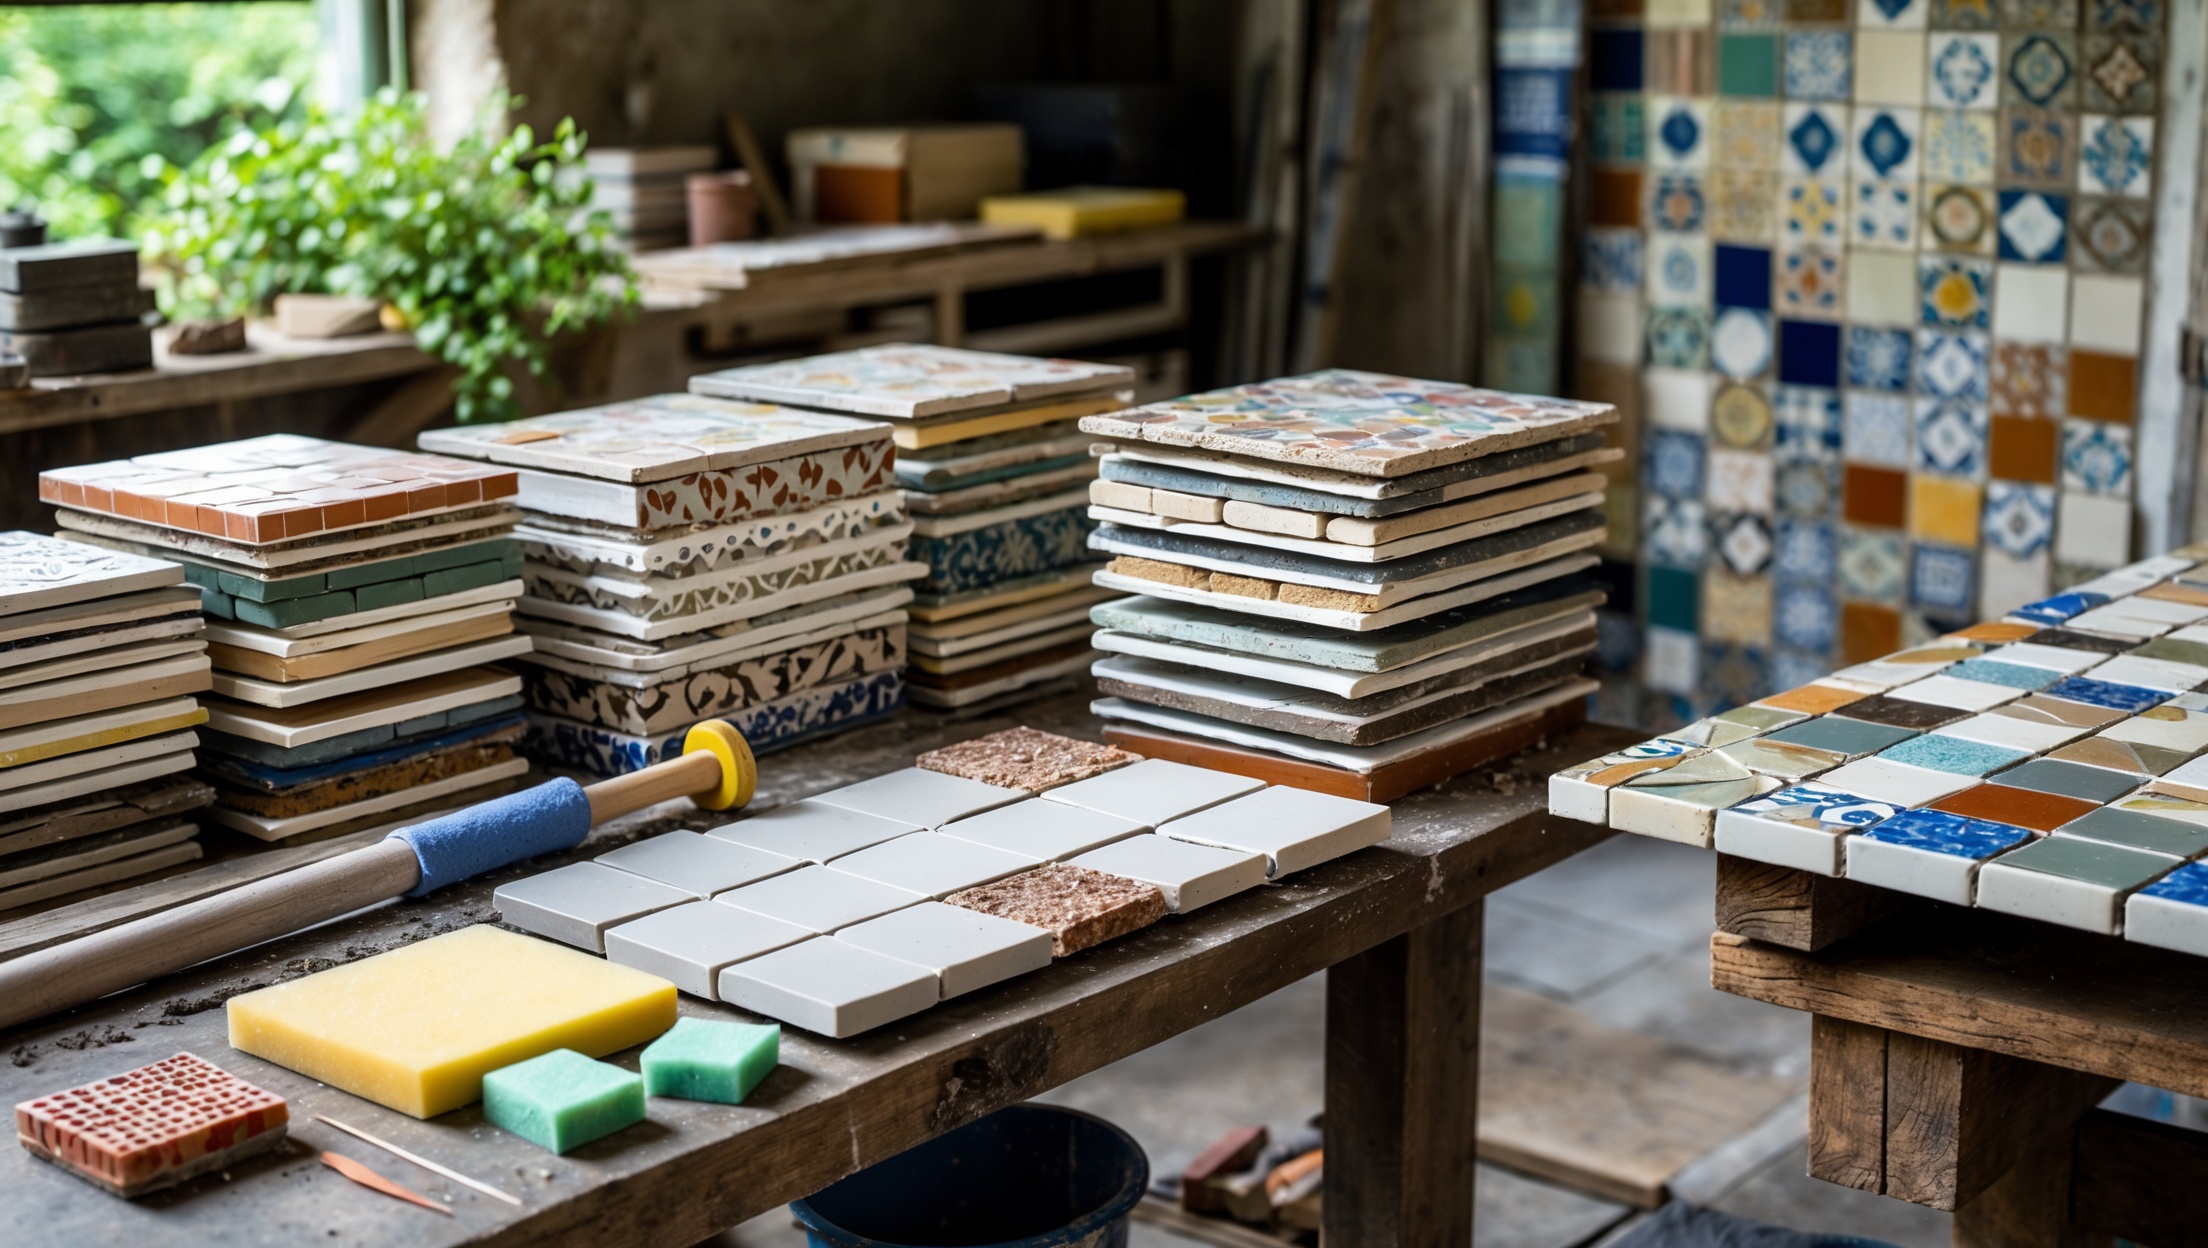
Upcycling and restoring salvaged tiles is a rewarding way to blend sustainability with creativity in your living space. Whether you’ve stumbled across a cache of vintage ceramic, rescued colorful mosaics from a renovation site, or inherited a box of porcelain tiles, these rescued materials can be transformed into stunning surfaces with character and eco-friendly appeal. In this in-depth guide, we’ll walk you through sourcing, assessing, restoring, and upcycling salvaged tiles—covering practical tips, essential tools, common pitfalls, and inspiring project ideas. By the end, you’ll be equipped to breathe new life into old tiles, reducing waste and adding bespoke charm to your home.
Sourcing Salvaged Tiles: Where to Find Hidden Gems
The first step in any tile upcycling project is finding quality salvaged material. While it may sound daunting, there are plenty of avenues for acquiring unique tiles—often at a fraction of the cost of new options.
Architectural Salvage Yards
Architectural salvage yards are treasure troves for vintage and reclaimed tiles. Look for yards specializing in building materials from demolished homes, old schools, or public buildings. These locations often sort tiles by type, color, or era, making it easier to find matching sets or unique pieces for mosaic work.
Online Marketplaces
- Reclaimed building material sites: Websites like Craigslist, Facebook Marketplace, and local building reuse groups frequently list leftover or salvaged tiles.
- Specialty retailers: Some online retailers focus exclusively on reclaimed materials, offering curated selections of antique or rare tiles.
Demolition and Renovation Sites
If you have contacts in the construction industry, ask about upcoming demolitions or renovations—especially of mid-century or older properties. With permission, you may be able to salvage tiles before they’re discarded. Always seek the property owner’s consent and prioritize safety.
Community Resources
- Recycling centers and Habitat for Humanity ReStores often have leftover tiles at low prices.
- Freecycle networks and local online forums can connect you with people clearing out basements or garages.
Assessing Tile Condition: What Can Be Restored?
Not all salvaged tiles are created equal. Assessing what’s reusable can save you frustration and ensure your finished project is both beautiful and durable.
Inspect for Damage
- Cracks and chips: Minor chips may be masked or used in mosaic work, but avoid tiles with structural cracks for surfaces exposed to wear or moisture.
- Crazing: Fine surface cracks (crazing) in glazed tiles are common in antiques. While they add character, they can harbor dirt or moisture—use with care in wet areas.
- Staining: Some stains can be removed, but deep discoloration may be permanent.
Check for Flatness and Evenness
Lay tiles face-down on a flat surface. Severely warped or bowed tiles are difficult to install and may not adhere properly. Slight irregularities can sometimes be compensated with careful installation and thicker adhesive.
Matching Sets or Patterns
If you’re aiming for a uniform look, ensure you have enough matching tiles for your project. For mosaics or patchwork styles, variety can be an asset.
Cleaning and Restoring Salvaged Tiles
Before installation or creative reuse, tiles need thorough cleaning and sometimes restoration. The goal is to remove old adhesives, grime, and restore the original finish as much as possible.
Removing Old Adhesive and Grout
- Manual scraping: Use a putty knife or chisel to gently remove mortar or adhesive from the tile back. Work slowly to avoid cracking.
- Soaking: For stubborn mortar, soak tiles in warm, soapy water for several hours, then scrub with a stiff brush.
- Chemical removers: Use adhesive removers designed for tile only as a last resort, and rinse thoroughly to avoid residue.
Surface Cleaning
- Wash tiles with a mild detergent solution and a soft sponge.
- For ingrained dirt, use a paste of baking soda and water, scrubbing gently with a nylon brush.
- Rinse and dry thoroughly.
Restoring Gloss and Color
- Glazed tiles: A diluted vinegar solution can help restore shine, but test on a small area first.
- Unglazed tiles: Apply a penetrating sealer to revive color and provide protection.
Treating Crazing and Fine Cracks
For tiles with crazing, clean thoroughly and consider applying a clear epoxy or sealant to prevent dirt and moisture infiltration, especially in kitchens and bathrooms.
Essential Tools and Materials for Tile Upcycling
Successful tile restoration and upcycling requires a core set of tools. Investing in quality equipment will streamline your workflow and improve results.
- Tile cutter or wet saw (for resizing or custom shapes)
- Nippers (for mosaics and irregular cuts)
- Notched trowel (for adhesive application)
- Grout float and sponges
- Level, tape measure, and chalk line
- Protective gloves and safety goggles
- Bucket, scrub brushes, and cleaning rags
- Adhesives: Thin-set mortar or mastic for wall/floor projects; construction adhesive for craft applications
- Grout and sealers
Creative Upcycling Ideas for Salvaged Tiles
Restored tiles can be used in countless ways beyond traditional walls and floors. Here are some inspiring project ideas to ignite your imagination:
Accent Walls and Backsplashes
Mix-and-match reclaimed tiles to create vibrant, one-of-a-kind accent walls or kitchen backsplashes. Patchwork layouts celebrate variety, while single-color batches can be arranged in herringbone, subway, or chevron patterns.
Tabletops and Furniture Inlays
- Transform an old table or sideboard by embedding salvaged tiles in the top surface. Use a waterproof grout and sealant for durability.
- Inlay tiles on drawer fronts, trays, or even plant stands for a custom touch.
Outdoor Projects
- Use weather-resistant tiles to create mosaic stepping stones, garden edging, or patio tabletops.
- Seal thoroughly to protect from freeze-thaw cycles.
Art and Decor
- Assemble broken or mismatched tiles into wall art, framed mosaics, or mirror surrounds.
- Craft coasters, trivets, or small plaques—perfect for gifts or market sales.
Restoring Historic Tile Features
For homes with original tile fireplaces, stair risers, or entryways, sourcing matching salvaged tiles and restoring existing ones preserves architectural heritage while reducing landfill waste.
Step-by-Step Guide: Installing Reclaimed Tiles
Proper installation is key to ensuring your upcycled tiles stand the test of time. Here’s a practical step-by-step for wall or tabletop projects:
1. Prepare the Surface
- Ensure the substrate is clean, level, and free of dust. For walls, use cement backer board or appropriate drywall; for tables, sand and prime the surface.
2. Dry Lay and Plan the Layout
- Arrange tiles without adhesive to finalize your pattern and check fit. Mark centerlines with chalk for symmetry.
3. Cut and Trim Tiles as Needed
- Use a tile cutter or wet saw for straight cuts; nippers for detailed mosaic shapes. Always wear eye protection.
4. Apply Adhesive and Set Tiles
- Spread adhesive with a notched trowel, working in small sections.
- Press each tile firmly into place, using spacers for even grout lines.
- Wipe away excess adhesive before it dries.
5. Grout and Clean Up
- After adhesive sets (per manufacturer’s instructions), mix and apply grout using a rubber float.
- Work diagonally across joints, and clean the surface with a damp sponge before grout hardens.
- Buff away haze after grout cures.
6. Seal and Protect
- Apply a penetrating sealer to protect grout and tiles, especially for unglazed or porous materials.
Budgeting and Cost-Saving Tips
While salvaged tiles are often inexpensive, costs can add up—especially for large projects. Here’s how to keep your project affordable:
- Buy in bulk: Salvage yards often discount larger lots. Even extras can be used for future projects or repairs.
- Mix and match: Embrace variety rather than hunting for perfect matches. Patchwork designs are forgiving and budget-friendly.
- DIY labor: Cleaning and prepping tiles yourself saves significant labor costs.
- Reuse materials: Repurpose old plywood or MDF as new substrates; reuse leftover grout or adhesive from other jobs.
Maintaining Upcycled Tile Surfaces
Proper care will ensure your restored tiles look great for years. Here are maintenance tips for various settings:
Daily and Weekly Cleaning
- Wipe surfaces with a damp cloth and mild soap. Avoid abrasive cleaners that can scratch glaze or erode grout.
- For heavily trafficked areas, sweep or vacuum regularly to prevent debris from scratching surfaces.
Periodic Sealing
- Reapply a tile and grout sealer every 1–2 years, or as recommended by the product manufacturer, to maintain water and stain resistance.
Repairing Chips and Cracks
- Small chips can be filled with color-matched epoxy or tile repair kits.
- Replace individual damaged tiles if spares are available; for mosaics, patch with complementary fragments.
Common Mistakes to Avoid in Tile Upcycling
- Skipping thorough cleaning: Residual adhesives or dirt can prevent proper bonding.
- Underestimating tile needs: Always source extra tiles to allow for breakage or mismeasurement.
- Ignoring subfloor or substrate prep: An uneven surface leads to lippage and loose tiles.
- Using the wrong adhesive: Match adhesive type to both tile material and project location (e.g., waterproof adhesive in wet areas).
- Neglecting safety: Always wear gloves, goggles, and a dust mask when cutting or grinding tiles.
Conclusion: The Lasting Impact of Upcycled Tile
Restoring and upcycling salvaged tiles is far more than a sustainable trend—it’s a creative practice that honors craftsmanship, preserves history, and reimagines waste as beauty. Whether you’re building a patchwork kitchen backsplash, crafting a mosaic garden table, or restoring original tilework in a historic home, each project tells a story and keeps valuable materials out of the landfill. The process requires patience, attention to detail, and a willingness to embrace the imperfections that make reclaimed tiles unique. But the rewards—both aesthetic and environmental—are well worth the effort.
By sourcing responsibly, assessing condition, and following best practices for cleaning, installation, and maintenance, you can ensure your upcycled tile surfaces remain stunning and functional for years to come. Every salvaged tile you restore is a small victory for sustainability and a testament to the power of creative reuse. Start small, experiment with layouts and color, and don’t be afraid to mix old with new. Your next project could be the one that sparks a lifelong passion for upcycling—and inspires others to see potential where others see waste.
Embrace the imperfections, celebrate the history, and enjoy the satisfaction of transforming forgotten tiles into extraordinary features that will last for generations.

When sourcing salvaged tiles from places like demolition sites or salvage yards, how do you ensure that the tiles are actually safe and free from any hazardous materials, like lead or asbestos? Are there any red flags to look out for when assessing older tiles?
When sourcing salvaged tiles, especially older ones, it’s wise to be cautious about hazards like lead or asbestos. Tiles from before the 1980s are more likely to contain these materials. Look out for crumbling backings, powdery glues, or thick adhesives, as these can be signs of asbestos. Brightly colored or glazed tiles may have lead. If in doubt, you can ask the source about the tile’s age or origin, and consider having a sample tested by a certified lab for peace of mind.
If I find a set of vintage tiles at an architectural salvage yard but they’re covered in old adhesive or grout, how do I safely clean and prep them for reuse without damaging the finish?
To clean salvaged vintage tiles, start by soaking them in warm, soapy water to soften old adhesive or grout. Gently use a plastic scraper or nylon brush to remove residue, being careful not to scratch the surface. For stubborn spots, a mixture of baking soda and water can help. Avoid harsh chemicals or metal tools, as these can harm the tile’s finish. Once clean and dry, they’re ready for reuse.
I’m really interested in upcycling mosaic tiles from renovation sites, but sometimes the quantities and sizes are inconsistent. Do you have recommendations for incorporating mismatched or incomplete sets into a cohesive design, especially for larger surface projects?
Absolutely, working with mismatched or incomplete mosaic tiles can actually add charm and uniqueness to your project. Try grouping tiles by color, tone, or material for a patchwork effect, or create intentional patterns with repeating shapes or color blocks. Using neutral grout can help unify the look. For larger surfaces, consider dividing the area into sections, each with its own tile style, or use the mismatched tiles as borders or accents within a simpler field tile. Planning your layout on paper first can help visualize the final result.